How to Hike the Amazing Hamilton Mountain Trail in the Gorge
If you’re looking for a Columbia River Gorge hike that includes a good workout, a towering waterfall, and some great views of the Columbia River Gorge, we think you should head straight to the Hamilton Mountain trail. Do not pass go, do not collect $200 (also, we wanted to take this opportunity to let you know that we absolutely loathe Monopoly).
Normally, you’d have to do three separate trails (okay, maybe two) to get all of those things. But there’s a slice of paradise at Beacon Rock State Park where you can get all three in one hike. It’s not an easy hike by any means, and you’ll want to be in pretty good hiking shape before attempting this one, but the proverbial juice is worth the proverbial squeeze here, we think.
Although, you definitely shouldn’t judge this hike by the views at the true summit, but more on that in a bit.
In this guide, we’re going to cover everything you need to know to hike Hamilton Mountain in Beacon Rock State Park (on the Washington side of the Columbia River Gorge). We’ll help you figure out how to get to the trailhead, what pass you need to display, and then give you a play-by-play of our experience on the hike so that you’re ready to hit the trail.
Disclaimer: Some of the links in this post, like hotel and vacation rental links, are affiliate links, meaning at no additional cost to you we make a little bit of money if you click through and book. That being said, we would absolutely never recommend something to you that we don’t stand behind 100%.
Hamilton Mountain: Hike Details
- Length: 7 miles
- Elevation Gain: 2,800 feet
- Season: Year round (except after big snowstorms and cold fronts)
- Trail Type: Lollipop
- Difficulty: Moderate / Hard
- Trailhead Location
- Dog Friendly: Yes – On a Leash
- Pass Required: Discover Pass (Annual or $10 Day Pass – Machines at Trailhead)
Which Route Should You Take?
At a high level, there are essentially two routes you can take to get to the summit of Hamilton Mountain. You’ll make your choice at a fork in the trail at roughly 1.6 miles into the hike, a little bit past Rodney Falls.
You can do it as an out-and-back, which takes you from that junction straight up the Hamilton Mountain Trail, and straight back down. This version is shorter, but as we’ll talk about in a second, misses an excellent part of the hike and one of the best views on the trail.
Alternatively, you can do it as a lollipop, which takes you up the same trail, and down the equestrian trail to Don’s Cutoff to the Hardy Creek Trail, which brings you right back to that fork in the trail.
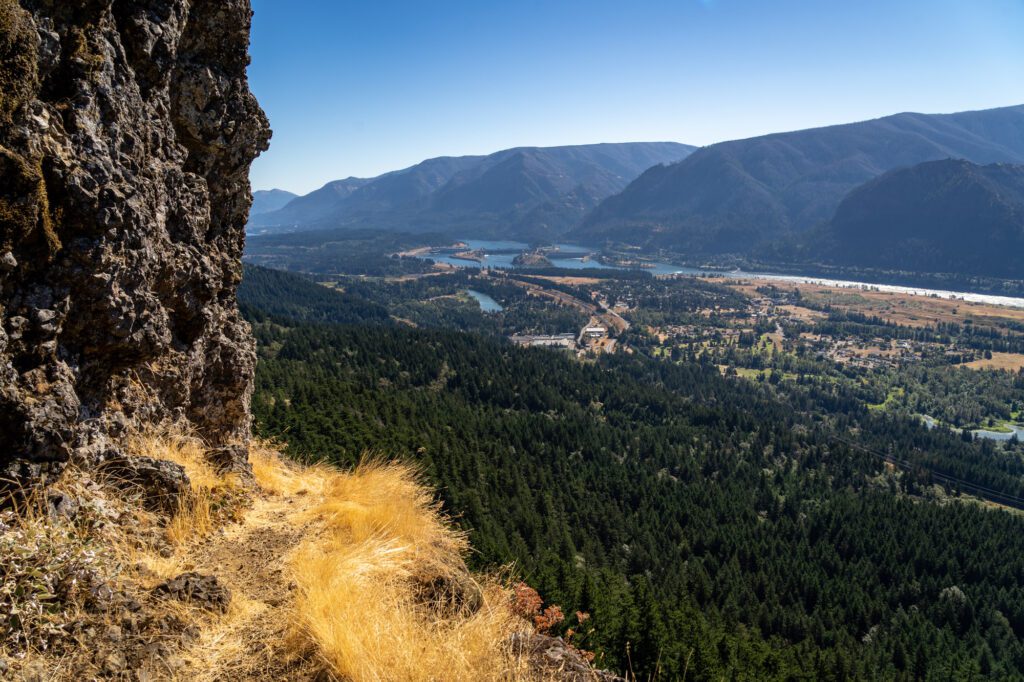
This is a longer hike, but the descent is significantly more gradual (which saves your knees!) and you’ll pass the Saddle, which is where you’ll find some excellent views of the Columbia River Gorge.
There is one important thing to know going into this hike. The best views on this hike ARE NOT from the summit – in fact, there’s basically no view at all from the true summit, which is obscured by trees and bushes.
However, that certainly does not mean that there are no views to be had! The two best views on the hike are from Little Hamilton Mountain (which you pass on the out and back) and from the Saddle, which you’d miss if you just did the out and back version.
Which is why, if you’re able, we’d strongly recommend doing the lollipop version, and tackling the lollipop counter-clockwise.
That means you’ll hit that fork at 1.6 miles in and head right, which takes you up the steep part of the trail, and has you coming down the more gradual part of the lollipop on the way back.
For what it’s worth, we left the trailhead fully expecting to do the out-and-back version of this hike. Then, we talked to a very friendly woman along the hike who mentioned that we should do the lollipop version, which we said we’d think about and went on our merry way.
Fast forward to us sitting at the summit enjoying our sandwiches in the small slice of shade we had found. “Do we really want to go back down that trail? That’s going to be brutal.”
And that’s how we ended up doing the lollipop, which we think is the better way to do it to avoid a week of sore knees after this hike.
It’s a little bit of extra mileage, but we think it’s worth it. The trail details section above reflects that version of the hike.
Getting to the Trailhead
This trailhead is in Beacon Rock State Park on the Washington side of the Columbia River Gorge.
If you’re coming from the Oregon side of the Gorge, you have two options to get there and back.
You can either head north on I-5, crossing the Columbia River into Washington State and head east on Highway 14, which takes you right to Beacon Rock State Park. The other option is to head east on I-84 and cross the Columbia at the Bridge of the Gods in Cascade Locks, which requires a $2 toll to cross.
Overall, if you’re coming from the Portland area, the first route along the Washington side of the Gorge is the fastest and most direct. Plus, no toll!
If you’re coming from the other direction, it’s about 32 miles west of Hood River and Bingen. If you’re coming from Hood River, you’ll want to cross the bridge into Bingen and drive along the Washington side of the Gorge, which is a much more pleasant drive than 84, where you’ll be sharing the road with countless semi trucks.
There are a couple of trailheads at Beacon Rock State Park – the one for the hike up to Beacon Rock, which is right on the side of Highway 14, and the trailhead for Hamilton Mountain, which is about a mile or so into the park on the north side of the highway.
Here is the trailhead you want on Google Maps – that’s where you’ll want to navigate to.
I repeat, you DO NOT want to park at the trailhead along the road. It will add about two miles to your hike, and there’s a much more convenient trailhead just up the hill inside the park.
Beacon Rock State Park is a Washington State Park, which means you’ll need a Discover Pass to park at the trailhead. It’s $30 for an annual pass and $10 for a day pass. If you think you’re going to make a couple of visits to Beacon Rock or other Washington State Parks, then the annual pass is worth it. For what it’s worth, we have one!
You can buy a day pass or an annual pass at the trailhead (they have automated machines that work…some of the time), or in advance online at REI (pro-tip – buy it at the beginning of the month to get the most out of it!).

There are bathrooms with flush toilets at the trailhead, along with a water spigot and some nice picnic benches.
This is a popular hike, so don’t be surprised if the parking lot is full by 10:00 am or so, especially on summer weekends, which are when you’ll see the heaviest crowds. For a more peaceful experience on the traill, try to get started by about 9:00 am or so.
Hiking the Hamilton Mountain Trail: A Complete Report
Now, we’ll give you a kind of play-by-play of the hike. We’ll follow the lollipop trail, tackling the lollipop section counter-clockwise (which is what we did). Our intention here is to help you understand what to expect so that you’re prepared to hit the trail when you make it out there!
For reference, we hiked Hamilton Mountain on the Sunday of Labor Day weekend, which means it was about as busy as it gets (although it really wasn’t as crowded as we expected).
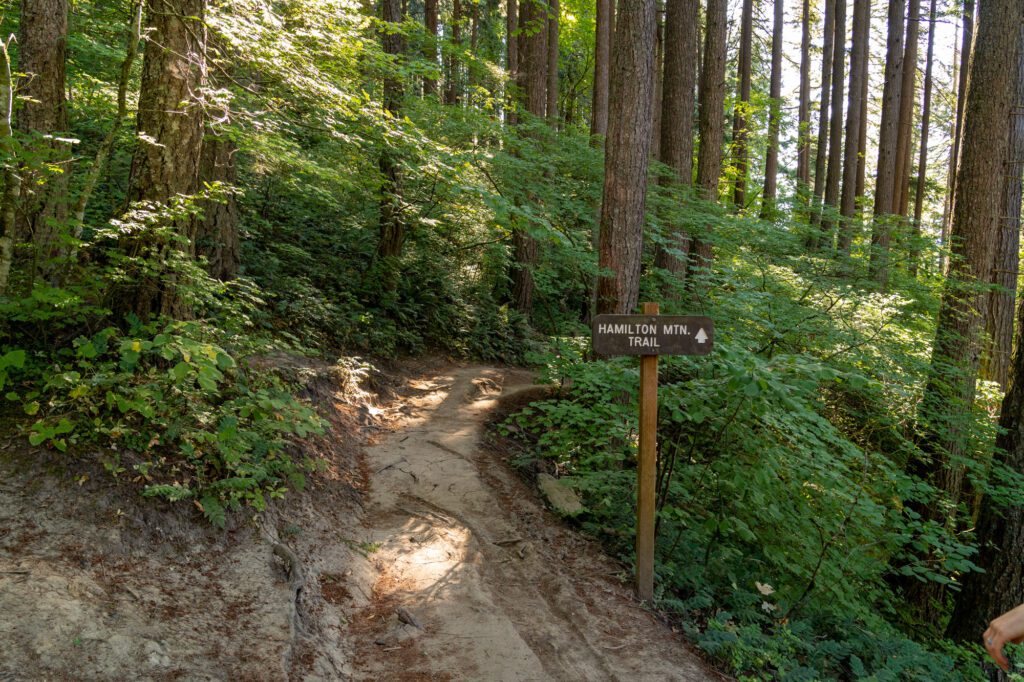
Part 1: Trailhead to the Fork in the Trail
Distance: 1.6 miles | Elevation Gain: 700 feet
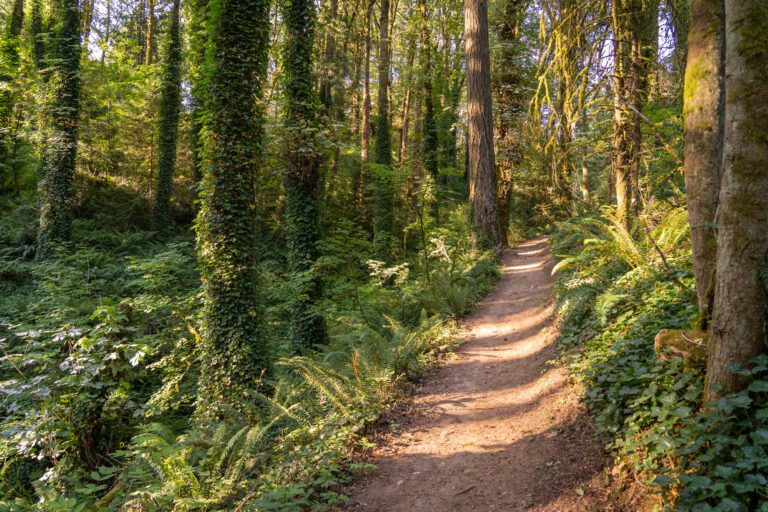
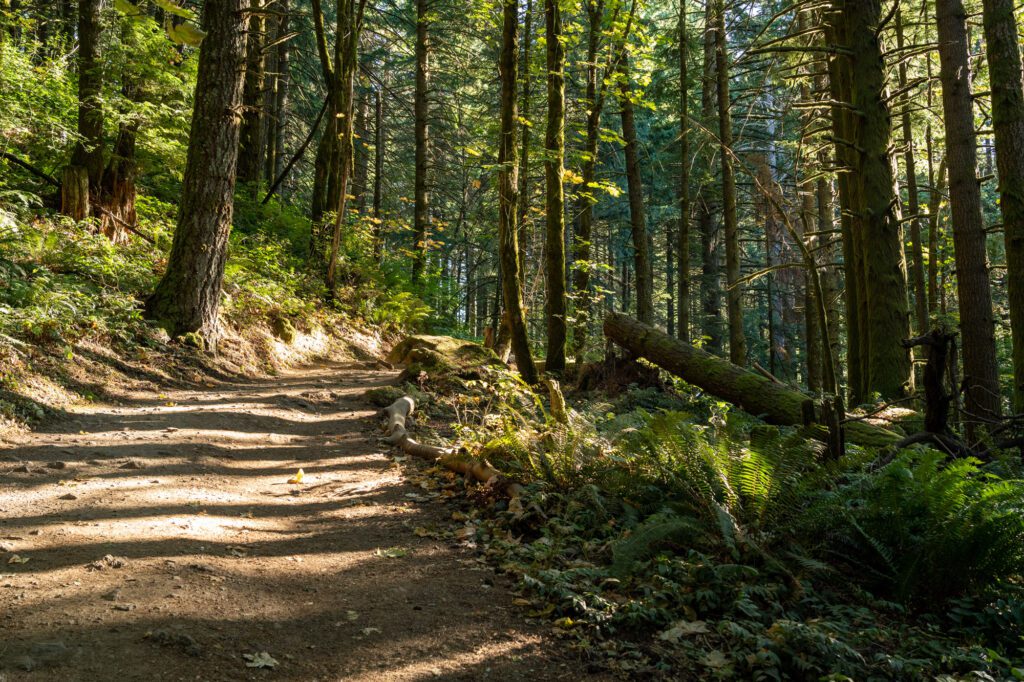
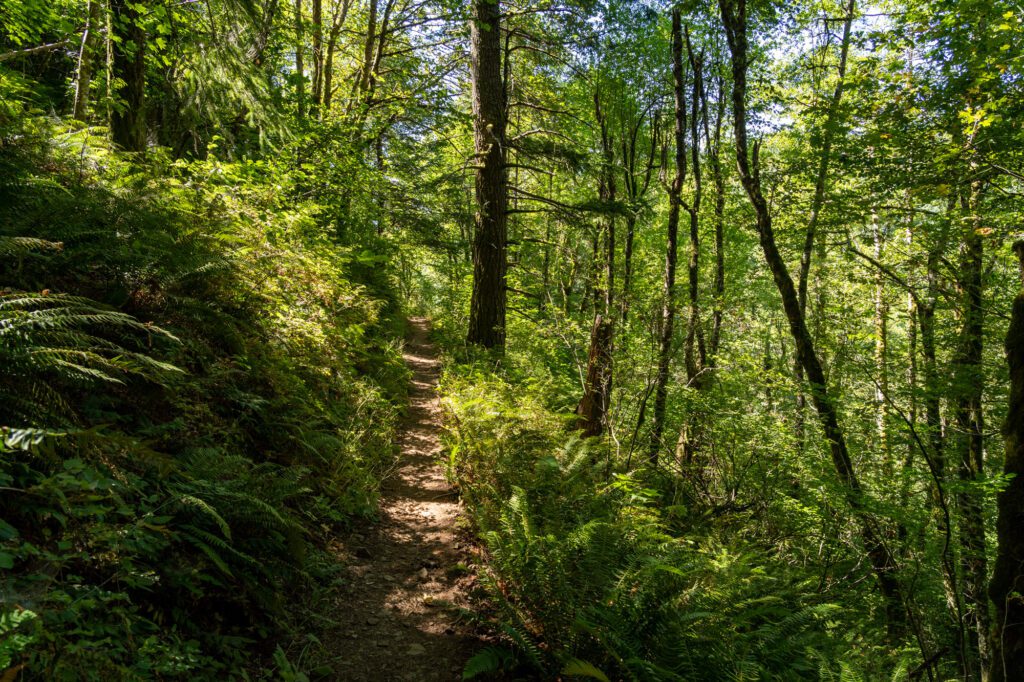
This section of the trail is the most mellow, and passes through a dense section of forest to arrive at Rodney Falls. From there, you’ll continue along the trail until you get to the 1.6 mile mark, where you’ll find a fork in the trail that begins the lollipop section of the hike.
Before you start, we’d highly recommend taking a picture on your phone of the trail map so you can reference it later (or download the map on Alltrails before you head out).
From the trailhead – where there are both bathrooms with flush toilets AND a water spigot (love Washington State Parks!), you’ll immediately start to climb, though at a relatively gentle clip compared to the steep switchbacks you’ll hit closer to the summit.
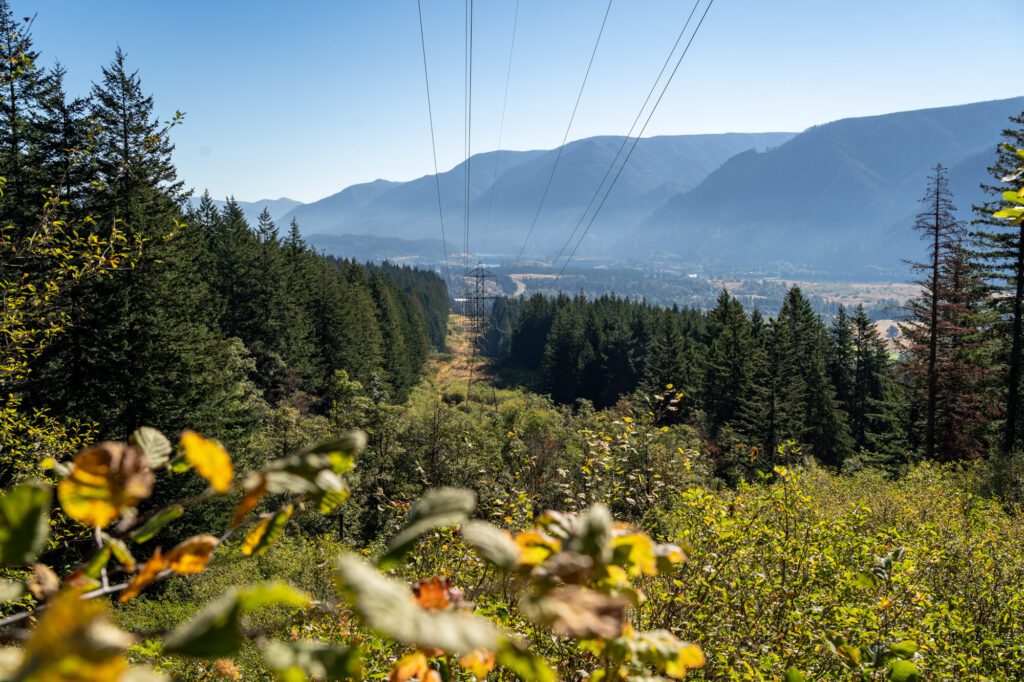
There’s a nice exposed section of the hike where you walk under some power lines, and get your first taste of the Gorge views that await you further up the trail.
At the 1 mile mark, you’ll see a turnoff to your right for the Hardy Falls viewpoint, which involves a steep scramble down to a wooden platform with a view of…nothing? We would definitely skip this – not worth the effort to get down and back up.
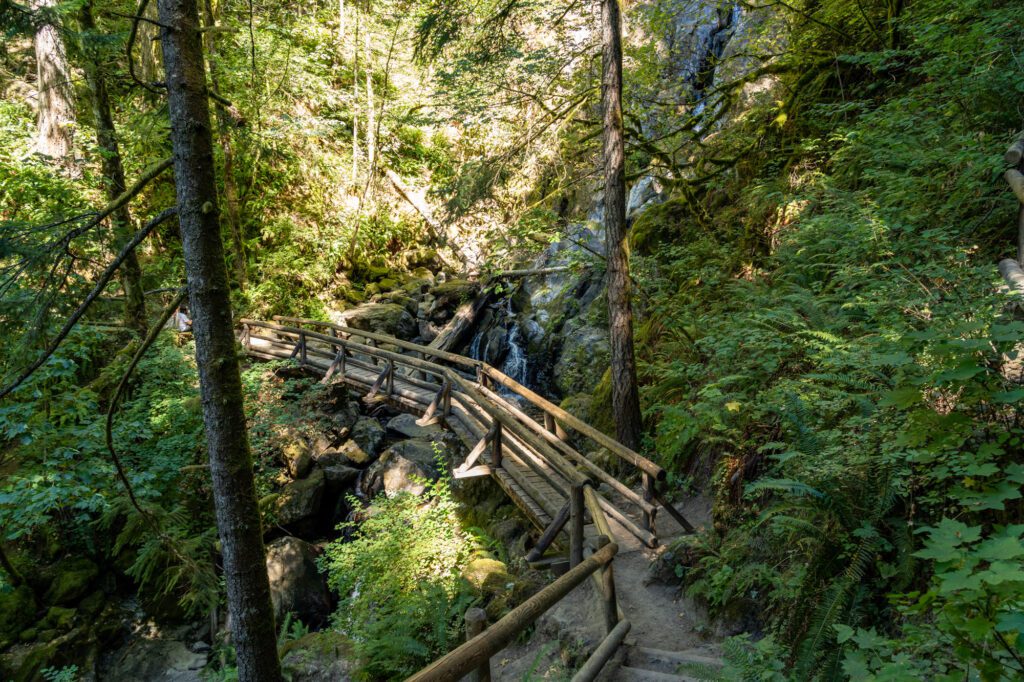
You’ll continue for another quarter mile or so, starting a slow descent, where you’ll hit a fork in the trail. To the left is a short detour to the upper falls and the Pool of the Winds, which is DEFINITELY worth the quick detour. You’ll get some nice views of the wooden bridge below from up there, too.
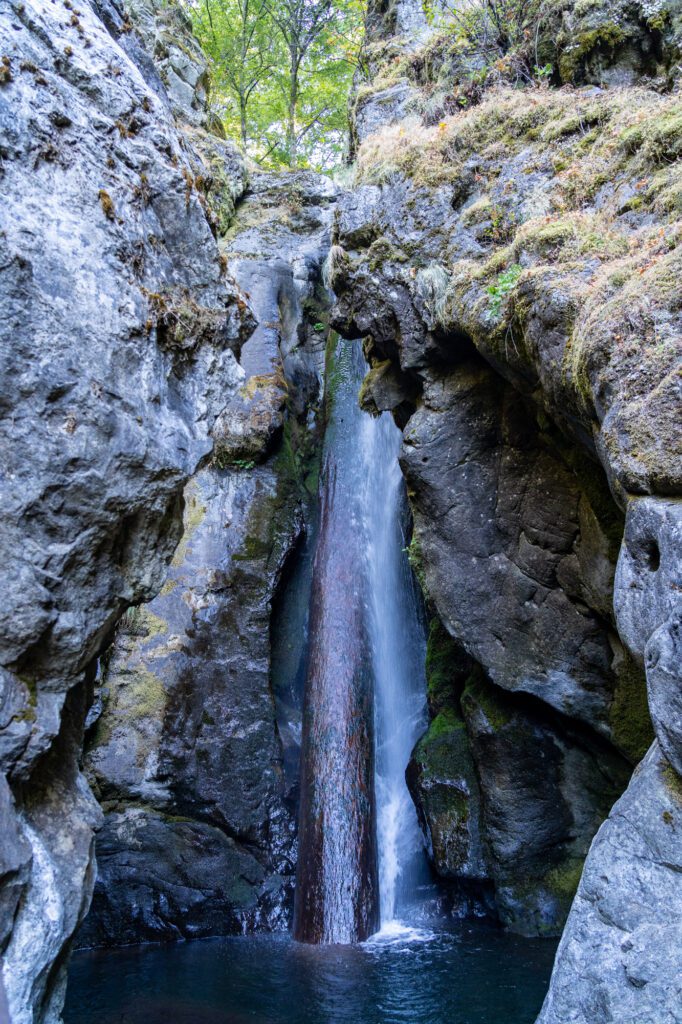
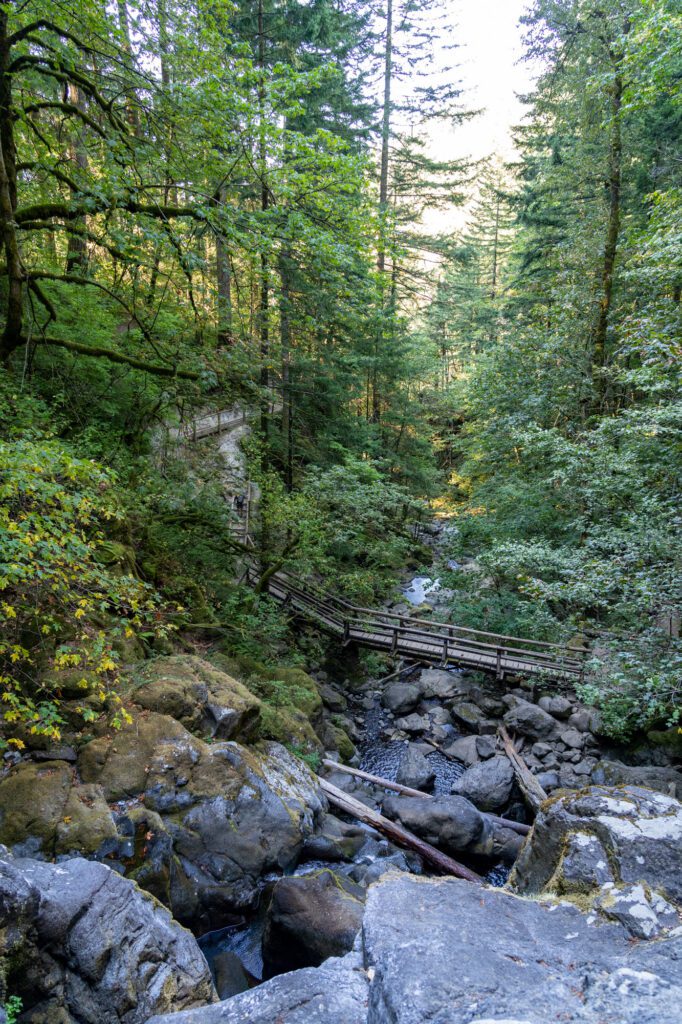
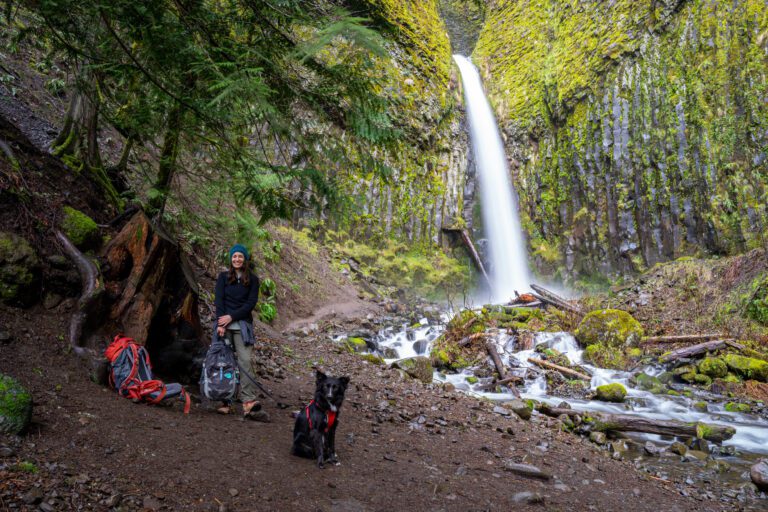
Head back to that fork, and head down the trail as it descends steeply down to the base of Rodney Falls. You’ll cross Hardy Creek over a picturesque wooden bridge, and then start to climb again.
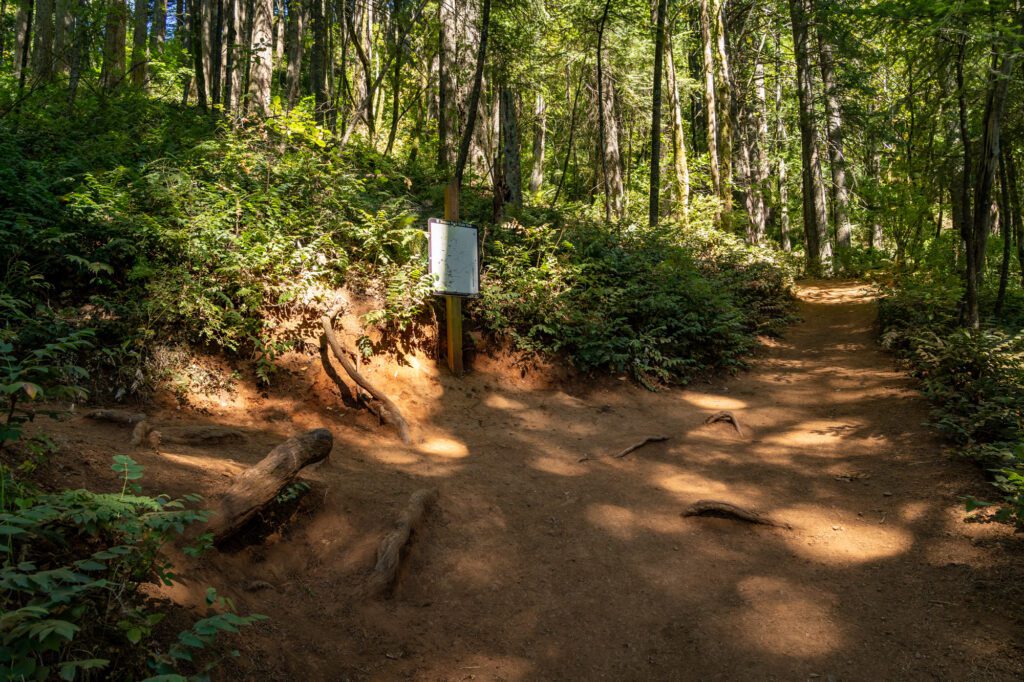
After another 0.2 miles, you’ll arrive at the fork in the trail that designates the beginning of the lollipop section.
Part 2: The Fork in the Trail to the Summit and the Saddle
Distance: 2.6 miles | Elevation Gain: 1,300 feet
If you’re taking our advice and doing the lollipop counter clockwise to save your knees on the way down, then you want to head right at this junction. We passed a couple of trail runners here who said “good luck” as we started off up the hill, and after the hike, we understood why.
This part of the trail is pretty brutal, climbing roughly 1,300 feet over the course of 1.8 miles, mostly in the form of steep switchbacks.
However, the good news is that the two best views of the hike are on this stretch of the trail, which means your efforts will be rewarded!
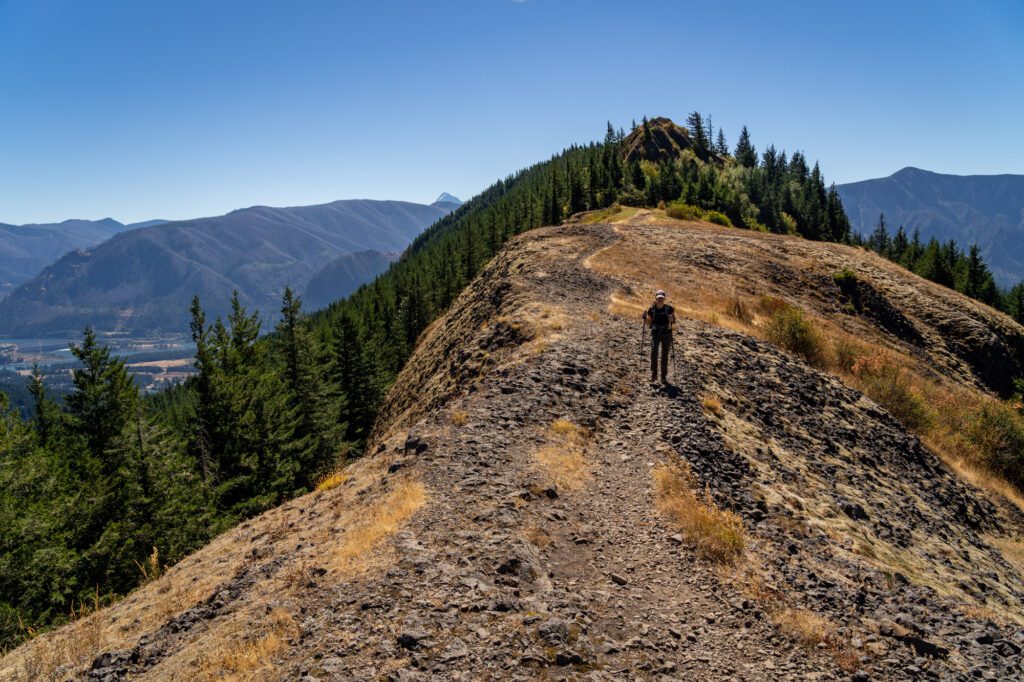
Start with a brief steep uphill section, then you’ll hit a series of tight, steep switchbacks that bring you to Little Hamilton Mountain, which is an excellent place for a break and a snack before continuing.
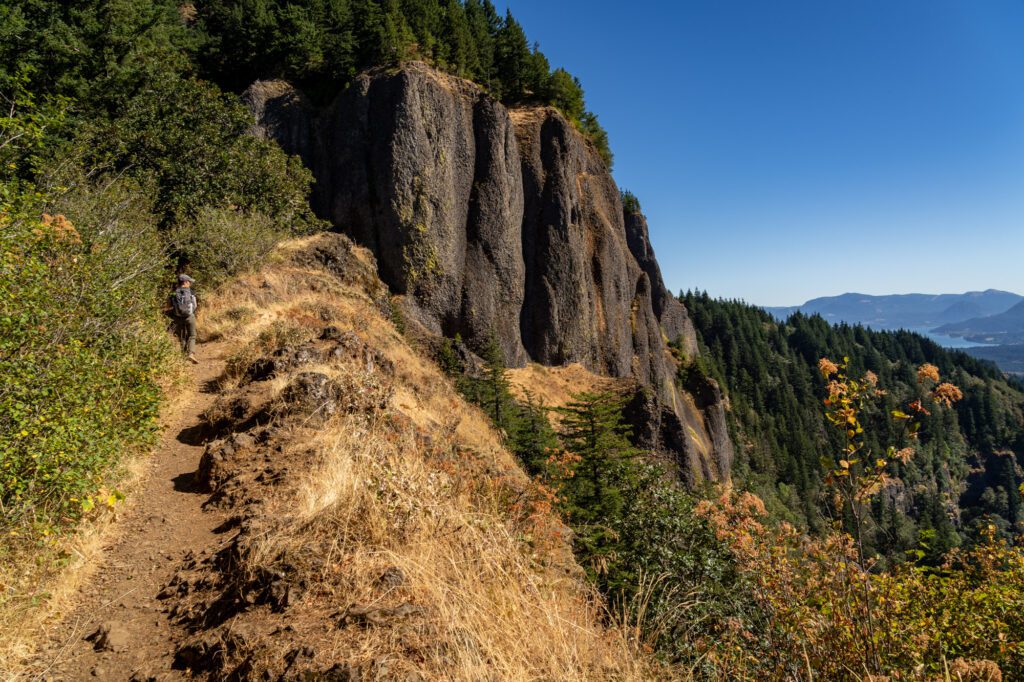
From there, you’ll have a brief respite from switchbacks, as the trail follows the ridge for a bit before you hit another set of steep switchbacks. The first few of these switchbacks are completely exposed, so sun protection will be your friend on a summer day.
You’ll know you’re getting close to the summit when the switchbacks enter the forest.
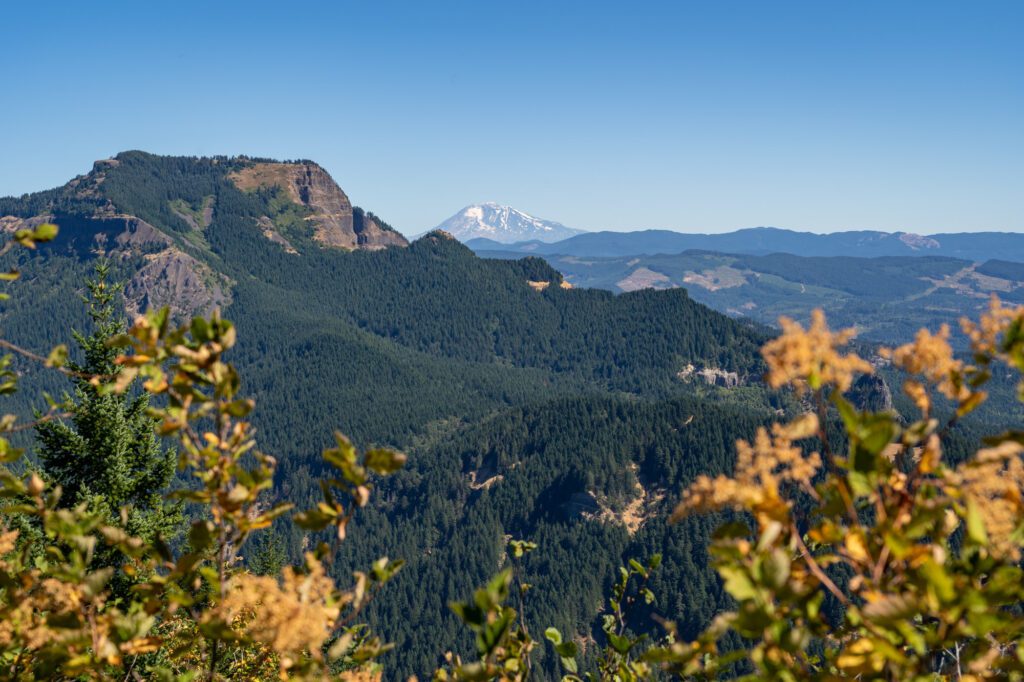
Eventually, you’ll hit a fork in the trail from which you have an excellent view of Mount Adams dead ahead. If you head right, you’ll hit the “summit,” which is where we stopped to eat lunch. There’s no view, though, as the brush is overgrown.
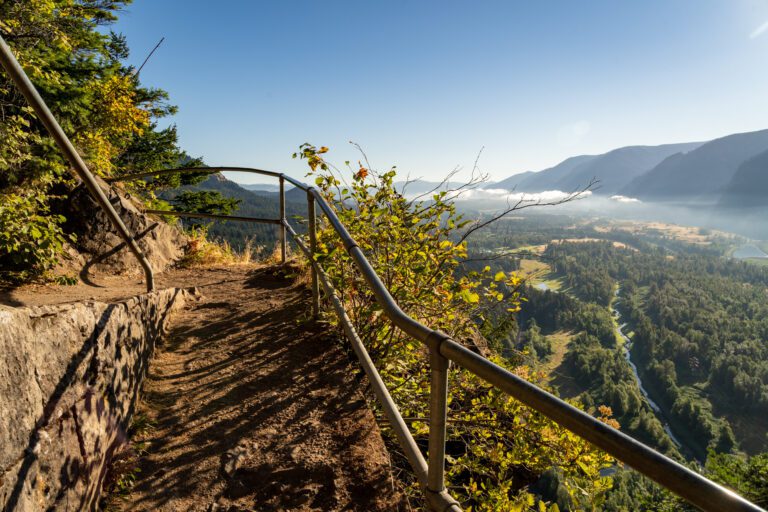
Instead of stopping there, we’d head left at that fork to start the slight descent to the Saddle, which is the second best view of the hike.
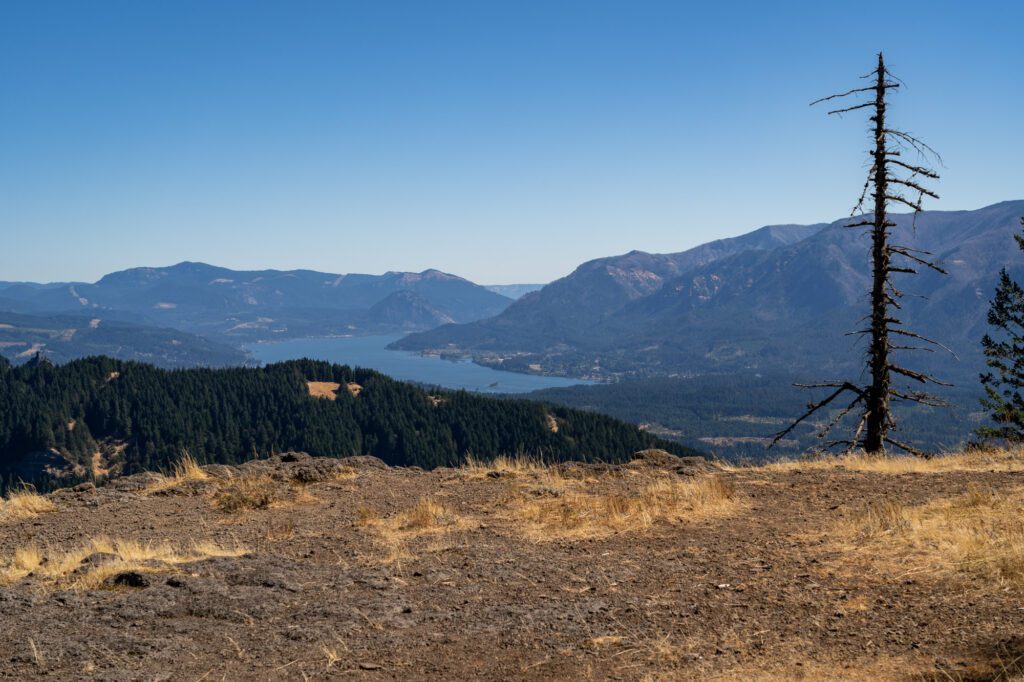
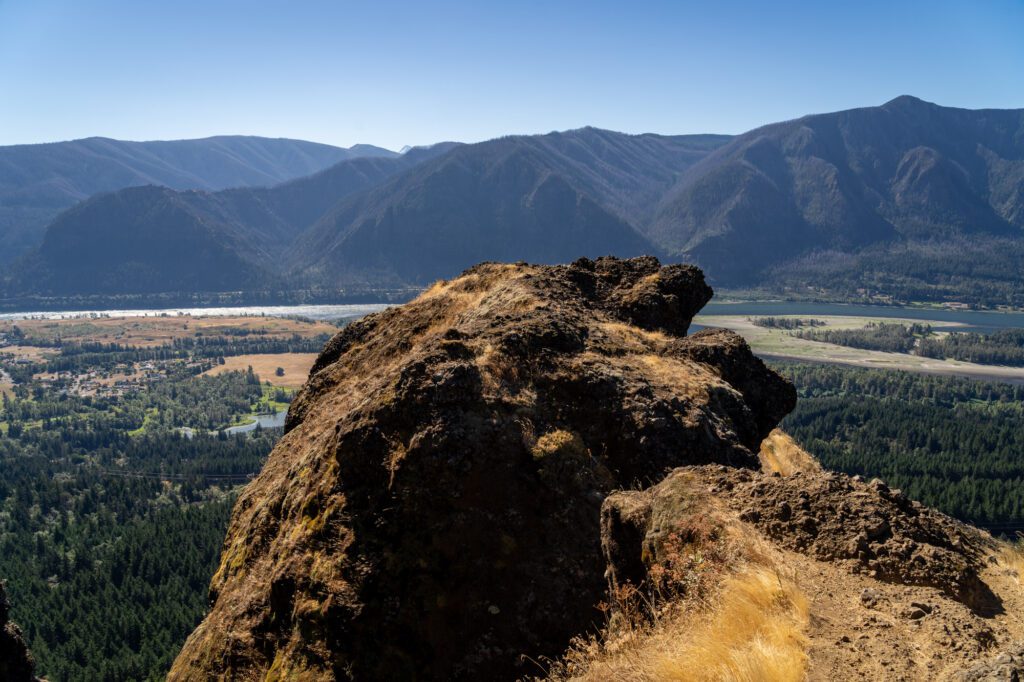
It’s a big flat section that is a perfect stop for a snack / your lunch, and you’ll have a great view of the Gorge, including the Bonneville Dam, Table Mountain, and a few of the nearby mountain peaks.
Part 3: The Gradual Descent from the Saddle
Distance: 3.8 miles | Elevation Loss: 1,700 feet
To start the main part of your descent, you’ll follow the trail to the other side of the Saddle, where it veers left into the trees, becoming the “Equestrian Trail.”
Shortly after you make that left, you’ll see a sign for Don’s Cutoff, which you should take for a more scenic route down. We stayed on the Equestrian Trail even though the woman who recommended the lollipop told us, multiple times, that we had to take Don’s Cutoff.
At the bottom of the Equestrian Trail, we regretted our decision, because that trail is just kind of boring (though it is a nice, gradual grade down).
At the bottom of Don’s Cutoff, head left on the Upper Hardy Creek Trail and follow it until you hit a picnic table and another trail junction. Here, you’ll want to head left, following the Hardy Creek Trail. It’s an easy 1.3 miles slightly downhill back to the start of the lollipop.
From there, you’ll head back to Rodney Falls, and then you’ll have to do a quick section of climbing before you get a nice, leisurely downhill stroll back to the parking lot.