The Multnomah – Wahkeena Falls Loop Trail: A Complete Guide
The Multnomah – Wahkeena Falls Loop covers five miles of peak Columbia River Gorge beauty, with babbling creeks, dense ferny forest, and FIVE waterfalls along the way. If you hike this trail, you’ll get a crash course in what makes the Columbia River Gorge National Scenic Area special.
As we were hiking this trail recently, we realized that we had done this hike before (though we had completely forgotten about two of the waterfalls), and that it was actually our first ever hike in Oregon nearly a decade ago. What a great introduction to the natural beauty that Oregon – specifically the areas around Portland – has to offer! No wonder we decided to move here.
In this guide, we’re going to cover all the information you need to know before you hit the trail. We’ll go through what route to take, what direction to hike in, where to park, and then we’ll give you a trail report based on our experience hiking this trail multiple times.

Disclaimer: Some of the links in this post, like hotel and vacation rental links, are affiliate links, meaning at no additional cost to you we make a little bit of money if you click through and book. That being said, we would absolutely never recommend something to you that we don’t stand behind 100%.
The Multnomah – Wahkeena Falls Loop: Trail Details
A quick note here at the top – there are a few ways to tackle this hike. You can do it as an out-and-back just up to Wahkeena Falls, which is significantly shorter (but still involves a lot of climbing!), or you can do a hike up to the top of Multnomah Falls, which is also a big climb.
The version we’re talking about here includes both in one big loop.
- Length: 5.1 miles
- Elevation Gain: 1,600 ft.
- Season: Year round
- Trail Type: Loop
- Difficulty: Moderate
- Trailhead Location
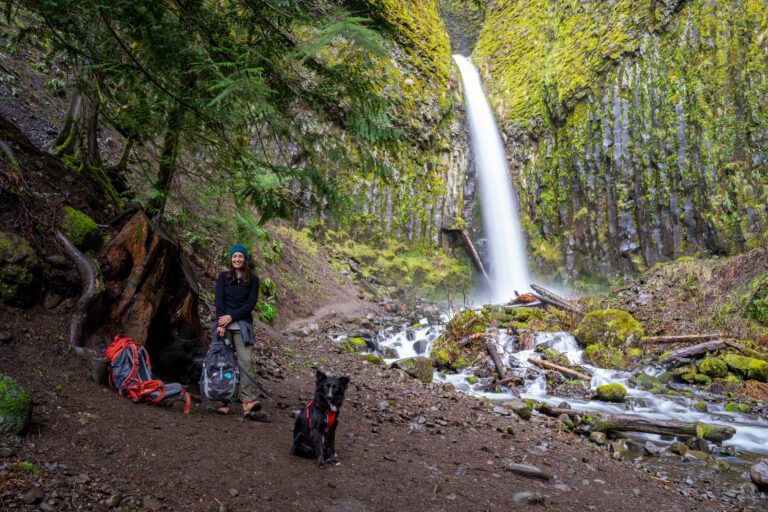
- Dog Friendly: Yes, on a leash
- Pass Required: Multnomah Falls timed use permit from Recreation.gov in the summer (more information here)
Which Route to Take on This Hike?
As we were finishing our hike, we started talking about the best way to tackle this loop with our hiking buddies.
The decision point here revolves around crowds at Multnomah Falls.
If you go counterclockwise, it’s a steeper ascent and a more gradual descent (which is generally our preferred direction), but you’ll end up doing that longer descent right in the middle of the peak time for most people visiting Multnomah Falls, which essentially means dodging busloads of cruise ship crowds.
For that reason, we concluded that we’d do it clockwise next time. Which is what we’re recommending here.
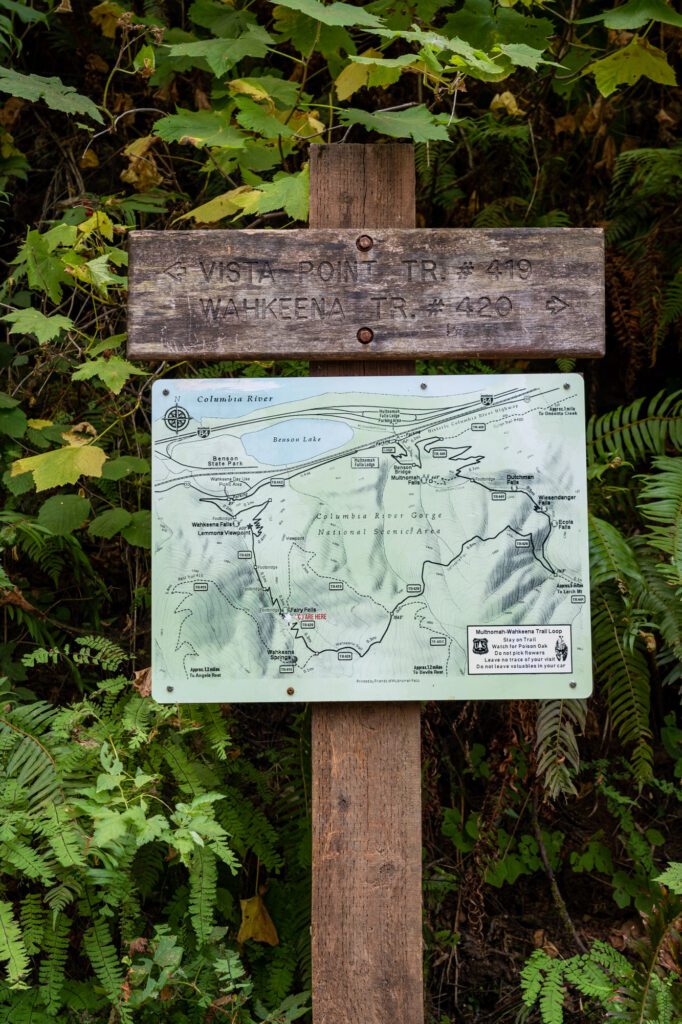
For that route, you’ll start at Multnomah Falls bright and early, climb the 11 switchbacks (that are marked so you know how many you have to go) to the top of the falls, then continue up to the ridge to connect with Trail 420, which you’ll follow all the way down past Fairy Falls and Multnomah Falls en route to the Historic Columbia River Highway.
From there, it’s a short walk along a trail that parallels the highway back to Multnomah Falls.
Where to Park?
If you’re taking our advice and doing the loop clockwise, that means you’ll want to park at the big parking lot for Multnomah Falls, which is here.
A couple of things to note here. The parking lot is big, though we have seen it at near full capacity on summer weekends between about 10:00 am and 2:00 pm. However, given that most people just walk up to the viewpoint for Multnomah Falls and back to their car, there should be plenty of turnover. Finding parking shouldn’t be too much of an issue.
However, since this is one of the most popular tourist destinations in Oregon, you’re still going to want to make sure to get an early start. Anytime before 9:00 am is great, but the earlier the better so that you have Multnomah Falls and all of the associated viewpoints to yourself (relatively, anyway).
The other advantage to parking here is that there are restrooms and a water fill station at the Multnomah Falls Lodge.
There is an alternate parking lot that you could use at the base of the Wahkeena Falls Trail (here on Google Maps), which has room for about 15-20 cars. However, there’s no restroom (facilities were closed when we were there) and very limited parking here, so we think the Multnomah lot is a better bet.
The Multnomah – Wahkeena Loop: A Trail Guide Based on Our Experience
As we mentioned above, we’ve done this trail twice, roughly a decade or so apart. The first time was on our first ever trip to Oregon, and this is actually the first hike we ever did in the state. The second time was much more recently after we moved here.
We’ve done the loop in both directions now, but we’re covering the clockwise direction here because that’s the way we’d recommend going for most people. However, it’s easy enough to basically reverse this guide to get an idea of what to expect going counterclockwise.
We’re going to break the trail up into a few smaller, more digestible chunks – the Multnomah side, and the Wahkeena side.
The intention here is to give you an idea of what to expect when you hit the trail so that you can tackle this amazing loop safely and confidently.
Leg 1: Multnomah Falls to the Larch Mountain Trail Junction
Distance: 2.6 miles || Elevation Gain: 1,150 feet
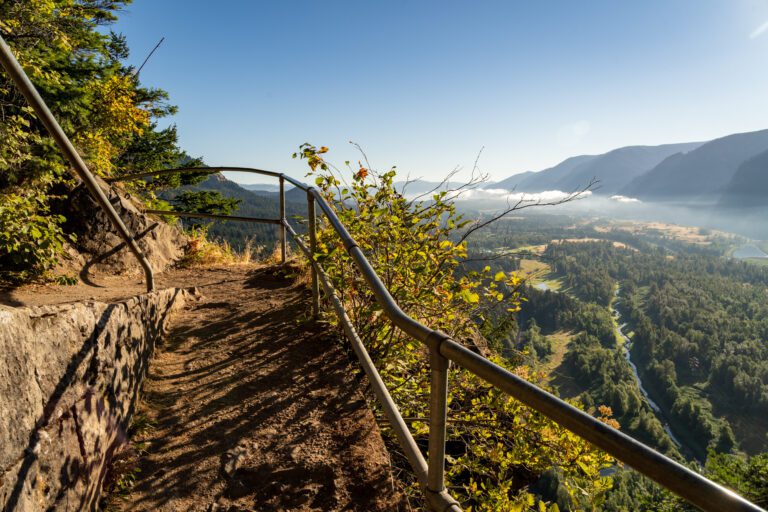
The first section of this hike starts at the Multnomah Falls Lodge and steeply ascends along Multnomah Creek via a set of 11 switchbacks, passing several great peek-a-boo views of the Columbia River Gorge and a few nice viewpoints along the way.
The trail from the lodge to the upper falls viewpoint is paved, though I wouldn’t call it “easy.” It’s the Larch Mountain Trail (#441), which you’ll follow to a T junction at the top of this section of trail.
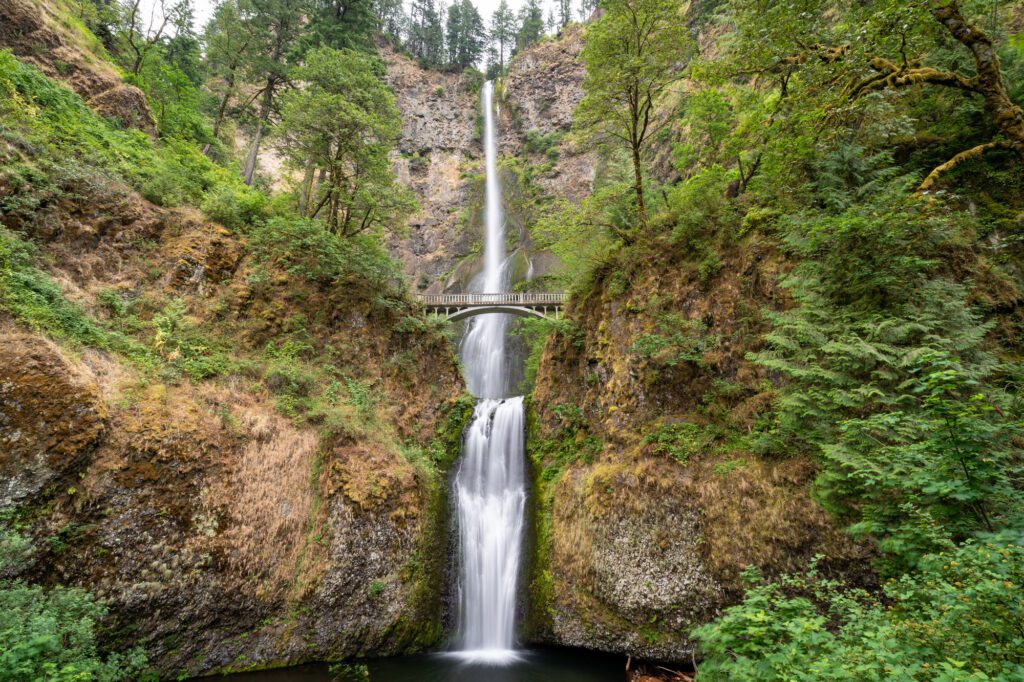
Starting from the lodge, you’ll follow the wide, paved path up the main viewpoint for the falls, which is the iconic shot you’ve probably seen before with the stone bridge high above you, with the falls towering over it in the background.
The trail heads off to the right (if you’re facing the falls) and starts a gentle climb up to the bridge, which is another great view of the falls (though not as impressive in our opinion, because you don’t get to see the two tiers).
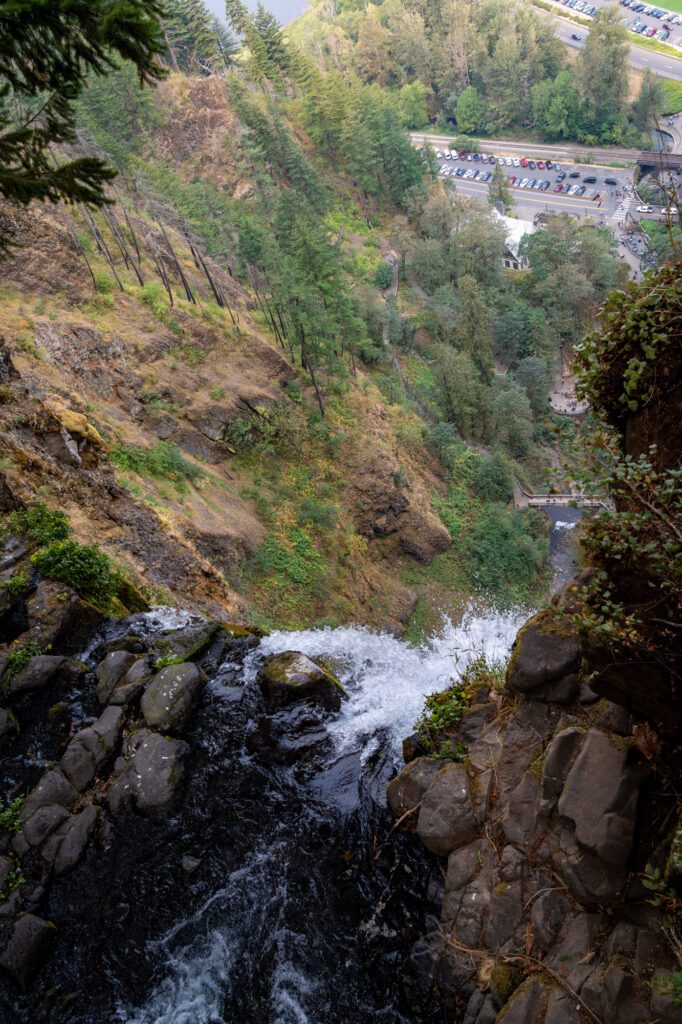
From there, it’s another short, steep climb to a third viewpoint, which has a nice view of the falls and a good view out into the Columbia River Gorge.
And then, the switchbacks begin. The section between this viewpoint and the viewing platform for Upper Multnomah Falls gains 450 feet of elevation in 0.7 miles, which is no joke. Take it slow. It is paved, which is kind of nice, but it’s still a tough climb.

There is a set of 11 switchbacks – helpfully labeled so you know how far you have to go – between you and that viewpoint.
Once you get to the top of the switchbacks, there’s a short spur trail that takes you off to the right to get a view from the top of the falls, which is kind of cool, but isn’t THAT interesting.
The trail continues up the canyon, following Multnomah Creek.
Along this stretch of trail between the upper falls viewing platform and the trail junction where you turn right onto trail #420 (roughly 0.7 miles), there were three things we enjoyed.
The first cool thing here is the stone bridge that crosses over Multnomah Creek immediately after you pass the spur trail to the upper falls. I don’t know why, but this bridge caught our attention.
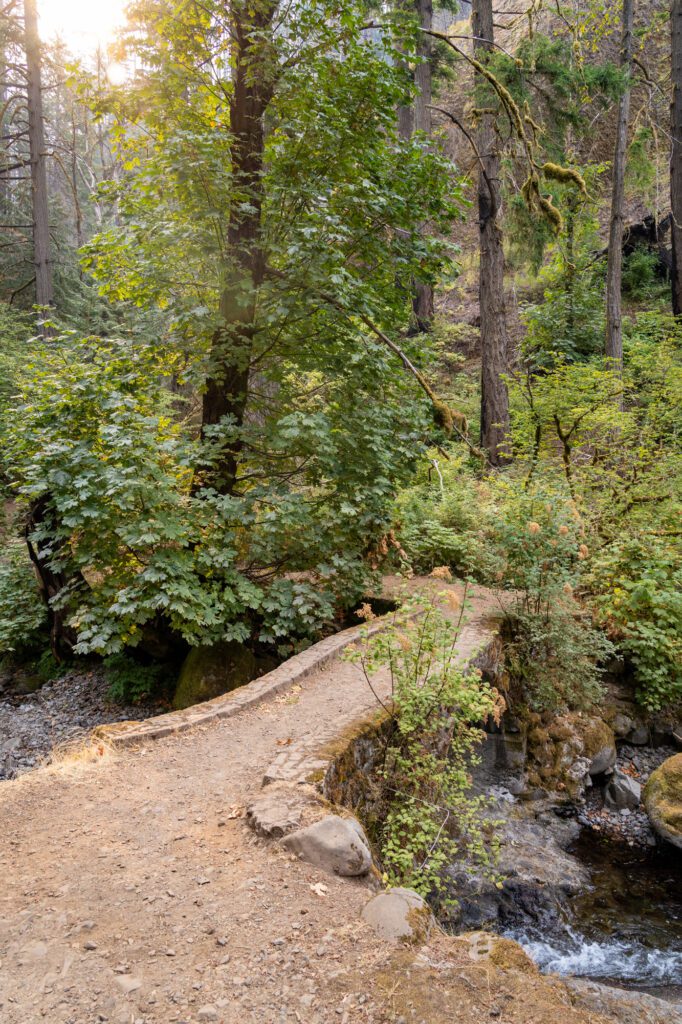
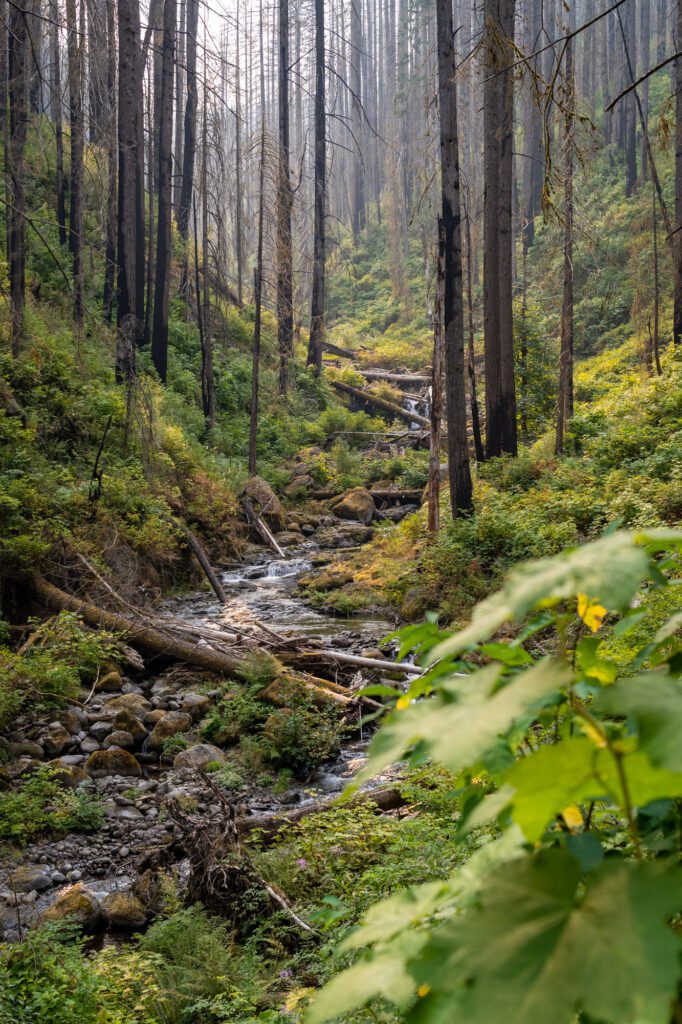
Second is the stretch of trail that passes under the canyon wall, which is covered in moss and ferns and is particularly fun in the winter, when the moisture means everything is bright green.

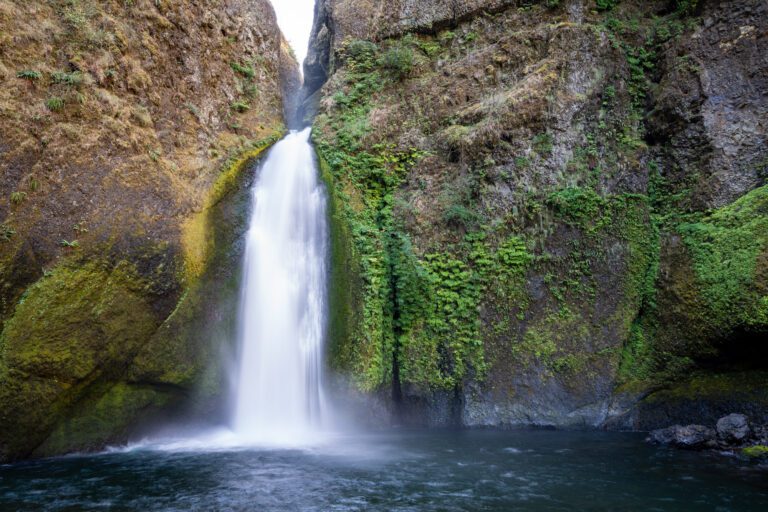
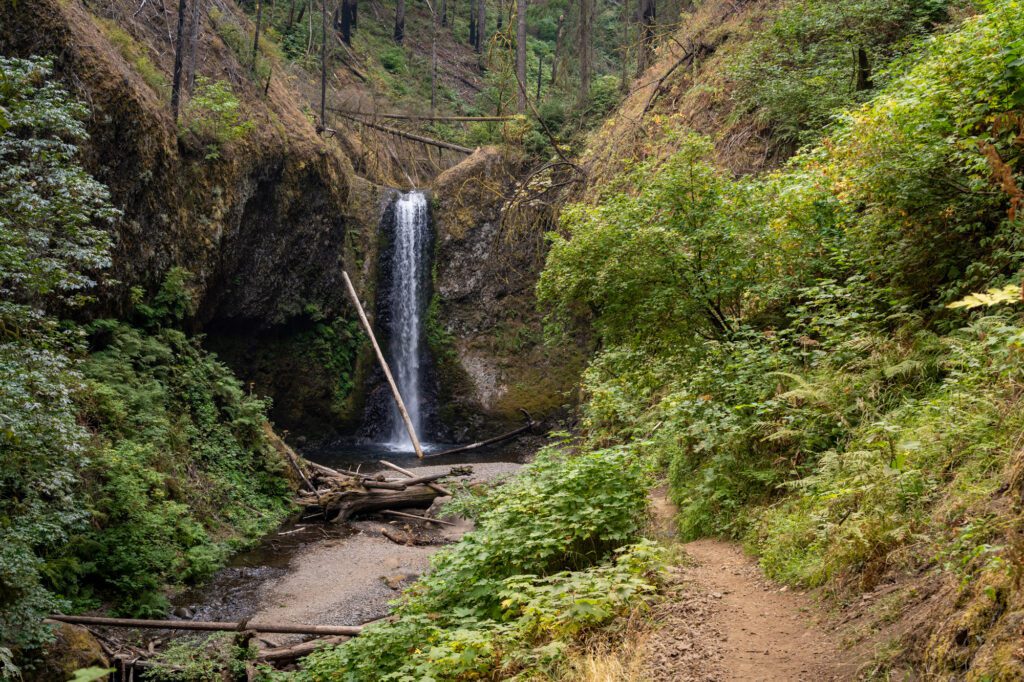
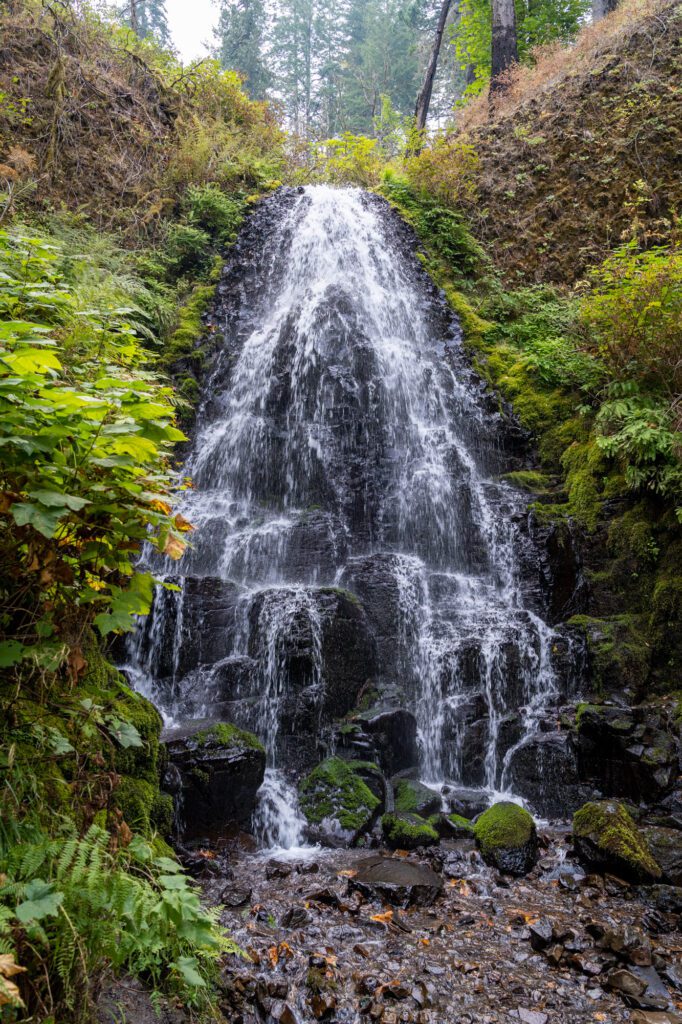
Last is the pair of waterfalls here – Weisendanger Falls and Ecola Falls – which would probably be major attractions if they were more accessible from the road. For those of you counting, that’s three out of the five waterfalls you’ll see on this hike.
The trail continues up to a T junction, where the Larch Mountain Trail heads up to the left, and Trail #420 heads off to the right. You want to head right, and you’ll follow 420 all the way down to the Wahkeena Falls parking lot.
Leg 2: The Ridge and the Descent on the Wahkeena Trail
Distance: 2.5 miles || Elevation Gain: 450 ft. || Elevation Loss: 1,600 ft.
From that junction, you’ll follow the trail along a ridge, slowly climbing to the high point in the trail in 0.7 miles. There’s a trail junction here – make sure to stay on trail 420 because it takes you down to Fairy Falls, which you won’t want to miss.
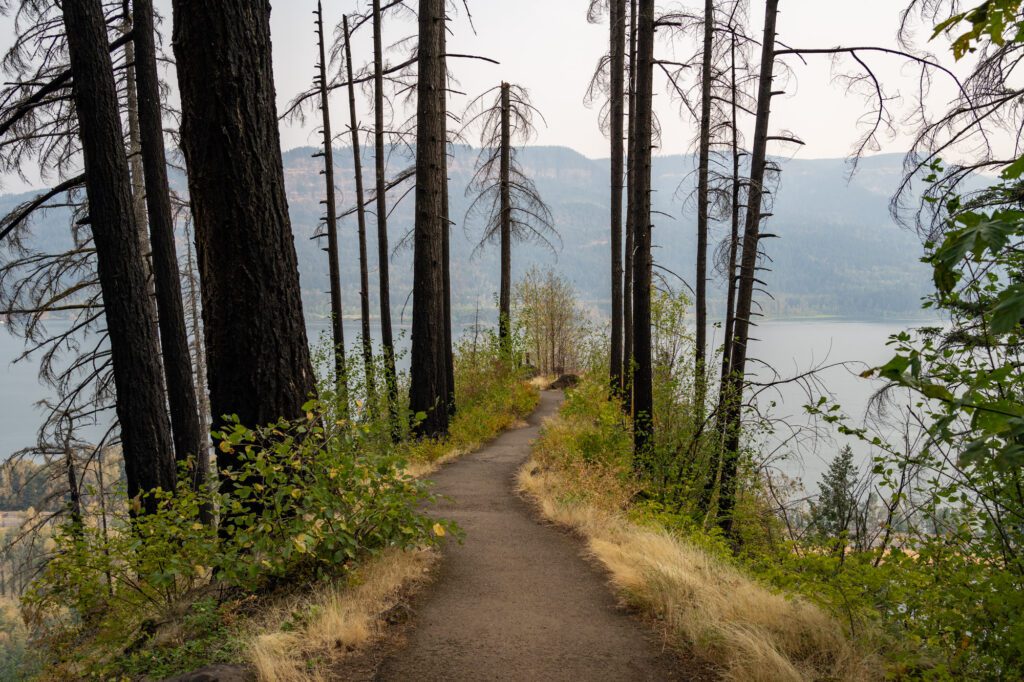
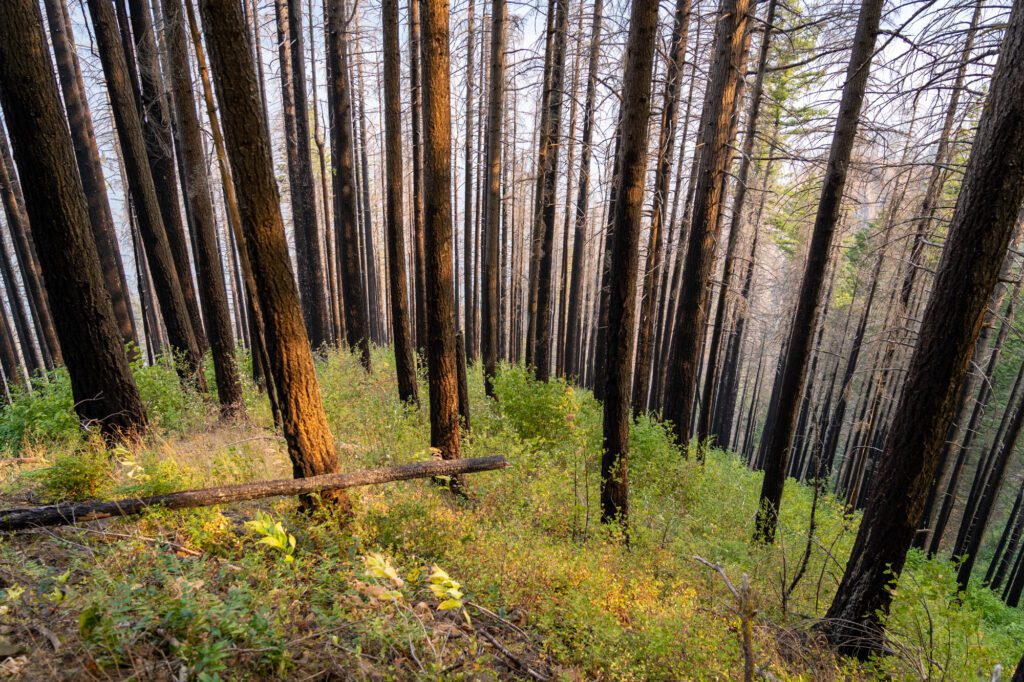
While you’ll likely have noticed fire damage from the 2017 Eagle Creek Fire at some point before now, this is where it really became clear how devastating that fire was to the ecosystem here. The trees are charred, and huge swaths of the understory were completely obliterated (though, as you’ll see, they’re in the process of recovering as we speak).
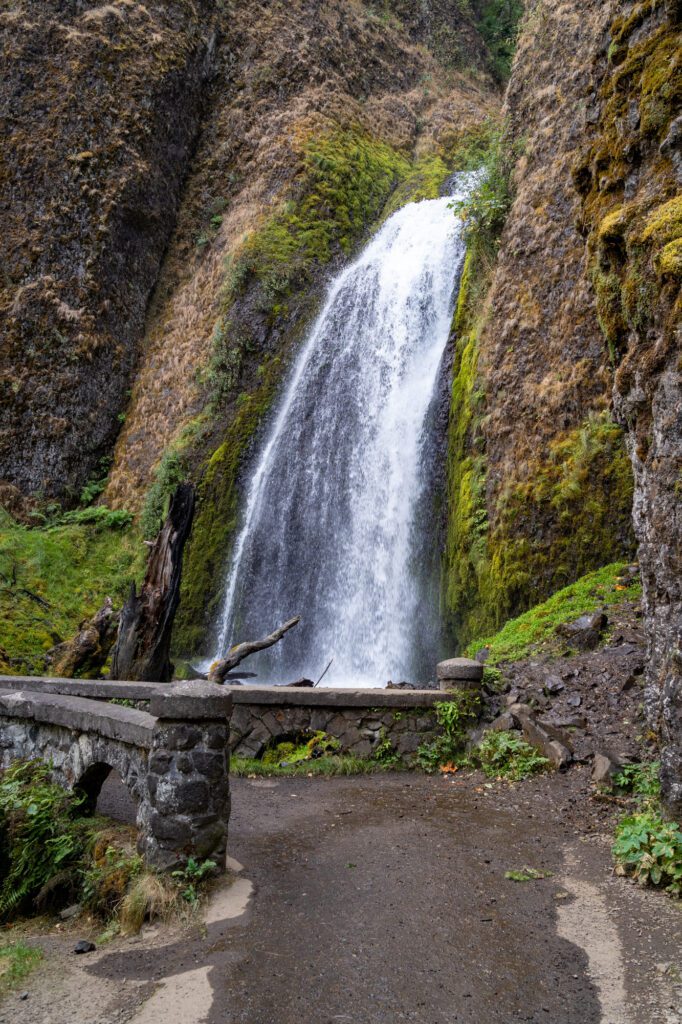
From the high point in the trail, it’s all downhill from here. And it can be steep at points. You’ll descend a series of tight switchbacks down to Fairy Falls, which is different from the other waterfalls on this hike.
Rather than plunging from a ledge into a pool (which is what most of the Columbia River Gorge waterfalls do), it cascades down a rock face, forming what looks like a web of water on its way down to the base of the falls.
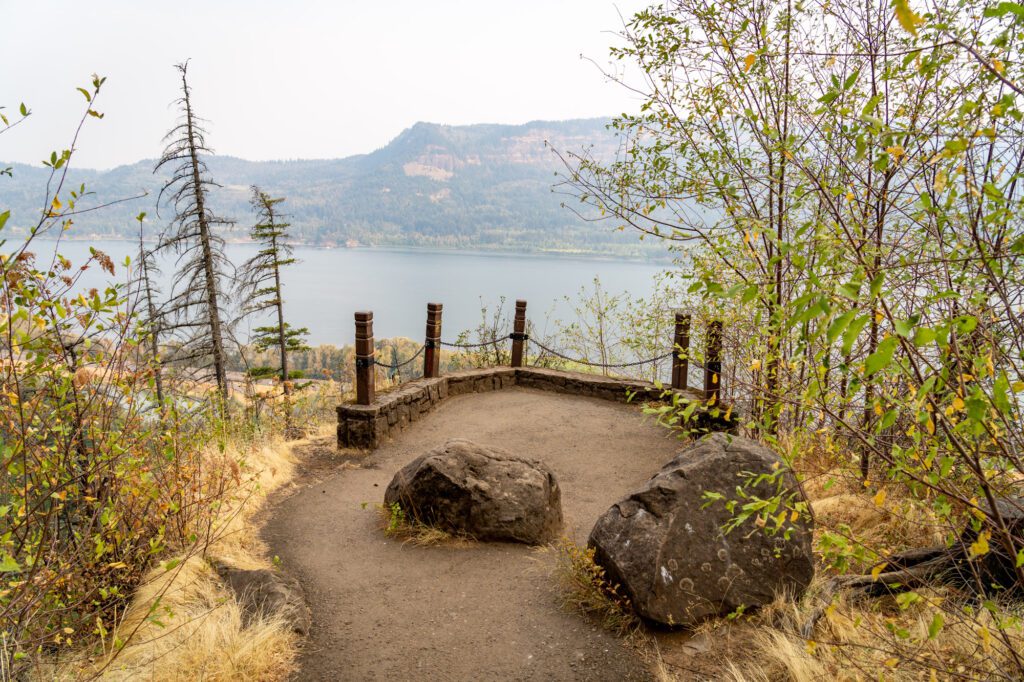
The next marker on your way down is going to be Lemmons Viewpoint, which has an excellent view of the Columbia River Gorge, particularly of the cliffs of Cape Horn across the Columbia River, which is prime peregrine falcon territory.
Unfortunately, on the day we did this hike most recently, it was smokey from nearby wildfires, so the view wasn’t at its best.
Immediately after that viewpoint, it’s a steep, tight set of switchbacks to get down to Wahkeena Falls. After
Lemmons Viewpoint, the trail is paved, though it’s STEEP. We climbed up this section, and it was not particularly easy. Lucky for you, you’re heading downhill.
The last section of trail is a short walk down the paved trail to the parking lot at the base of the Wahkeena Trail. From here, it’s a final quick stroll along a nice trail that parallels the road back to the Multnomah Falls parking lot.