Everything You Need to Know to Hike the Trail of Ten Falls
Looking for a guide to hiking the Trail of Ten Falls in Silver Falls State Park? We have some good news for you – you’re in the right place! We love this hike (it’s one of our favorite hikes in Oregon), and we try to do it at least once a year (which means we’ve done it three times at the time of writing).
In this guide, we’re going to share everything we think you need to know to plan your hiking adventure in Silver Falls State Park.
It’s no secret that Oregon is paradise for waterfall lovers. Between the waterfalls in the Columbia River Gorge and the ten we’re about to talk about in Silver Falls State Park, we’re fairly certain that you could put Oregon head-to-head with any other state in terms of beautiful waterfalls and it would easily win.
If you’re looking for beautiful waterfalls, the Trail of Ten Falls is absolutely the best bang-for-your-buck in Oregon. Over the course of eight (ish) miles, you’ll see ten different waterfalls of various shapes and sizes, including a few of the most impressive in the entire state.
In this guide, we’re going to go through everything we think you need to know to hike the Trail of Ten Falls in Oregon.
We’ll start with the logistics – where to park, and other things you need to know for a smooth trip – and then go into a trail report based on our own experiences hiking the trail.
Sound good to you? Let’s get into it.
Disclaimer: Some of the links in this post, like hotel and vacation rental links, are affiliate links, meaning at no additional cost to you we make a little bit of money if you click through and book. That being said, we would absolutely never recommend something to you that we don’t stand behind 100%.
Hiking the Trail of Ten Falls: Trail Details
- Length: 7.5 miles
- Elevation Gain: 1,200 feet
- Season: Year Round (watch out for snow/ice in the winter)
- Trail Type: Loop
- Difficulty: Easy/Moderate
- Pass Required? Oregon State Parks Pass
- Dog-Friendly? Sort of (ONLY on the Rim Trail)
- Trailhead Location: Silver Falls State Park South Falls Day Use Area
The Route for Hiking the Trail of Ten Falls
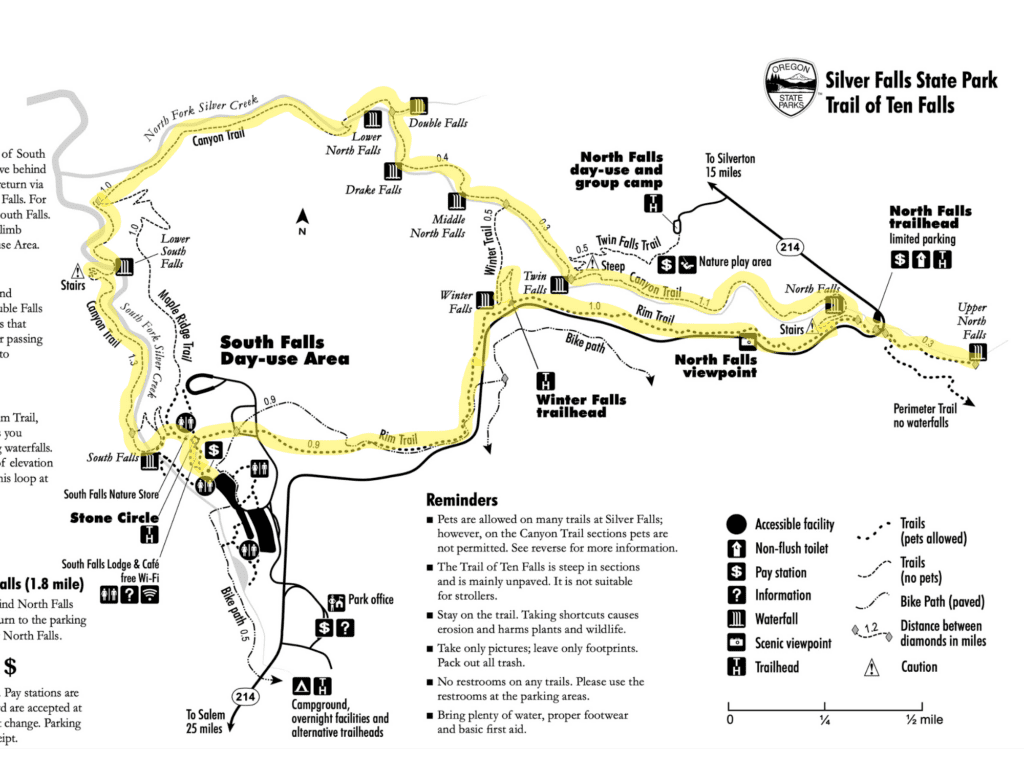
The classic route for this hike is a clockwise loop that starts at the South Falls parking lot, drops down behind South Falls and takes the Canyon Trail alllll the way out to North Falls. Right after North Falls, you’ll climb out of the canyon up to the rim, and do a quick out-and-back to see Upper North Falls.
From there, you’ll meet up with the Rim Trail that brings you back to the parking lot.
Here’s a map, courtesy of the park:
This is exactly how we’d do the hike for a few reasons.
First, if you get an early start (we got there right at 8am, when the gate opened), you’ll find at least a little slice of solitude for the first portion of the hike.
Going clockwise means you won’t meet up with the hikers coming the other direction for quite a while, so if you’re one of the first people on the trail, you’ll only be sharing it with the other earlybirds.
Second, the parking situation is much better at the South Falls Trailhead, which has literally hundreds of parking spots, than at the North Falls Trailhead, which has ~30 spots. Yes, it’s a little bit of a zoo (especially around midday), but it’s MUCH better than not getting a spot!
Going clockwise also front-loads the waterfalls. If you start at the South Falls Trailhead and go counterclockwise, you’ll spend your first few miles on the Rim Trail, which is fairly boring and mundane compared to the rest of the hike.
How Difficult is the Trail of Ten Falls?
We’d say that this hike is on the border between the easy and moderate categories, but only because of the distance. The elevation gain is very gradual, and isn’t particularly difficult.
On the last trip, we did this hike with Matt’s mom, who is a 60-something hiker who works in an office five days a week, and she was pleasantly surprised at how moderate this hike is.
If you follow our advice and go clockwise from the South Falls Trailhead, you’ll drop down past the South Falls into the canyon, and it’s basically flat all the way until you go to climb out of the basin at North Falls. That climb is very gradual with a steep section right before you arrive on the rim.
Then you’re on the Rim Trail to get back to the parking lot, which is also basically flat.
In fact, if this hike was not 8+ miles long, we’d probably even put it in the “easy” category.
But the full loop is eight miles long, so you will need to be prepared for a relatively long hike. That means snacks and water, along with good shoes.
Shortening This Hike
There are a few options for shortening this hike if eight miles is a little too much for you.
First is the Winter Falls Loop (~5 miles), which takes you past seven of the ten falls and starts at the same place as the full hike. It follows the same route as the full Trail of Ten Falls, and then cuts over on the Winter Trail to get back up to the rim, which cuts off the last two (ish) miles of the full loop.
Second is the Maple Ridge Loop (~2.5 miles) which takes you down past South Falls to Lower South Falls, where you cut back on the Maple Ridge Trail to return to the South Falls parking lot.
Last, and our lowest recommendation of the three shorter hikes, is the North Falls Loop (~3 miles), which starts at the North Falls Trailhead, descends behind North Falls, and cuts back on the Winter Trail to get back up to the rim.
Getting to the South Falls Trailhead (Silver Falls State Park)
The South Falls Trailhead is the best place to park to start this hike. It’s about an hour and 15 minutes south of Portland, near the town of Silverton (which is a very cute spot to stop for lunch on the way back to Portland).
IMPORTANT NOTE: The park is closed overnight, which means a 6am start isn’t possible. Here are the hours where they unlock the gates at the South Falls & North Canyon day use areas:
- November- January: 8:00am- 5:00pm
- February: 8:00am- 6:00pm
- March: 8:00am- 8:00pm
- April- August: 7:00am- 9:00pm
- September: 7:00am- 8:00pm
- October: 8:00am- 7:00pm
If you are looking to get an earlier start, your best bet is to park at the North Falls Trailhead (here on Google Maps), which has no gate. There are still signs that say the trail is closed until the above hours, though.
Parking at the South Falls Trailhead
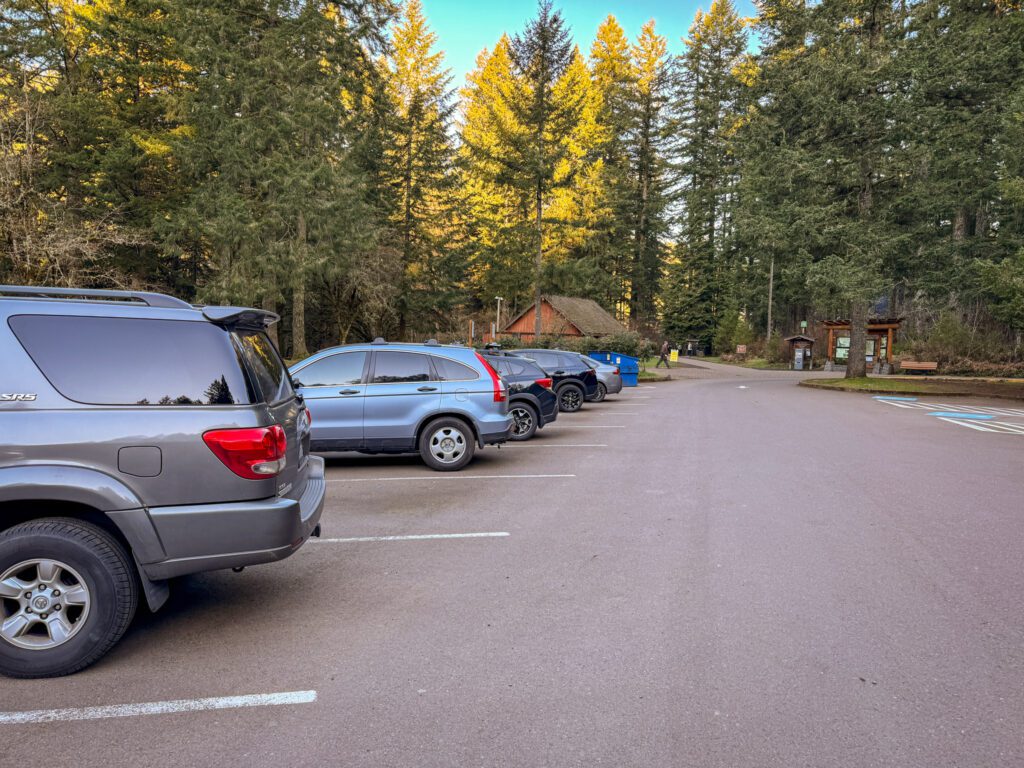
As we mentioned above, the South Falls Trailhead has room for literally hundreds of cars. And if you visit on a summer weekend, it’s likely to be close to full (we were here in mid-March and it was basically full when we got back to our car at around noon).
We arrived as soon as the gates opened at 8am, and there were 20 cars in the parking lot by the time we had strapped on our packs and laced our boots. Considering it’s one of the most popular hikes in the state AND it was the first nice weekend that spring, not bad!
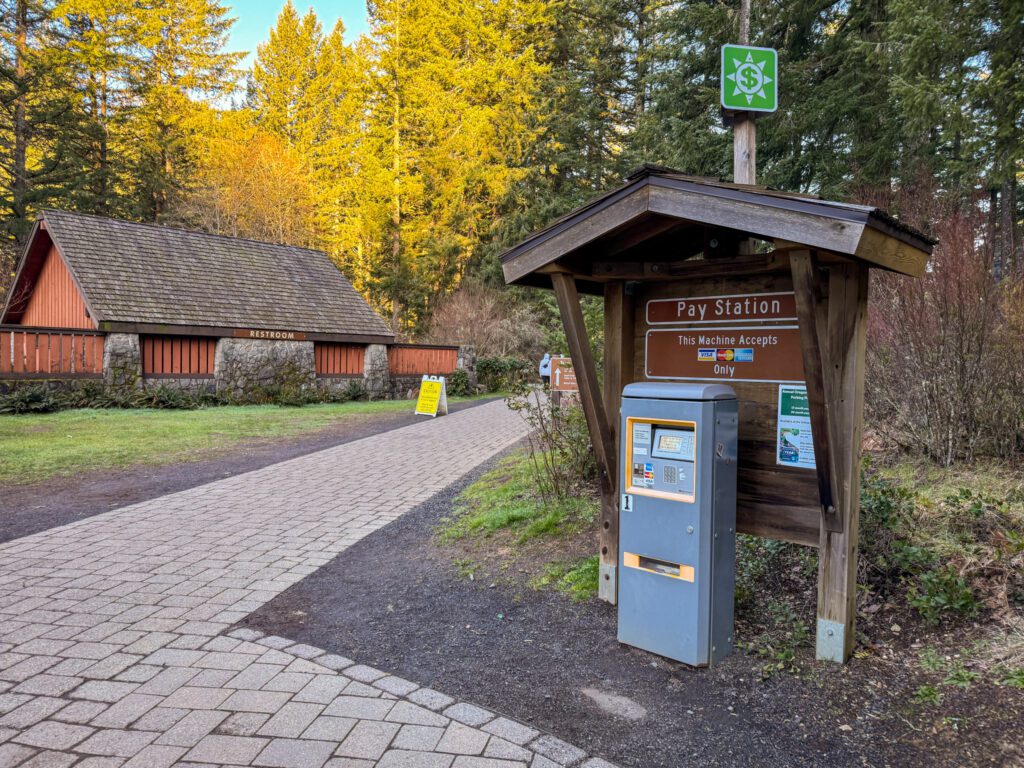
There are trail maps, a station to buy a day pass (which costs $5), and nice bathrooms at the trailhead.
IMPORTANT NOTE: If you park at the North Falls Trailhead and need to buy a parking pass, the machine there only accepts cash.
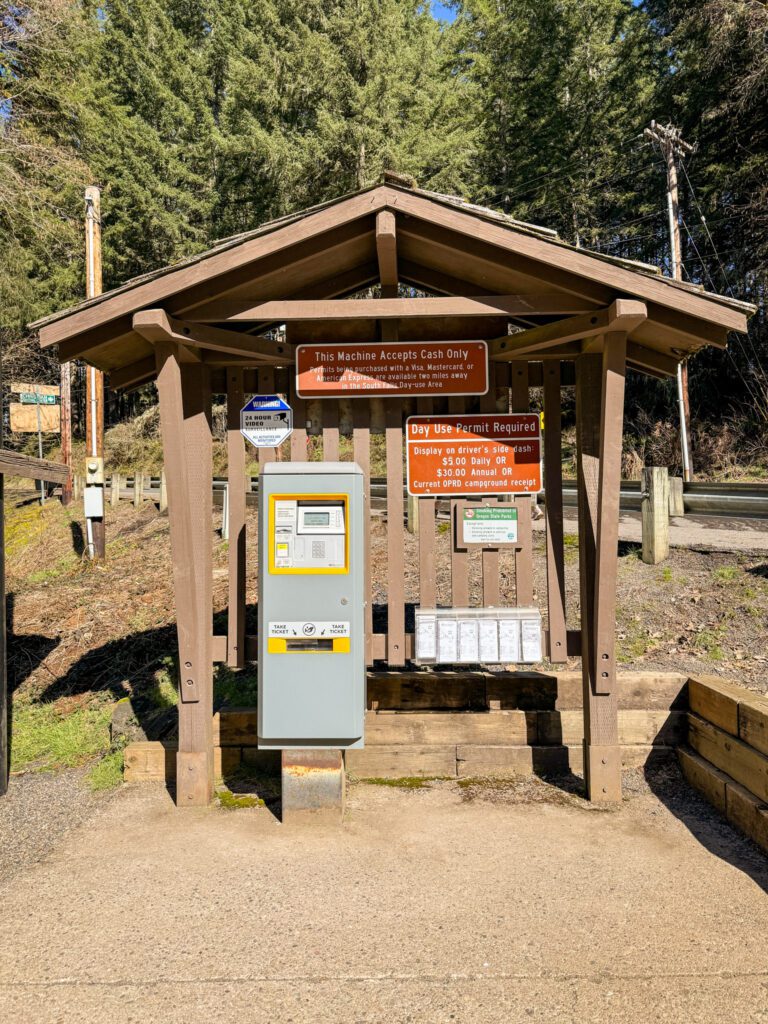
We sat there eating a snack and saw multiple people get frustrated that they only had their card, so bring $5 cash!
The Best Time to Hike the Trail of Ten Falls
Until this last trip down to Silver Falls, we had only done this hike in the summer and fall.
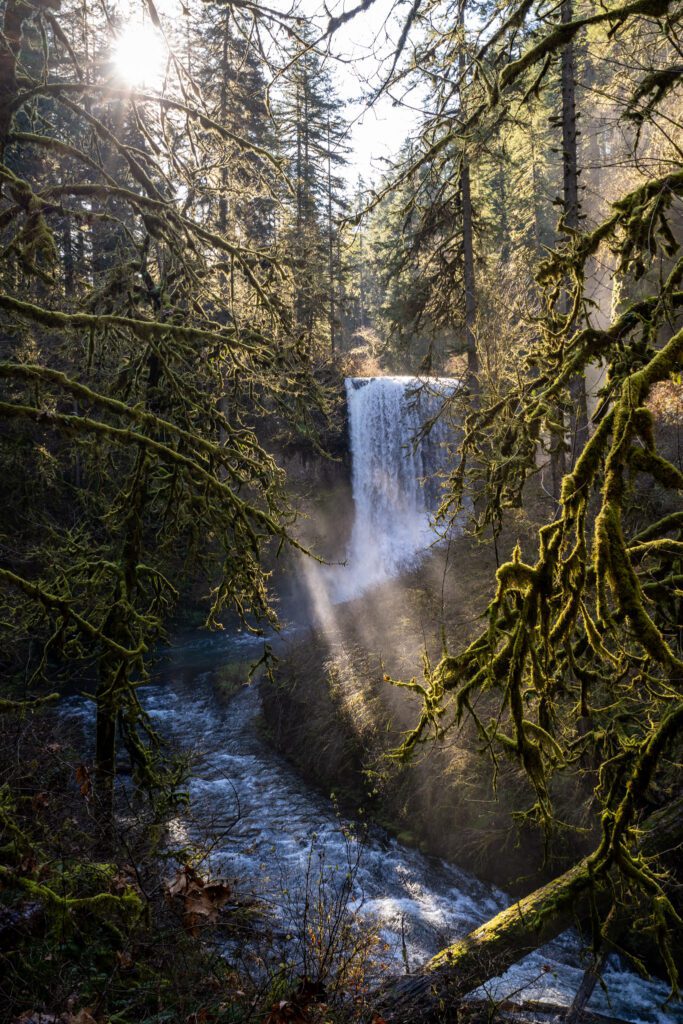
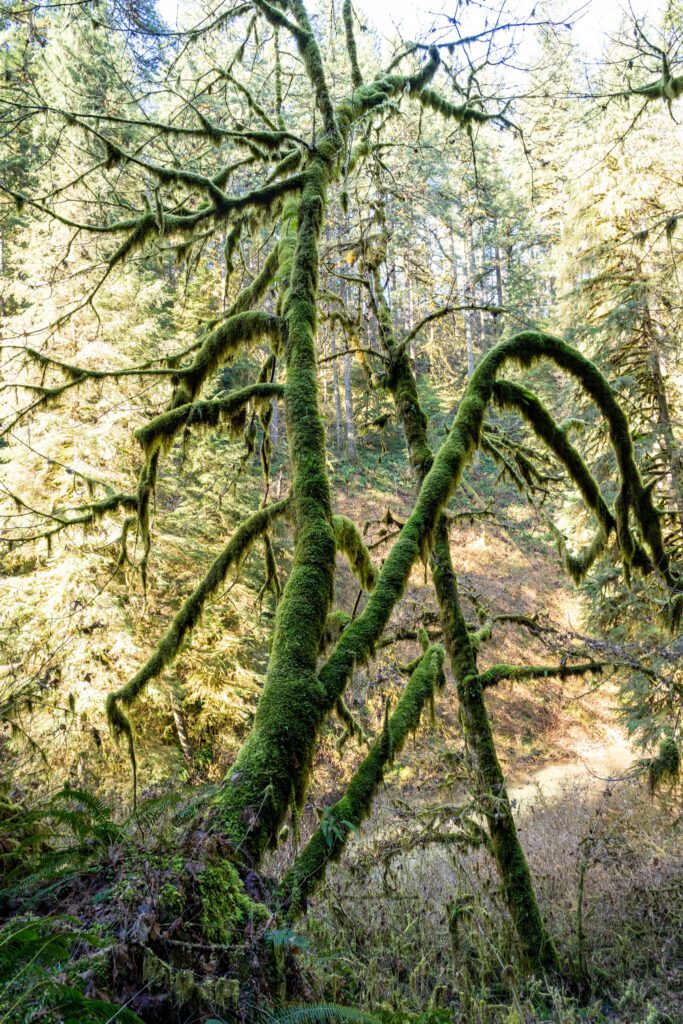
On this past trip, we headed down on the first nice day of spring and it was a completely different experience.
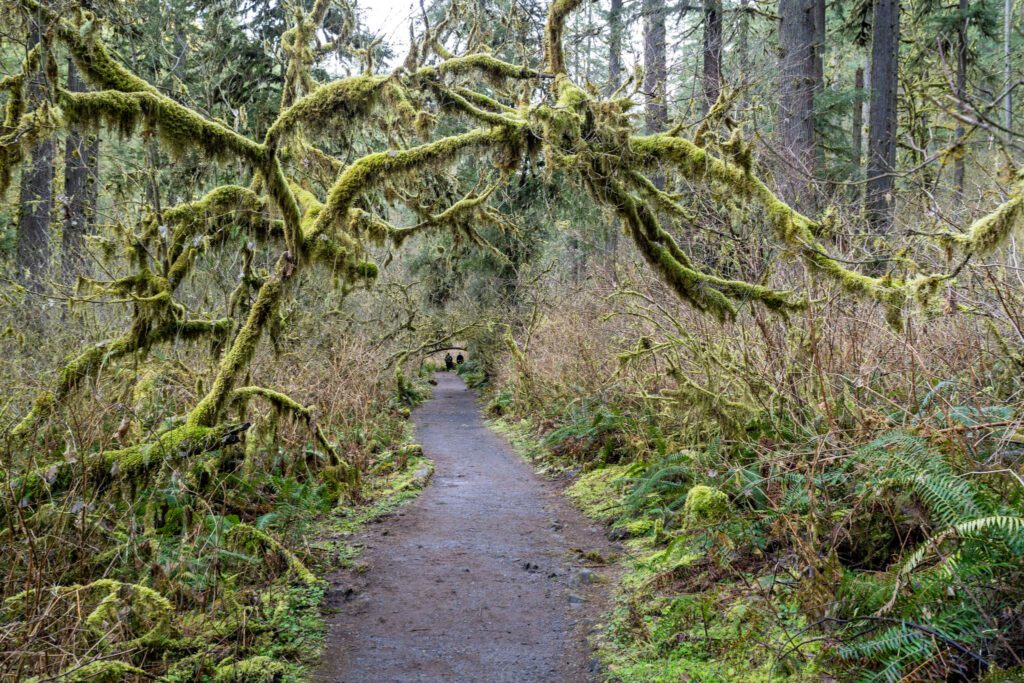
The forest was covered in a lush layer of moss. The walls of the canyon were covered in seasonal waterfalls thanks to the recent rain. And, most importantly, the waterfalls were absolutely roaring.
Compare that to the summer and fall, when the water levels are lower and the forest is largely dry.
Our best advice – and this is what we did on our most recent trip – is to head here on the first nice day of spring, when you’ll get the benefits of blue skies and also the high spring water levels that make the waterfalls incredibly impressive.
The best part about this hike is that there really is no bad time to do it.
Spring is our favorite time thanks to the high water levels, but you will find more rain and even patches of snow and ice on the trail.
Summer and fall offer warmer weather and blue skies, but the water levels tend to be lower. Don’t get us wrong, the waterfalls are still plenty impressive.
Winter would also be a good time to hike from a water level perspective, but you need to be prepared for cold, wet weather, and potentially be ready to navigate some snow and ice along the trail.
Are Dogs Allowed on the Trail of Ten Falls?
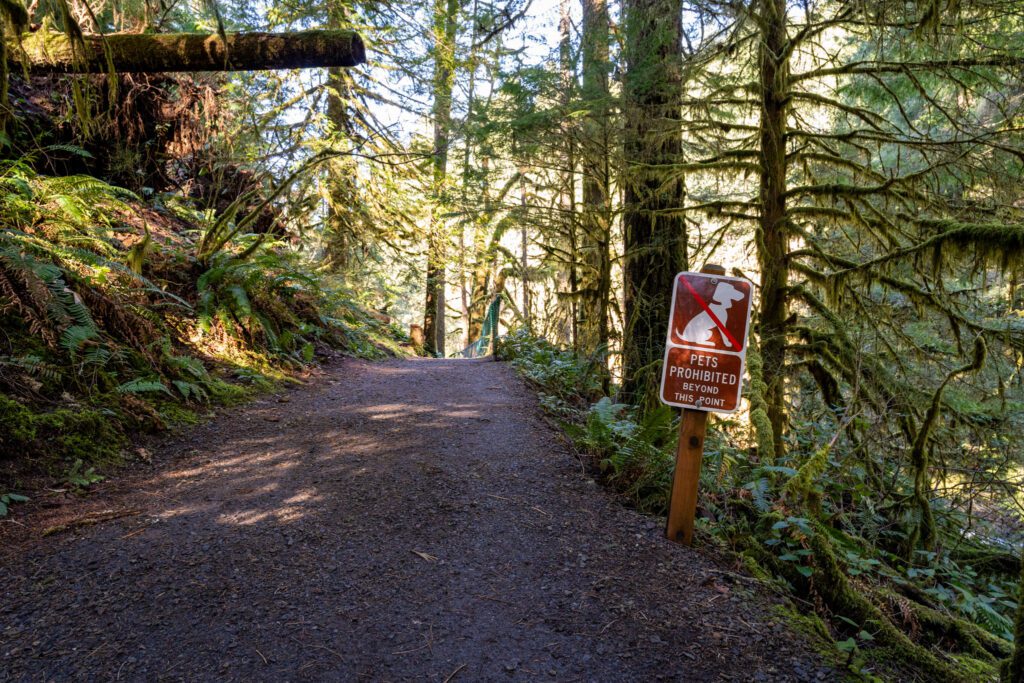
The answer to this is a little complicated. Dogs are allowed on a portion of the trail, and unfortunately it’s the less-interesting portion of the trail.
As we covered above, the classic Trail of Ten Falls loop includes two trails that form the loop; the Canyon Trail that takes you down into the basin where you’ll find the majority of the falls, and the Rim Trail that brings you along the rim of the canyon back to the parking lot.
Dogs ARE allowed on the Rim Trail, but that’s – BY FAR – the least interesting portion of the hike.
Dogs ARE NOT allowed on the Canyon Trail, which is where the waterfalls are. There are tons of signs reminding people of this, but we saw multiple groups with their dogs on the lower trail (off-leash, no less). Don’t be that person!
Things to Know Before You Hike the Trail of Ten Falls
Here are a few things to keep in mind before you hike, in no particular order.
The park is closed overnight. Luckily, I realized this the night before we hiked, otherwise we would’ve showed up at 6:30am to a closed gate. The park opens its gates at 8am in the offseason (and 7am in the late spring through summer).
Don’t expect solitude. This is one of – if not THE – most popular hikes in the entire Pacific Northwest, which means it gets crowded. We’ve seen the South Falls parking lot – which probably holds 300-400 cars – completely full.
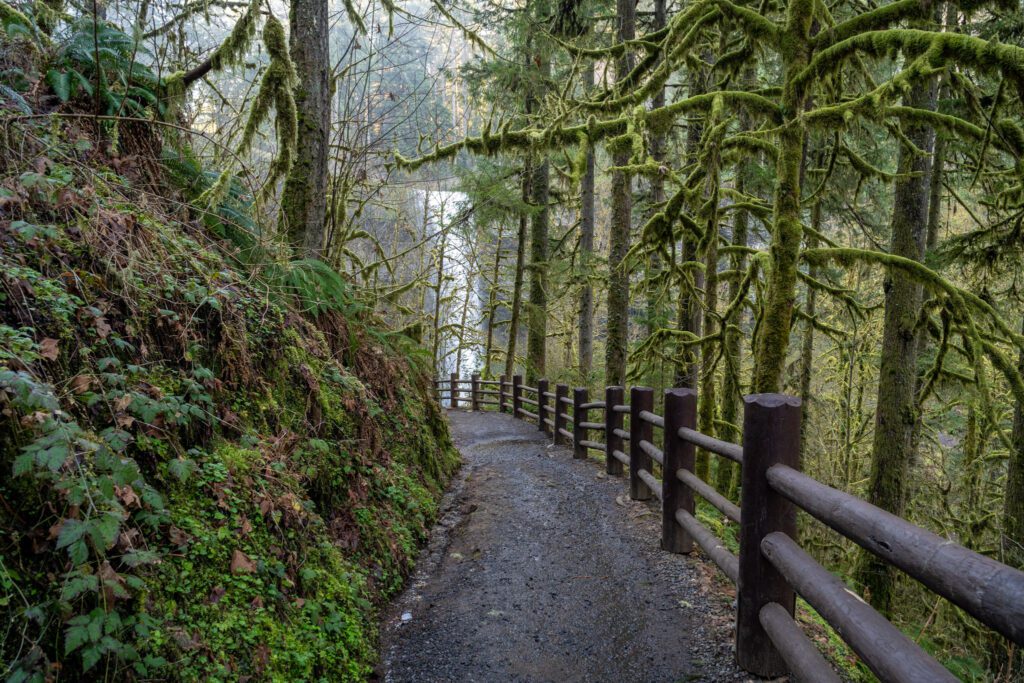
It will likely be muddy. Leave the all white Nikes at home! Especially in the winter and spring, where everything is just a little bit wet. You’ll also get wet when you walk behind four of the waterfalls, so be prepared for that.
You need an Oregon State Parks Pass to park. It costs $5 and you can buy a day pass at the machines in the parking lots at the South Falls and North Falls Trailheads – cash only if you park at the North Falls Trailhead. If you’re an Oregon resident, we highly recommend buying an Oregon State Parks Annual Pass, which costs $30 (or $50 for two years, which is what we did).
There are shorter hike options if 8 miles is too much. The shorter five mile loop from the South Falls Parking Area skips North Falls, but hits the majority of the waterfalls.
Come on a weekday for thinner crowds. As one of the most popular trails in the state, this isn’t a place to show up on a Saturday and expect a slice of solitude while you hike. However, if you get an early start on a weekday, you’re much more likely to have a little peace and quiet.
Hiking the Trail of Ten Falls: A Complete Trail Guide
Now that we’ve covered most of the information we think you need to know before you get out on the trail, let’s talk about the trail itself!
This hike is a pretty straightforward affair, but we’re going to break it into several distinct sections to make it more digestible, and so that you’ll be able to keep track of where you are on the hike when you’re on the trail.
Those sections, however, are not just a list of the different waterfalls – we’re going to cover the sections in between the waterfalls too, so you know what to expect.
Those sections are:
- The Trailhead to the Base of South Falls
- South Falls to Lower South Falls
- Lower South Falls to Lower North Falls & Double Falls
- Drake Falls, Middle North Falls, & Twin Falls
- Twin Falls to North Falls & Upper North Falls
- The Rim Trail Back & Winter Falls
For each section, we’ll give you the (rough) distance and elevation gained in that portion of the hike, along with a relatively short description of the terrain, calling out anything that we think might be useful to know (e.g. there’s a steep section with some scrambling, there’s a toilet, etc).
Trailhead to the Base of South Falls
Distance: 0.6 miles // Elevation Gain: -200 feet
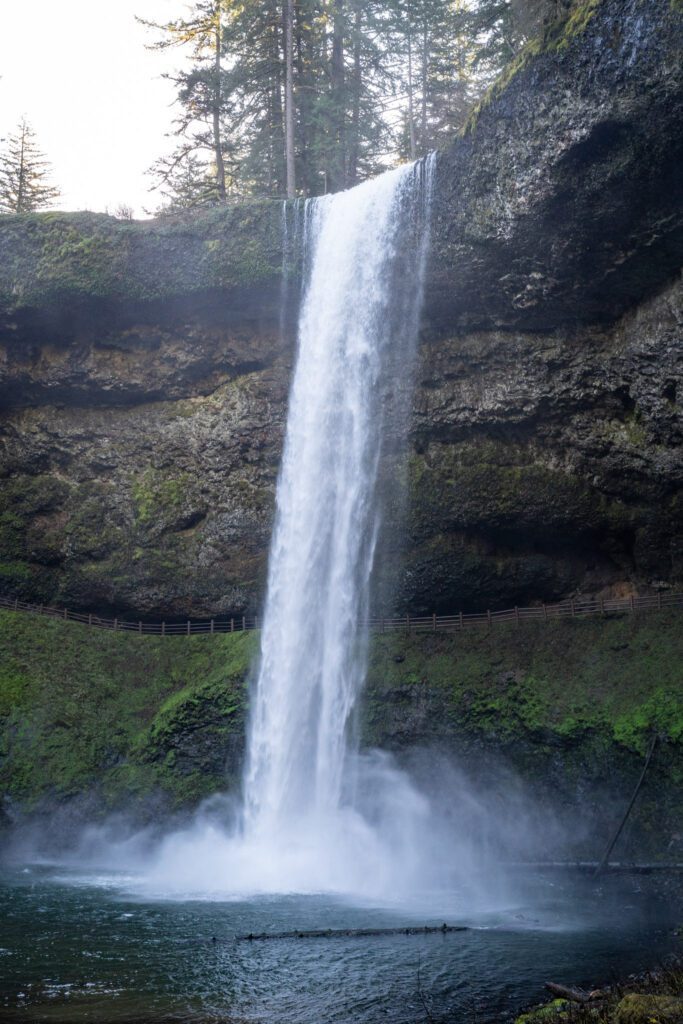
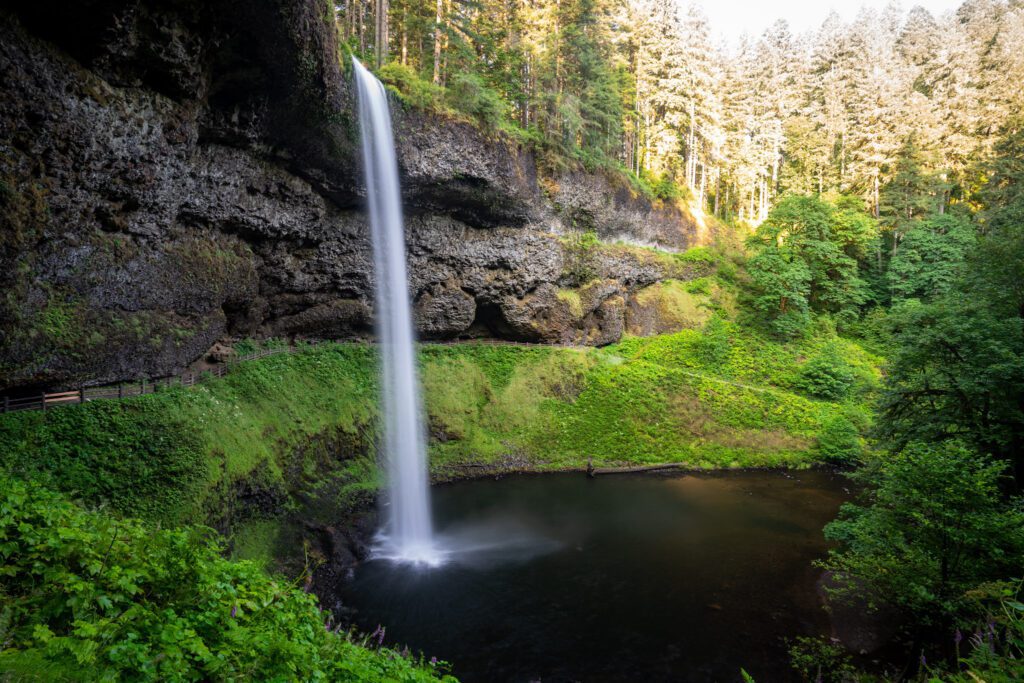
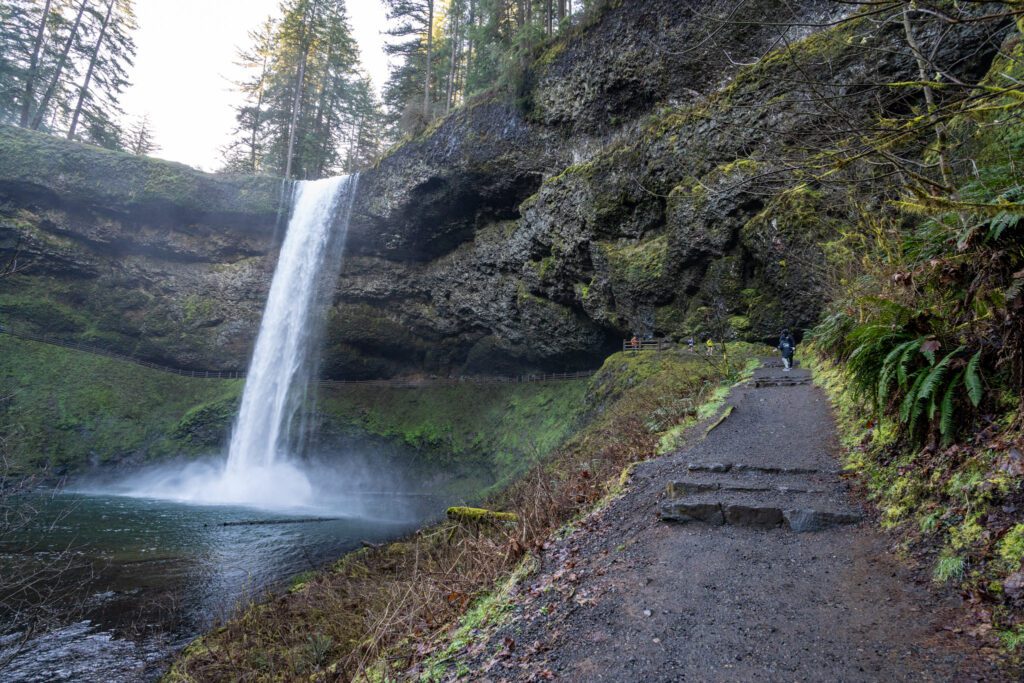
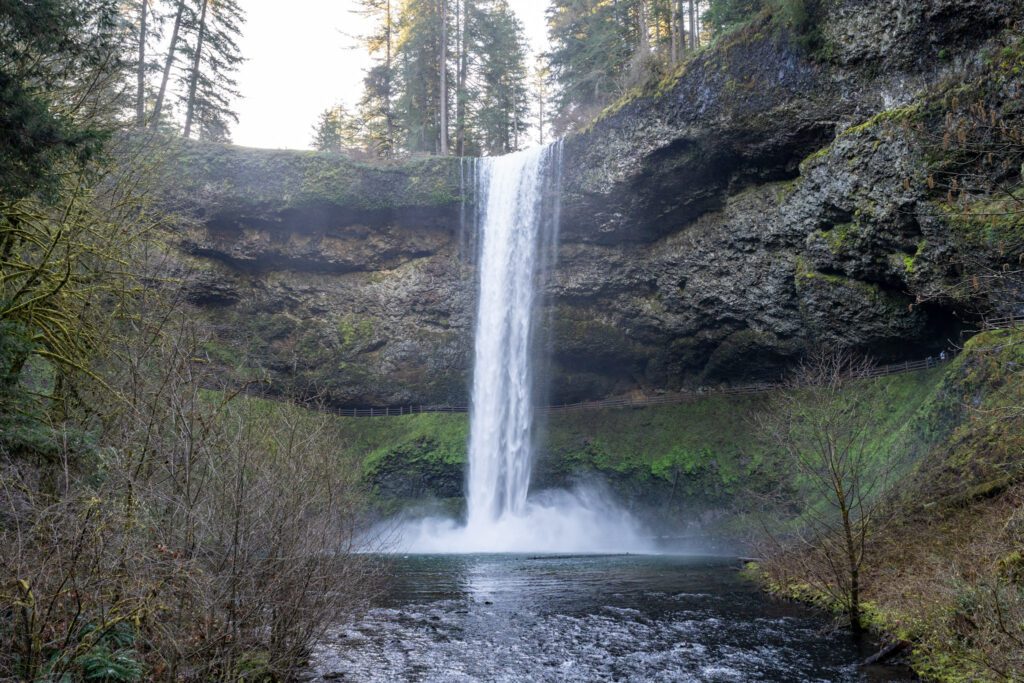
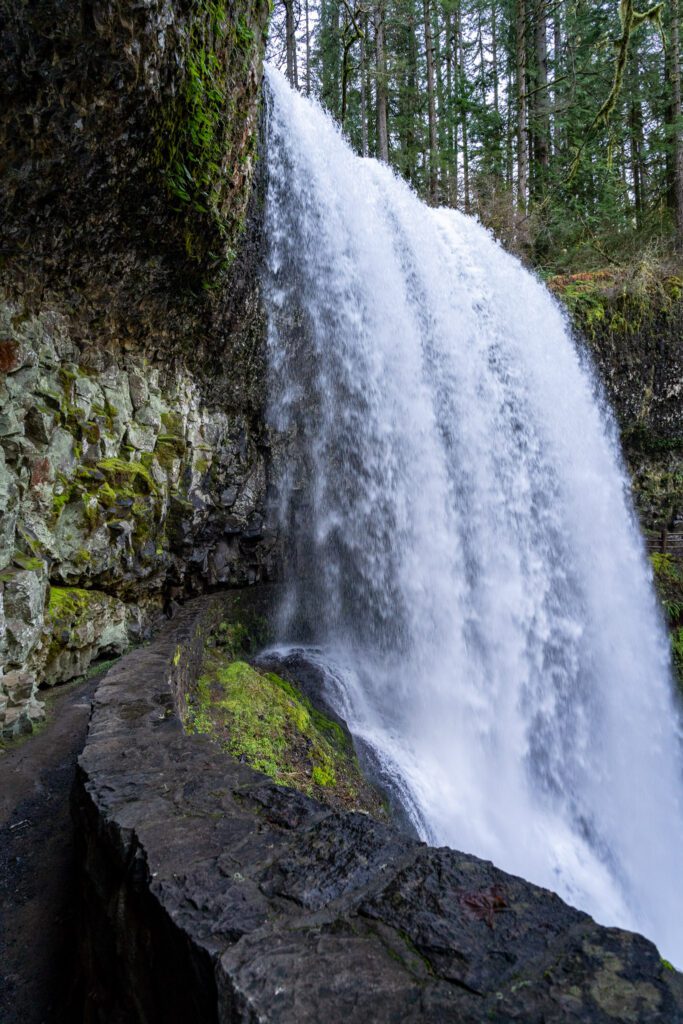
This first section of the hike is a short one, and it starts from the parking lot and follows a paved path past the South Falls Lodge (which has a coffee shop and restaurant, along with a gift shop) to a viewpoint of South Falls, which is the most impressive of the bunch, we think.
It tumbles 177 feet off of a ledge and down into the South Fork of Silver Creek. The trail actually passes behind the falls, which offers a unique vantage point and all around fun experience.
Just past the lodge, you’ll come to a fork in the trail where the Canyon and Rim Trails meet. These two trails form the two halves of the loop, and you want to head left here to start on the Canyon Trail, which you’ll follow for the next five or so miles.
Follow the Canyon Trail as it drops down into the…canyon. It’s a wide switchback that brings you to another fork in the trail that forms a mini-loop.
Right takes you down to the water level (which you’ll get to, but in a bit), and you’ll head left to pass behind the falls and make your way down to the wooden bridge, which is another good vantage point.
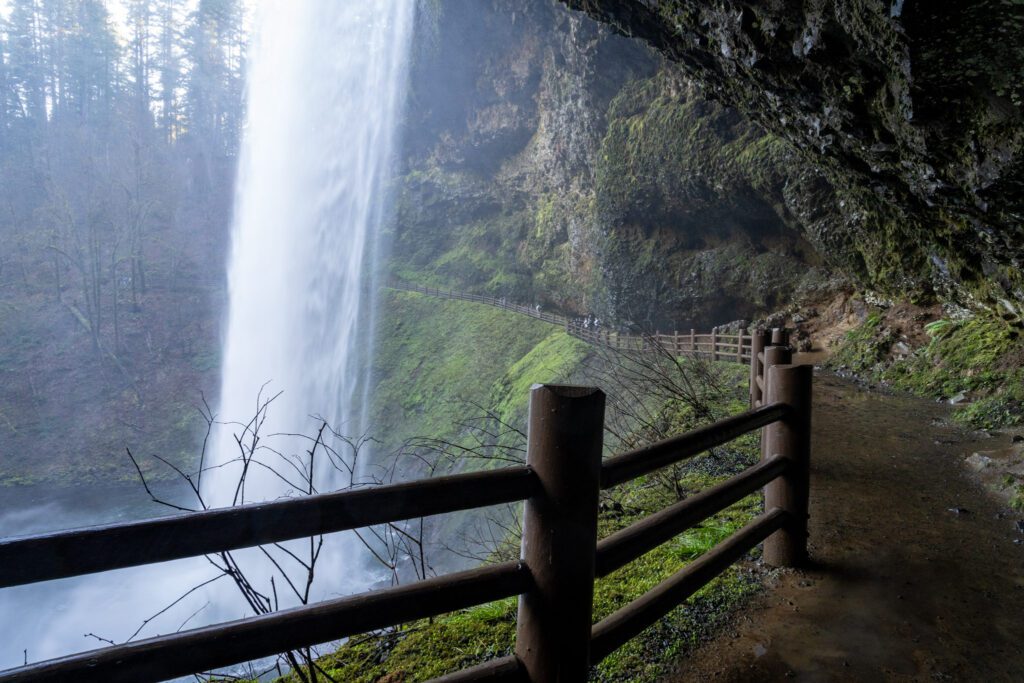
You are going to get wet as you walk behind the falls, especially in the winter and spring when the water is noticeably higher. The best photo spots, we think, are on that wooden bridge at the base, and from the trail on the far side of the falls from the parking area.
Note that you can’t actually get to the base of the falls – we mean the wooden bridge that sits at the water level.
South Falls to Lower South Falls
Distance: 0.6 miles // Elevation Gain: -100 feet
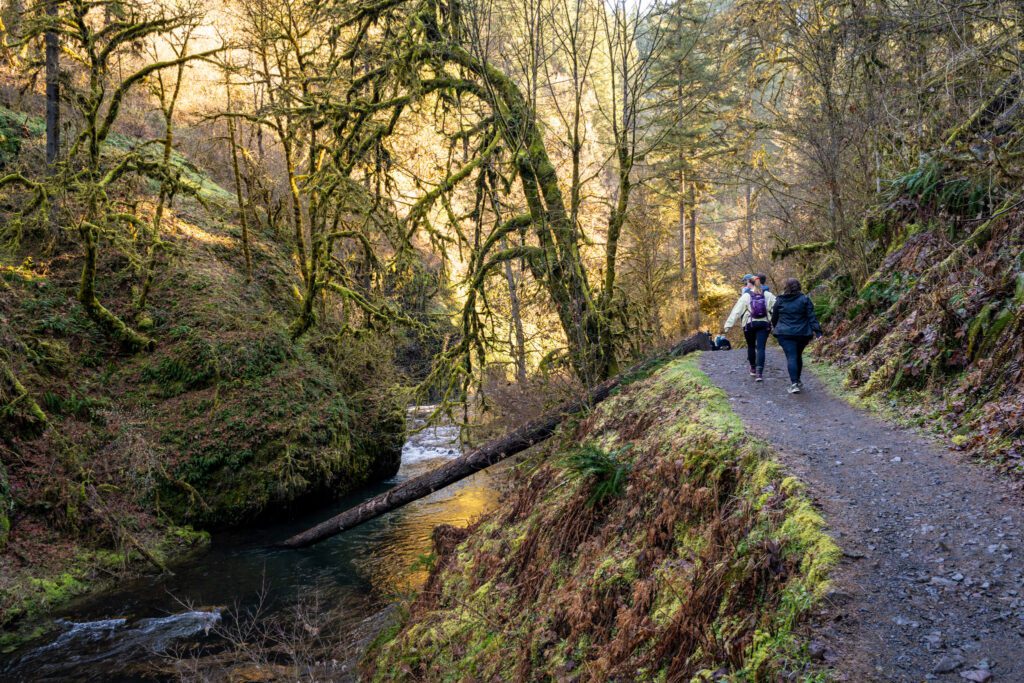
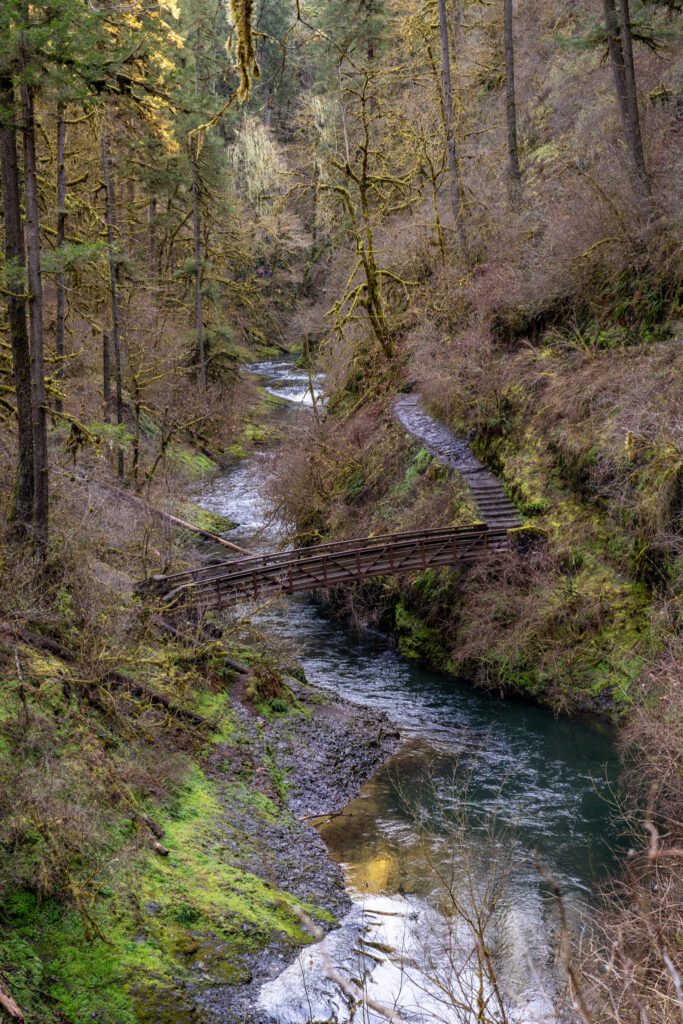
From that wooden bridge, the trail follows the South Fork of Silver Creek on a slight downhill grade into the forest. It’s a peaceful walk on this section, and you’re accompanied by the sound of the babbling creek, which is always a nice auditory backdrop on any hike.

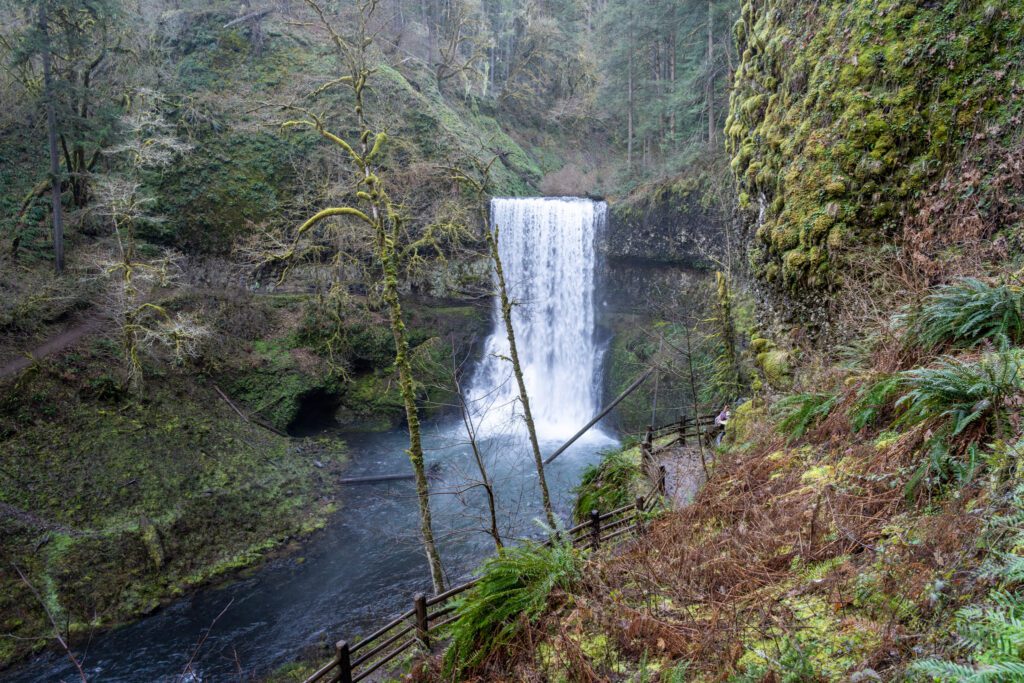
Eventually, you’ll come to a steep set of switchbacks that head down to Lower South Falls, which comes into view as you get to the bottom of the switchbacks.
Watch your footing here, as it gets wet and slippery.
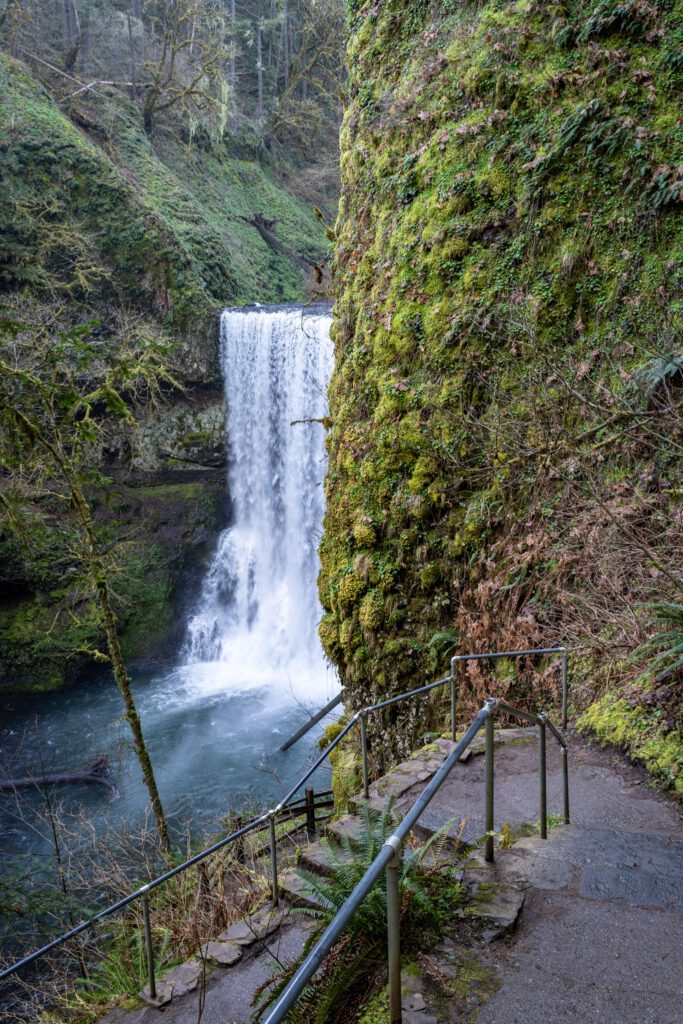
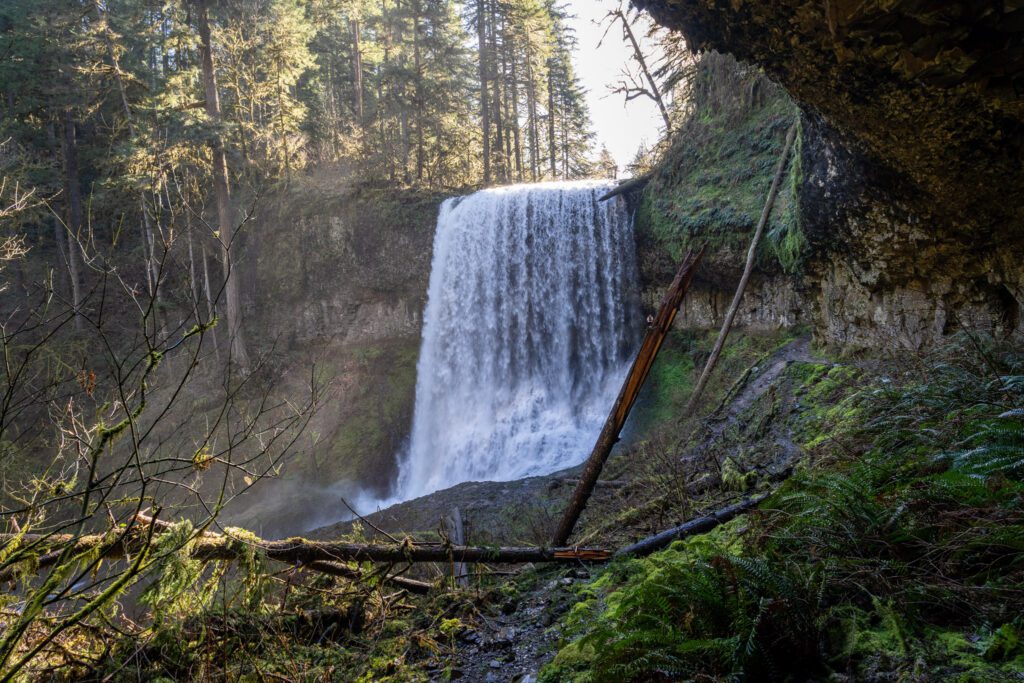
Lower South Falls is smaller than its big brother that you came from, but it’s still impressive. Plus, it’s the second of four falls that you can walk behind!
Lower South Falls to Lower North Falls & Double Falls
Distance: 1.2 miles // Elevation Gain: 300 feet
From Lower South Falls, you begin a very slight uphill grade that continues through the end of the first half of the loop. It’s hardly noticeable though because it’s so gradual.
You’ll continue along the Canyon Trail, and you’ll come to a trail junction a quarter of a mile into this section that connects with the Maple Ridge Trail, which brings you back to the South Falls Trailhead.
This version of the hike is a quick and easy loop that is good for families with small kids or people with limited mobility.
To continue to the other waterfalls, veer left and downhill.
The trail meets back up with the creek, and this is a particularly lush and green section of the trail as it rises and falls gently, finally bringing you to a wooden bridge that crosses the creek.
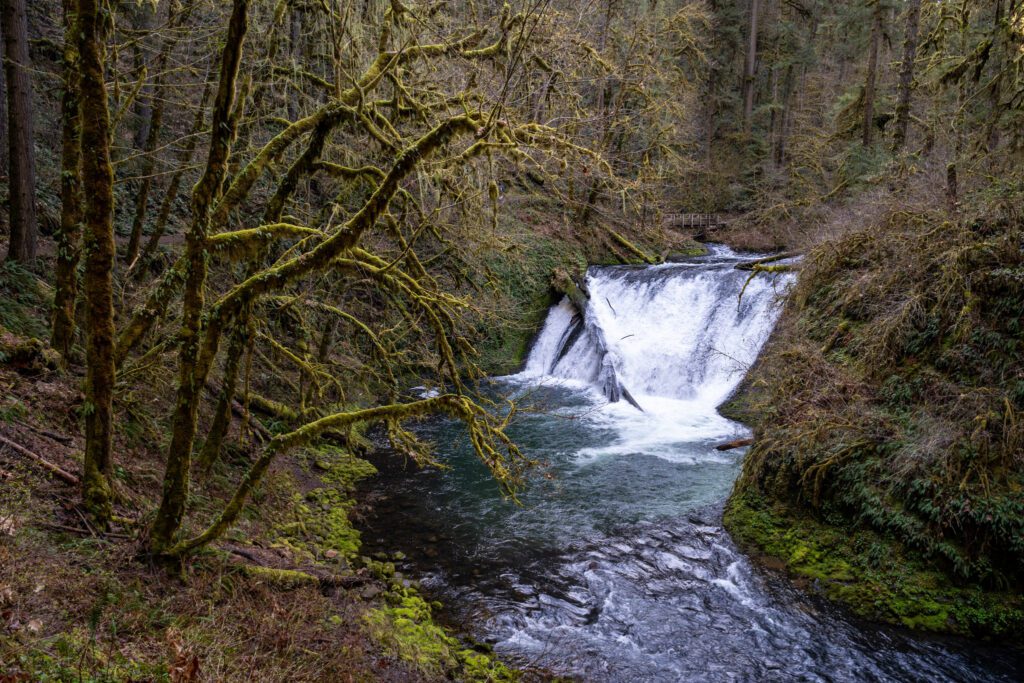
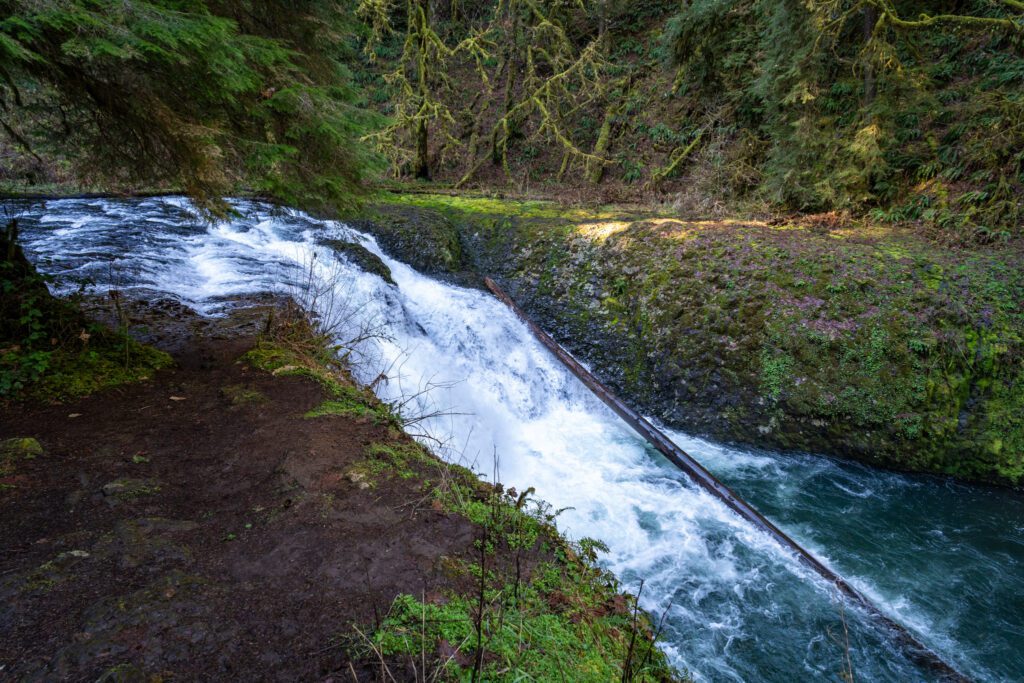
Immediately after that bridge, you arrive at Lower North Falls. It’s not the most impressive of the bunch in terms of height, but the powerful rush of water was impressive in a different way in the spring.
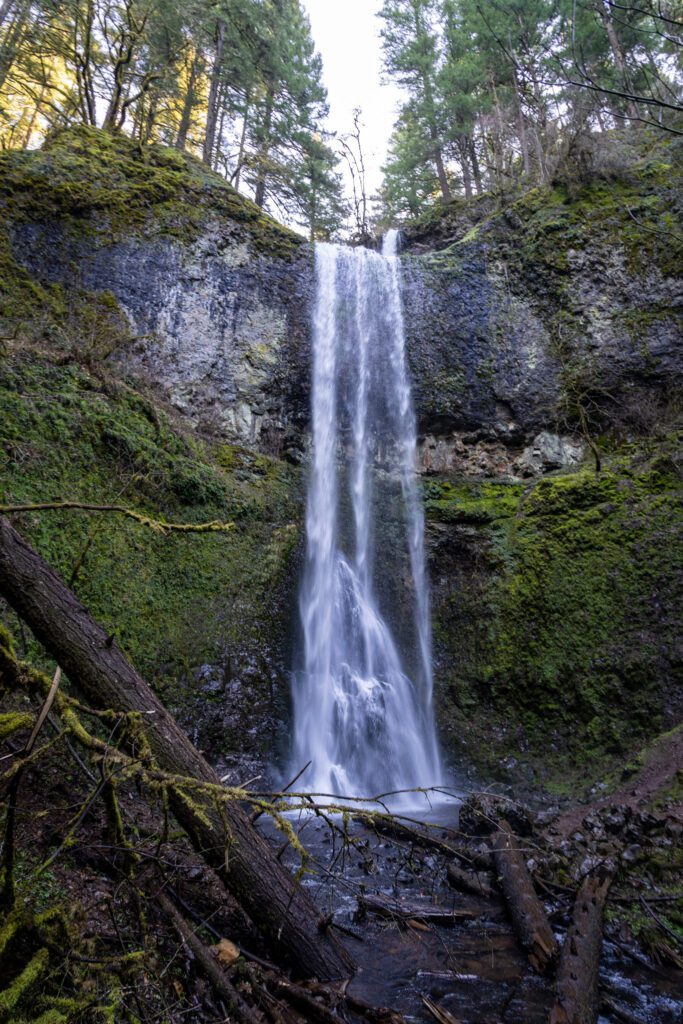
Right after you pass the falls, there’s a trail junction that takes you on a detour to the left out to Double Falls, which is 178 feet tall, squeezing past South Falls to claim the title of tallest waterfall of the day.
In the spring, this was an impressive sight. It’s almost three separate tiers (which would ruin the name), with an upper and lower tier along with the cascade that forms behind the lower tier.
In the summer, the flow was barely a trickle over the ledge, which was far less impressive. Here’s a comparison.
Can you guess which one was in the spring?
Make your way back out to the main trail and take a left, crossing over the wooden bridge and continuing along the Canyon Trail.
Drake Falls, Middle North Falls, & Twin Falls
Distance: 0.8 miles // Elevation Gain: 200 feet
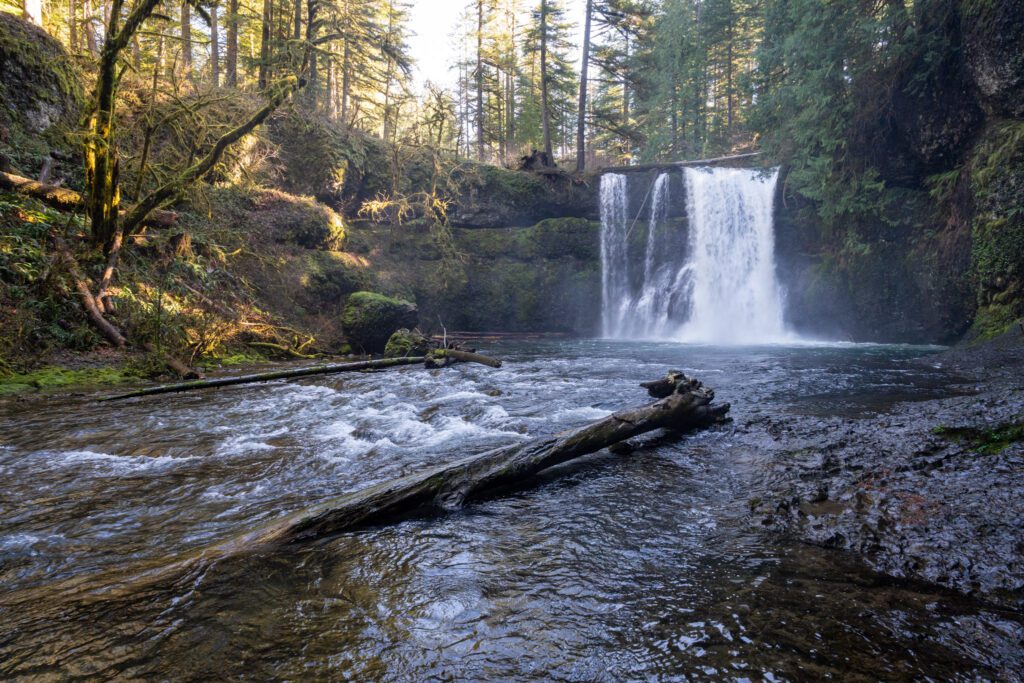
This section of trail is probably the least interesting, but does feature one of the top three falls on the hike – Middle North Falls – which is worth taking the quick detour to walk behind.
You’ll start on a short uphill walk to Drake Falls, which features a wooden viewing platform and a relatively small falls (it’s funny how quickly you become jaded on this hike).
From there, it’s another short uphill walk to Middle North Falls, where there’s a path off to the right that takes you down behind the falls. It’s worth doing the detour to get over to the cave on the other side of the waterfall, which offers the best view, we think.
Back on the main trail, you’ll pass the stone bridge that is the junction with the Winter Trail, which is the cut over to do the five mile loop described above.
To finish the entire loop, continue along the Canyon Trail. Almost immediately you’ll come to a water-level overlook for Twin Falls, which is another “meh” waterfall when compared to the majesty of some of the other waterfalls you’ve already seen (and the waterfalls that are yet to come!).
Twin Falls to North Falls & Upper North Falls
Distance: 1.7 miles // Elevation Gain: 350 feet
From Twin Falls, you’ll notice that the climb gets marginally steeper. Or you might not notice at all, because shortly after leaving Twin Falls (and when the climbing really starts) you get your first glimpse of towering North Falls, enticing you to push through the final climb.
At one point, you’re walking along the floor of the canyon and looking up at the rim hundreds of feet above you. Yes, you do need to get up there to get back to your car. But first, there are two great waterfalls to see!
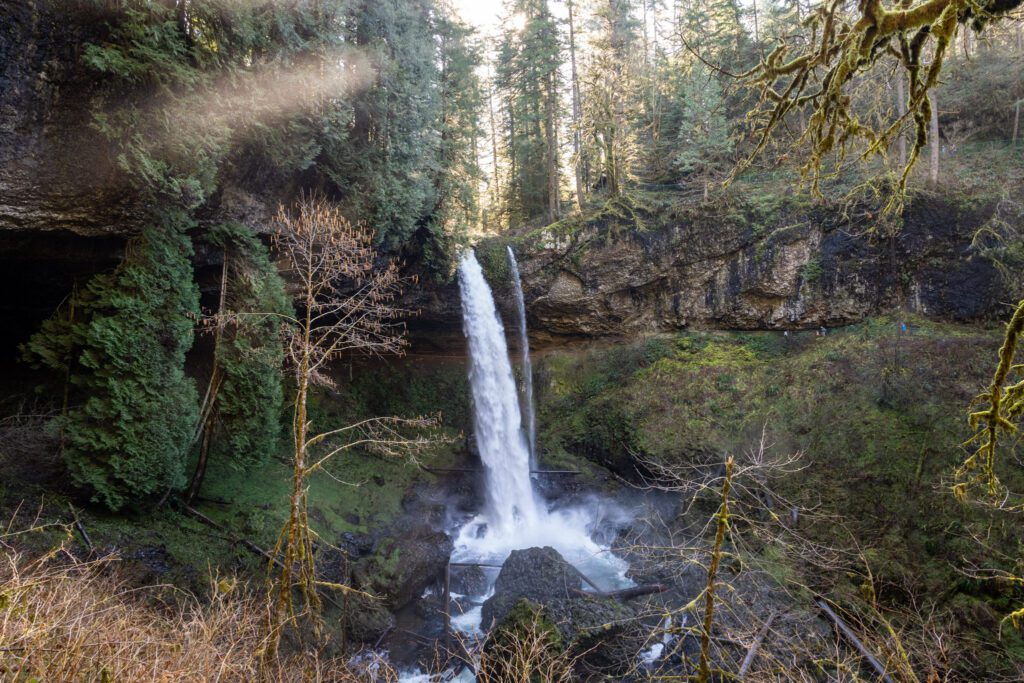
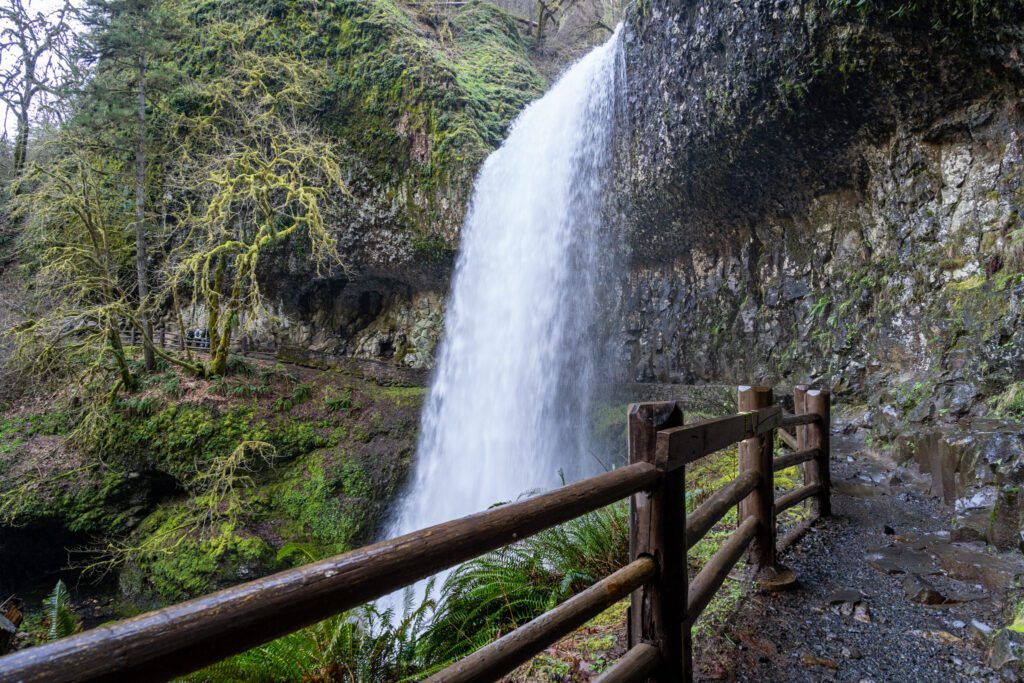
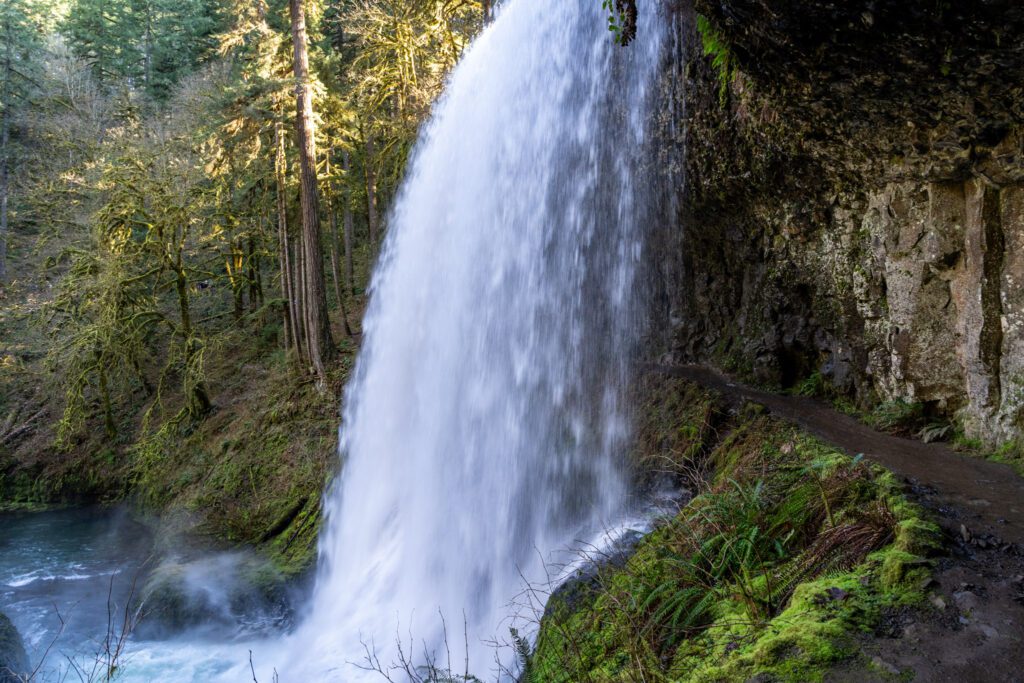
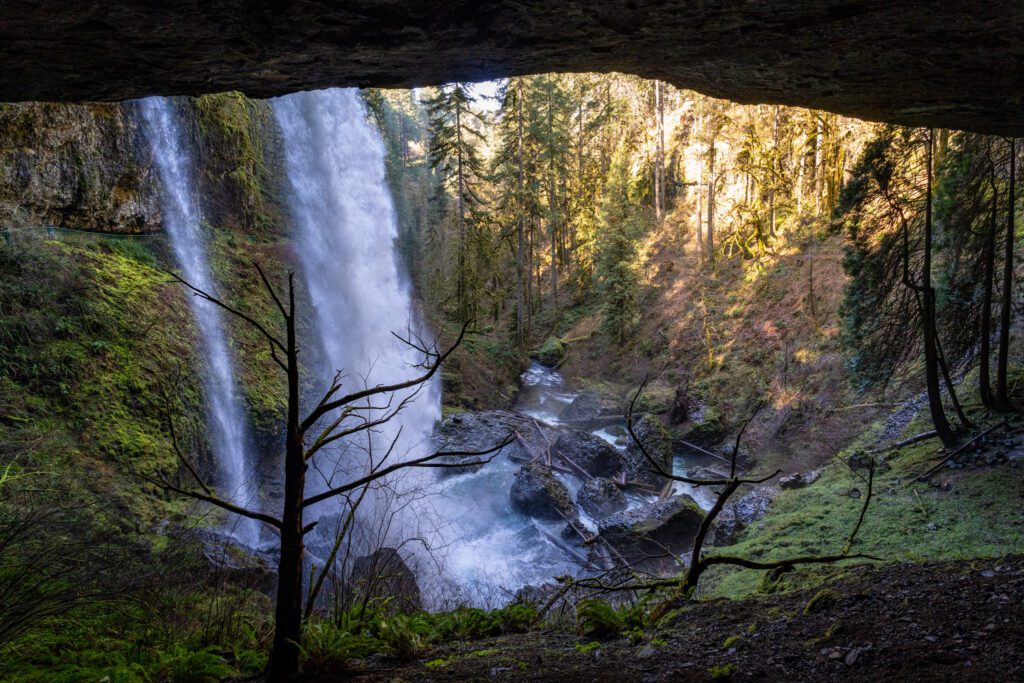
North Falls is the waterfall that you catch a glimpse of from the trail, and it’s a good one. It’s not the tallest – it’s 136 feet tall – but it is one of the most interesting in the park because of the landscape surrounding it.
It tumbles over a rocky ledge into a big bowl, and behind the falls is a big cave that has been created over hundreds of years of erosion, which you can walk through (marking the last of the four waterfalls you can walk behind).
The view from behind the falls out into the canyon is very cool, and was my mom’s favorite view of the hike.

From North Falls, you’ll complete a short but steep uphill climb to reach the rim of the canyon, but there’s a quick detour to do to see Upper North Falls before you embark on the journey back to the car.
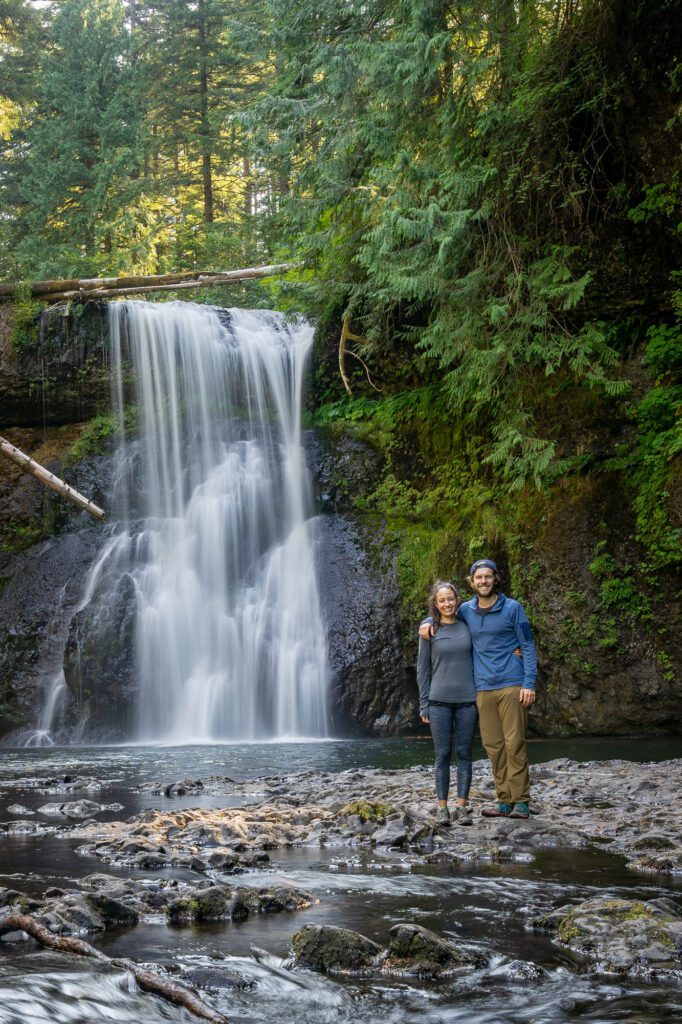
Upper North Falls is another 0.4 miles past the junction with the Rim Trail, and it’s worth the journey. You’ll pass the North Falls Trailhead – where there is a restroom if you need it – and follow the trail under the road, continuing out to the falls (the trail is basically flat).
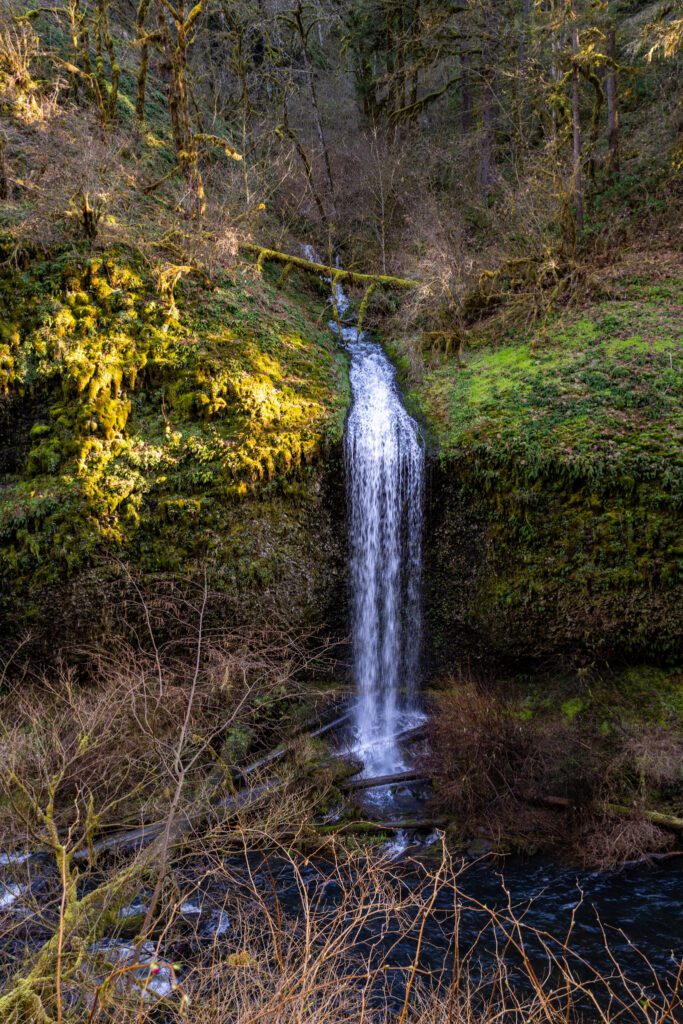
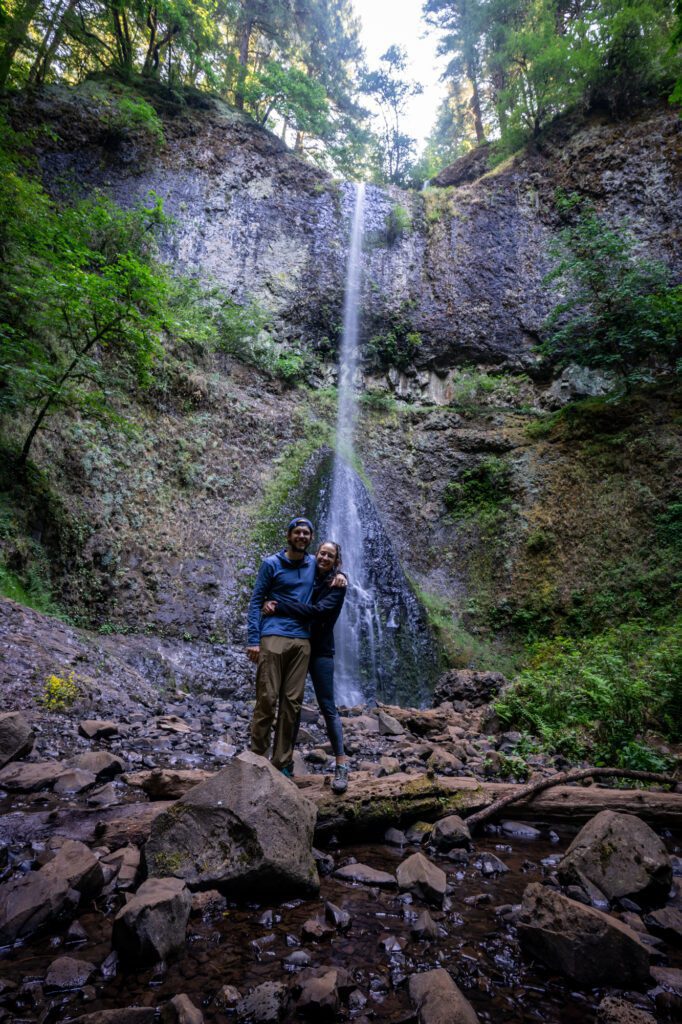
Upper North Falls is another waterfall that looked pretty different in the spring than it did in the summer, when the water was much lower. It’s 65 feet high, and falls into the pool at its base before continuing down the creek to tumble over North Falls.
Head back to the trail junction with the Rim Trail, which you’ll hop on to finish the hike.
The Rim Trail Back & Winter Falls
Distance: 2.5 miles // Elevation Gain: 150 feet
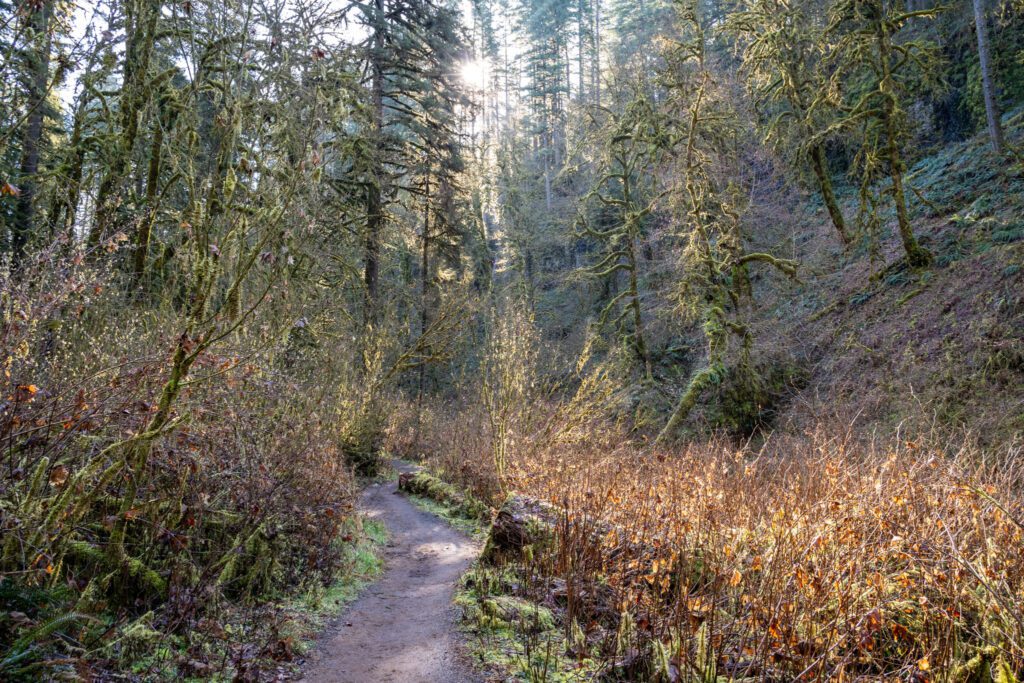
We’re going to be honest, this part of the hike is a bit of a slog. Not only are you 5-6 miles into the hike at this point, but the only waterfall on this stretch was a disappointment for us in the summer.
The Rim Trail is largely flat, and follows the road for most of the way back to the South Falls Day Use Area (which is much less pleasant than a babbling brook!). There is a bike path for portions of this section, though, which would be a nice bike ride.
Roughly halfway through, you’ll come to a tiny parking lot and a trail junction. This is where the Winter Trail comes up to form the five mile loop we mentioned a couple of times already. It’s also the trail down to the last of the ten falls, Winter Falls.
On our first jaunt out here, we did the detour down to Winter Falls and there was literally no waterfall to speak of. Which was a bummer, because it’s a steep journey down to the viewpoint, and back up to the rim.
So when we returned in the spring, I immediately vetoed that journey, but now I realize that there might have actually been a waterfall to see this time!
If you want to see the tenth waterfall, you’ll take the detour down to the viewpoint that leaves from the small parking lot that you pass along the Rim Trail.
The trail continues from that parking area and eventually forks into a paved section and a dirt section. They go to exactly the same place, one is the aforementioned bike path, one is a walking path.