Hiking the McNeil Point Trail: A Complete Trail Guide
The McNeil Point trail is one of those hikes that we have somewhat conflicting feelings about. We tell everyone we know that it’s one of the best hikes in Oregon, reminisce about first seeing the view of Mount Hood from Bald Mountain on an early summer morning and having to pick our jaws up off of the trail, and also…we probably won’t do this hike more than once every few years.
Like many of the hikes near Mount Hood, there are some truly show stopping views of the snowcapped peak of Mount Hood on display along the McNeil Point Trail, including getting about as close as you can to the top without climbing it.
Combine that with dazzling displays of dense wildflower meadows in the summer, panoramic views of the surrounding mountains on a clear day, and it’s easily one of our favorites in the entire state of Oregon.
In this guide, we’ll take you through everything you need to know to tackle the hike to McNeil Point. We’ll start with logistics, like getting to the Top Spur Trailhead, what route to take (should you take the scramble trail shortcut?), and other things to consider before hiking. Then we’ll go through a mini play-by-play of the hike from start to finish so you know what to expect before you head out there (with pictures, of course).
Sound good? Let’s get into it.
Disclaimer: Some of the links in this post, like hotel and vacation rental links, are affiliate links, meaning at no additional cost to you we make a little bit of money if you click through and book. That being said, we would absolutely never recommend something to you that we don’t stand behind 100%.
McNeil Point Trail Details
- Length: 10 miles
- Elevation Gain: 3,300 ft.
- Season: Mid July – October
- Trail Type: Out and Back
- Difficulty: Hard
- Trailhead Location: Top Spur Trailhead
- Dog Friendly: Yes, on a leash
- Pass Required: Northwest Forest Pass OR America the Beautiful Pass
The McNeil Point Route Options
There are two main routes to get up to McNeil Point – the out and back version of this hike that avoids the somewhat scary scramble trail, or the lollipop version that goes up the scramble trail (we wouldn’t come down that trail, but that’s just us) and down through the wildflower meadows to complete the lollipop counter clockwise.
We’re going to mostly refer to the out and back version throughout this guide, but you should know about the lollipop option because it’s a good alternative if you’re comfortable with a little bit of scrambling and want to save a little bit of distance at the expense of a brutal climb.
The out and back version of this hike that we’re referring to here avoids the cut off completely, veering left at the junction and following the Timberline Trail (#600) for the majority of the hike until it meets the McNeil Point Trail (#600M) for the final ascent.
While this cuts out the somewhat technical scramble, it does add roughly 1.5 miles to the distance. Though it should be noted that the piece that’s added is one of our favorite parts of the hike with the wildflower displays and views of Mount Rainier, Mount Adams, and Mount St. Helens from the trail.
The lollipop version of this hike is best done – in our opinions – by taking the lollipop portion counterclockwise. You’ll reach the turnoff a hair over 3.5 miles into the hike, and you’ll climb roughly 700 feet in a half mile, putting you at the iconic McNeil Point rock shelter.
From there, head up the trail a bit to get even closer to Mount Hood’s northwestern face before finishing the lollipop and heading back to the trailhead the same way you came.
To sum it up, if you’re looking for the most direct route and don’t mind a somewhat dangerous scramble, do the lollipop (and tackle the lollipop portion counterclockwise so you go up the cut off).
If you’re a less experienced hiker and you’re a little apprehensive about the scramble, do the slightly longer out and back version that skips it.
How Difficult is the Hike to McNeil Point?
This is a difficult hike. Period.
You need to be prepared with a strong level of fitness, plenty of water, and the right equipment (namely sturdy footwear and a solid backpack) before you head out on this hike.
There are two main route options to choose from to get from the Top Spur Trailhead to McNeil Point. The cut through (or “scramble trail”) saves about a mile and a half, but is a steep, vertical scramble that is more technical than any other piece of the trail.
Without the scramble trail, it’s an extra mile and a half added to the total distance, which puts it around 10 miles and squarely into the “difficult” category.
Either way you do it, it’s going to be a long, tough climb to the top. But it’s worth it!
Getting to the Top Spur Trailhead
The trailhead for this hike is the Top Spur Trailhead, which is in Mount Hood National Forest.
To get to the trailhead from Portland, you’ll hop on 26 East and follow it all the way up to Zigzag, where you’ll turn left onto E Lolo Pass Road. Follow the Sandy River for about 4 miles, and first veer right onto Muddy Fork Road then left onto Forest Road 1828, which you’ll follow up to the trailhead.
The last stretch of road is a gravel forest road that can be a little bumpy. However, our old minivan made the journey, so it should be doable by most passenger vehicles. Take it slow and avoid the major dips and you should be alright.
There is parking for 15-20 cars in the lot itself, and you’ll also see cars lined up along the road leading up to the trailhead. There’s not a whole lot of room to maneuver and turn around here, so be prepared for some tight turns.
There is, however, a pit toilet at the trailhead.
The Best Time to Hike to McNeil Point
This is best done in the summer and fall, roughly July to mid-October, when the trail and roads to the trailhead are clear of snow. It is doable in the winter as a snowshoeing adventure, but we much prefer the summer version.
Passes and Permits Needed For the McNeil Point Trail
This hike – more importantly, the trailhead – is on National Forest land. You’ll need a Northwest Forest Pass – either an annual pass ($30) or a day pass ($5) – to display in your car to park at the trailhead, which you can get in advance at REI here.
You might be able to purchase a day pass at the trailhead for $5 cash, but we’ve also seen plenty of times where the envelopes are all gone, especially on summer weekends.
An America the Beautiful Pass also works, because it covers all federal recreation land (including national forests). If you’re planning on visiting three or more national parks in the next 12 months, the America the Beautiful Pass is the way to go (it pays out at 3+ park visits). Get one from REI here (or at the entrance of any national park).
Are Dogs Allowed on the McNeil Point Trail?
Yes, Dogs are allowed on the trail, but they need to be on a leash.
Yes, yes, I’m sure your dog is a very good pup, but they still need to be on a leash out of respect to both the environment (so they don’t, for example, trample wildflowers along the trail) and to your fellow hikers.
Some people don’t like dogs all up in their business, no matter how adorable they are.
It is worth noting that, if you are planning to bring your dog, you DEFINITELY should do the out and back version of the hike and skip the scramble, which is not made for dogs.
Hiking the McNeil Point Trail: A Complete Trail Guide
And now that we’ve covered most (hopefully, all!) of the logistics associated with this hike, on to the trail report!
We’ll break the hike into three distinct sections – from the trailhead to the viewpoint at Bald Mountain, from Bald Mountain to the McNeil Point Trail Junction, and from that junction to the final point just above the shelter.
We’re recommending the out and back hike, so from there you would head back the way you came.
Parking Lot to Bald Mountain
Length: 0.8 miles // Elevation Gained: 450 feet
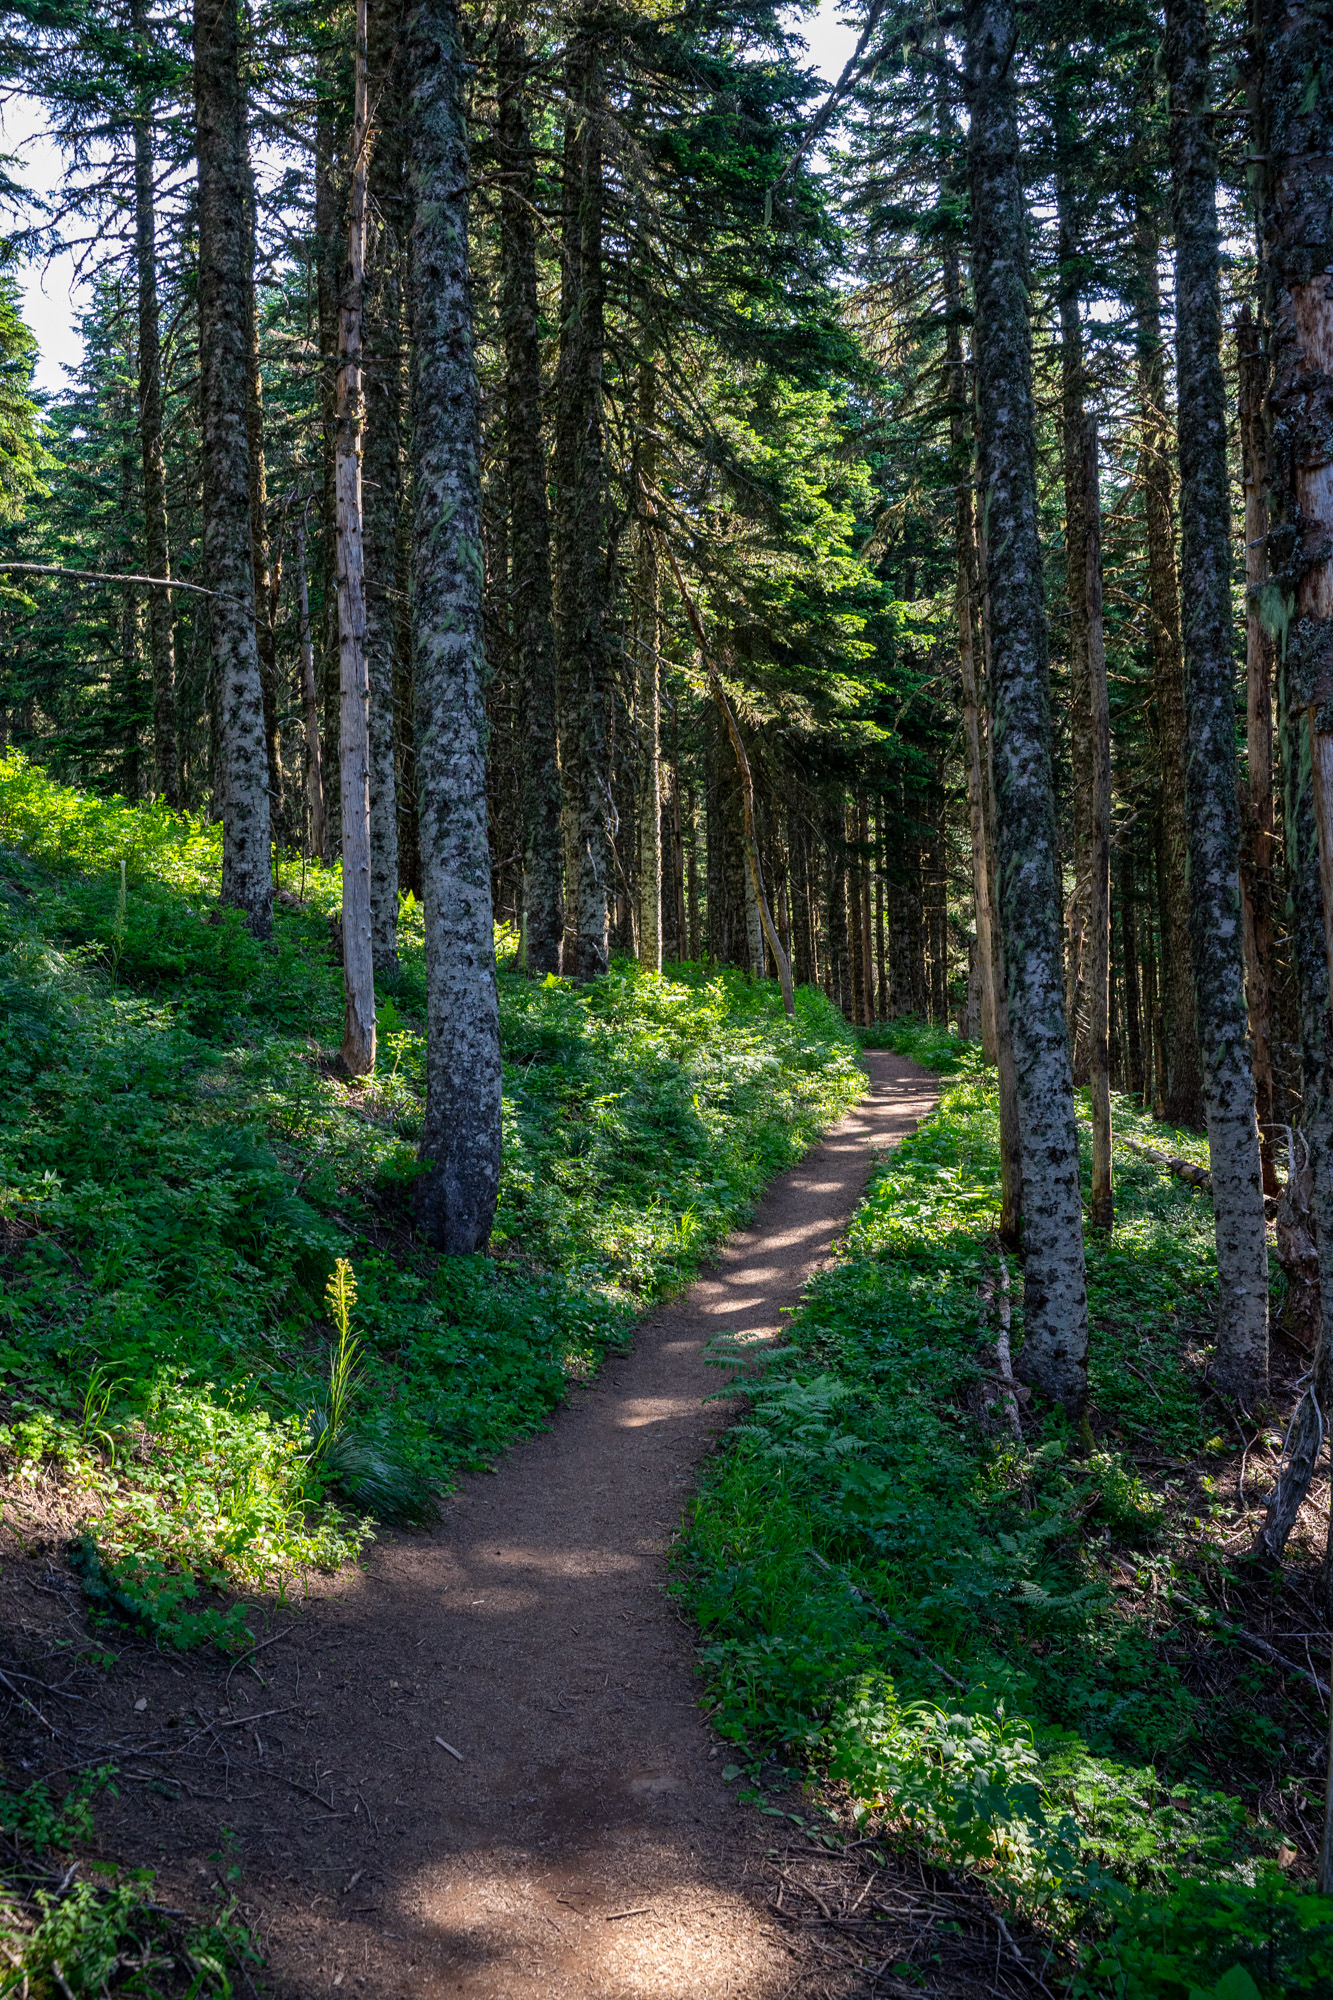
From the trailhead (there’s a pit toilet if you need it!), hop on Top Spur Trail #785 and follow it for about half a mile.
You’ll turn right to hop on the Pacific Crest Trail for a hot second (literally a few hundred feet or so) before hitting another trail junction, where you’ll head straight to hop on Timberline Trail #600.
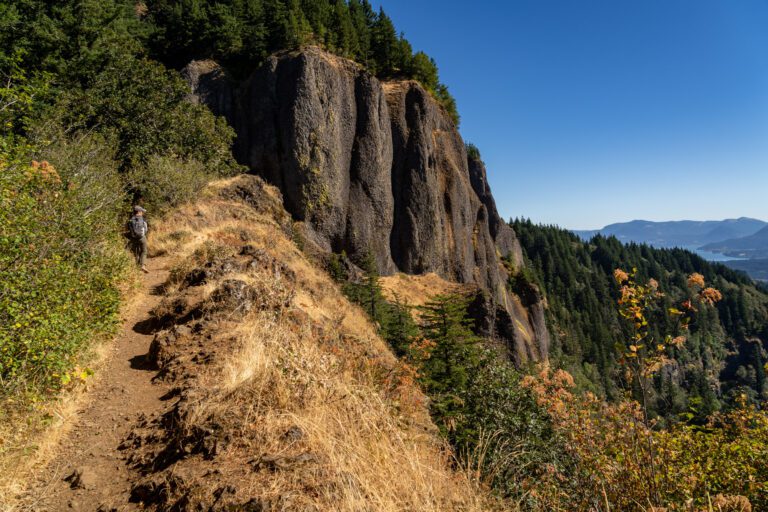
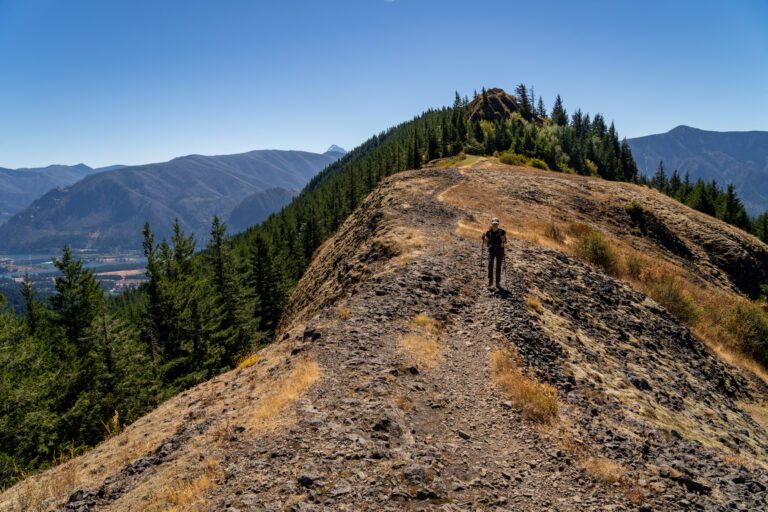
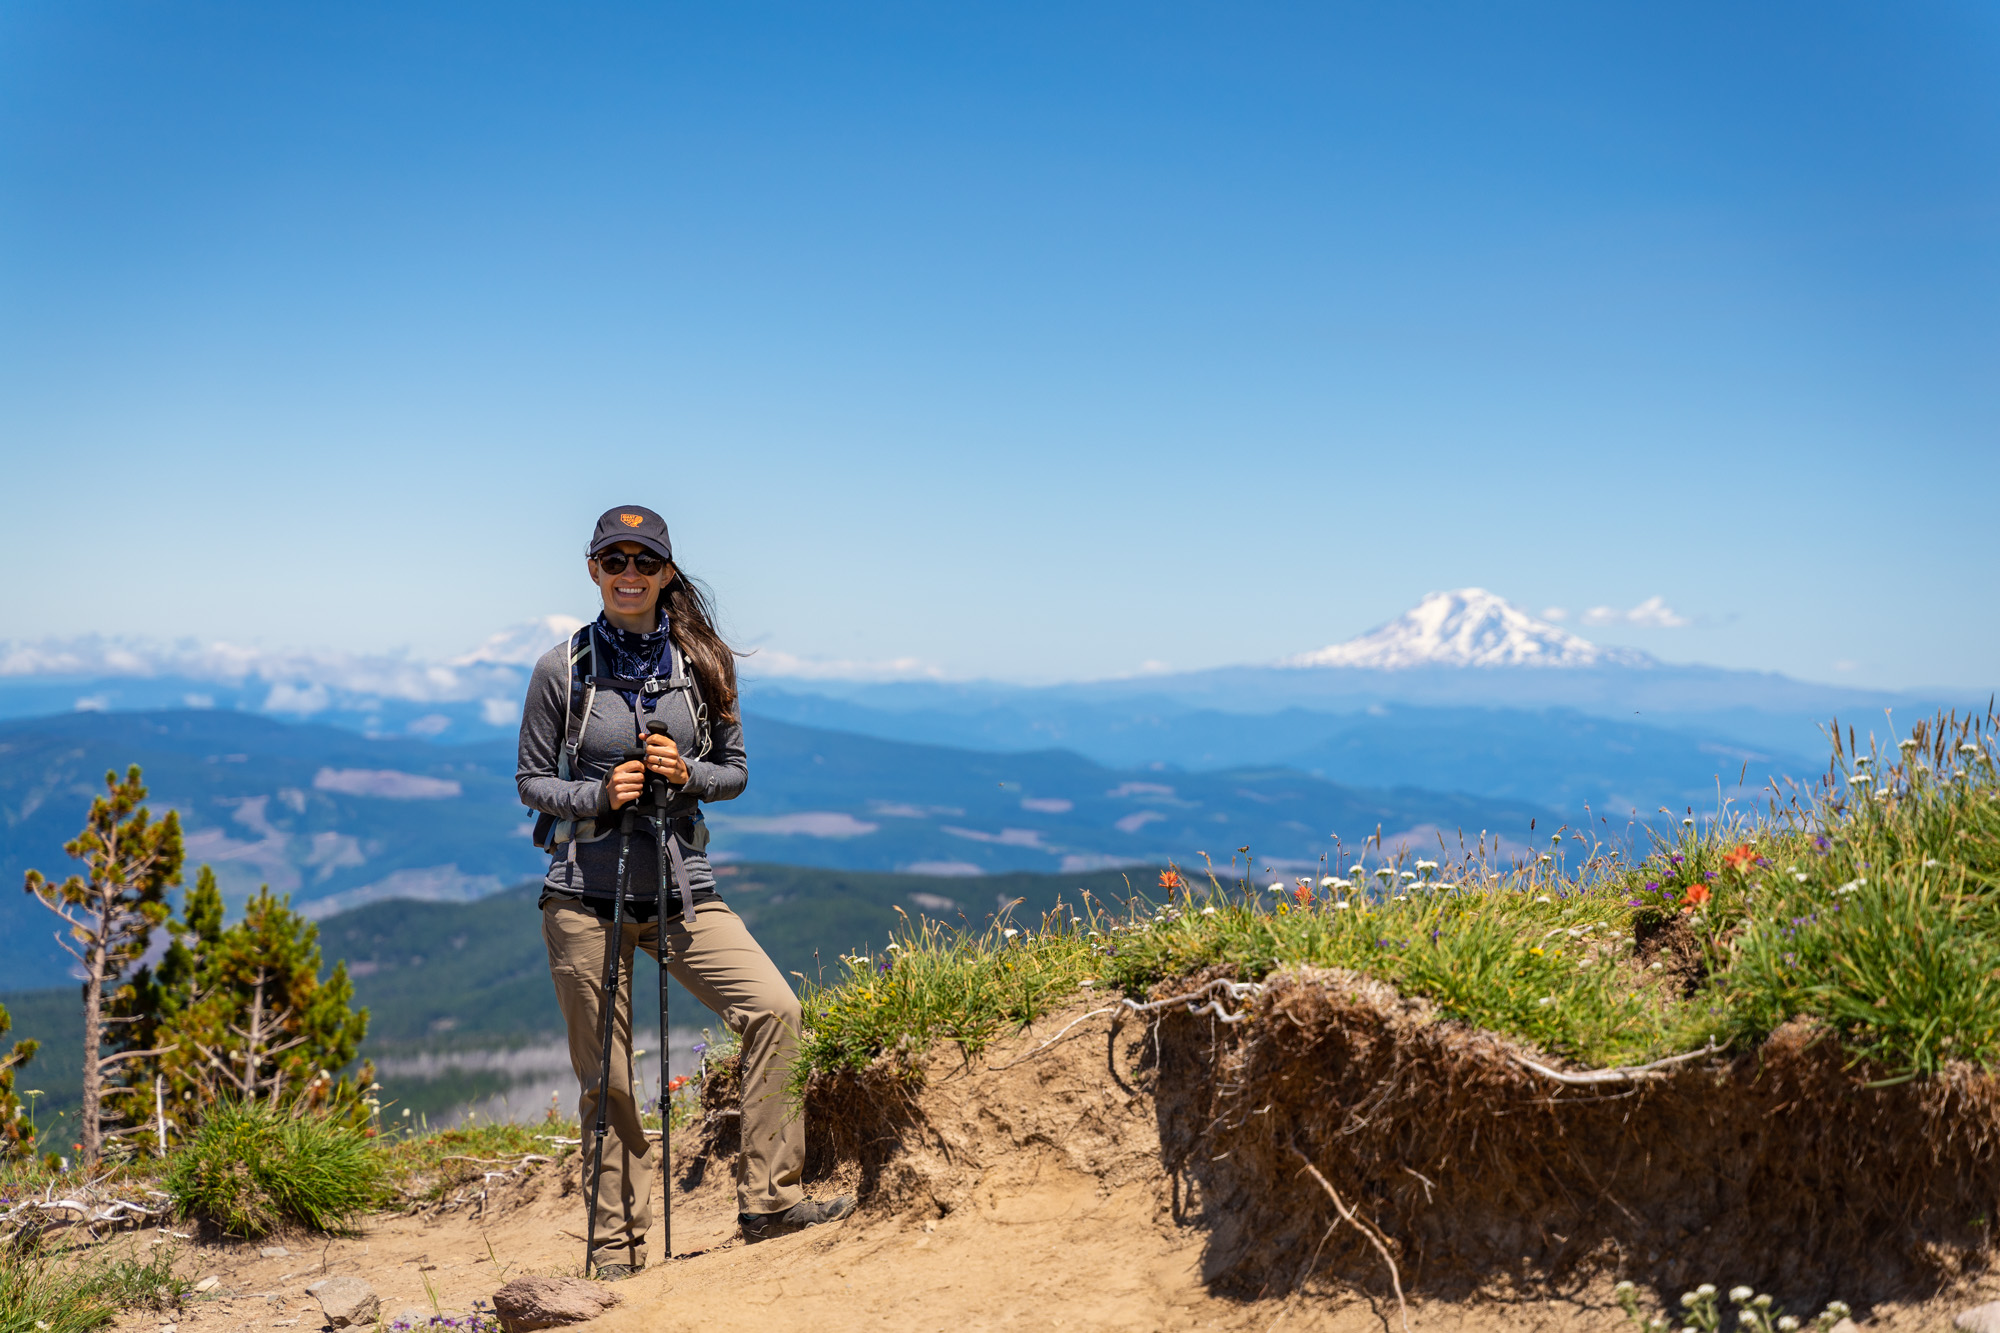
From that junction, you’ll cover another 0.4 miles or so before emerging from the forest onto the slopes of Bald Mountain, face to face with our favorite view in Oregon.
Fun fact: We first experienced this view on a cloudy, drizzly day where you couldn’t see your hand in front of your face, much less Mount Hood towering above the valley, and we were looking for the faint outline of Mount Hood in the complete wrong direction. Which we learned when we returned on a clear summer day.
Bald Mountain to the McNeil Point Trail Junction
Length: 3.3 miles // Elevation Gained: 1,400 feet
After you put your blown-off socks back on, you’ll continue around the bend past Bald Mountain and re-enter the forest to kick off the bulk of the climbing.
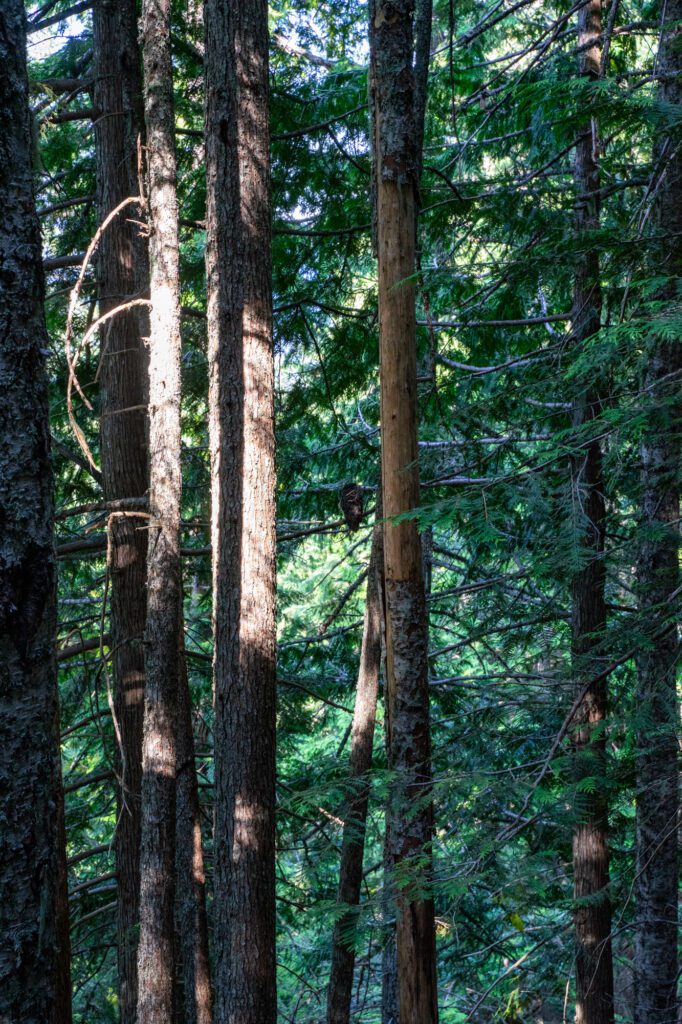
There’s a confusing junction here that had us heading down the wrong version of the Timberline Trail – you need to turn left at 1.4 miles into the hike to catch the Timberline Trail cutoff (it climbs up and over a small hill) to meet up with the trail that heads up to McNeil Point.
Though, on that little detour (read: wrong turn) we did see a spotted owl, which made the extra mileage worth it.
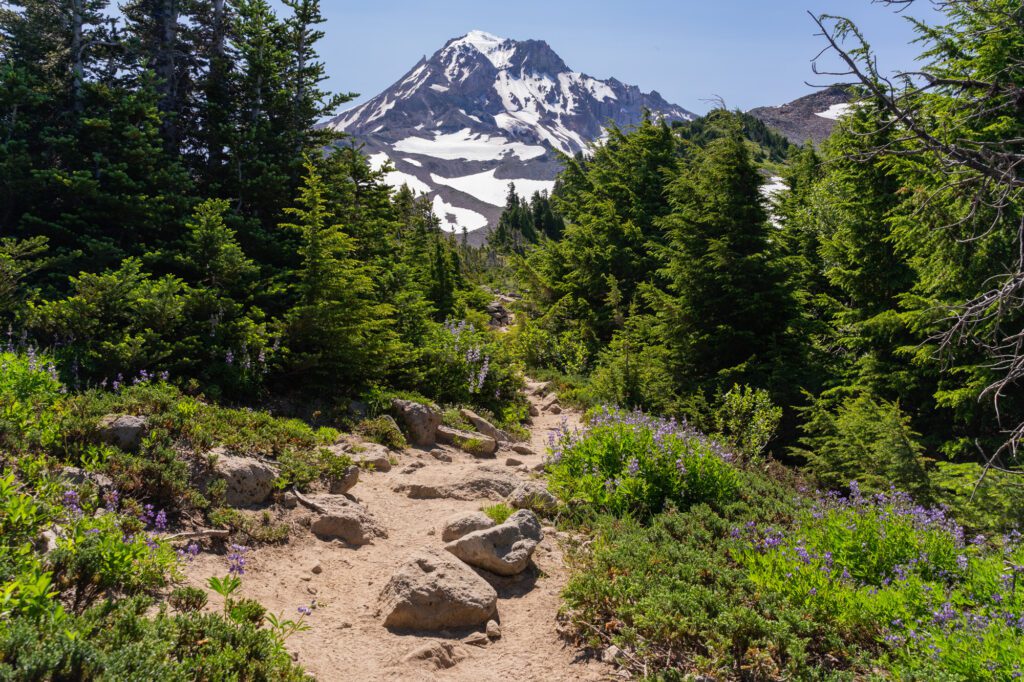
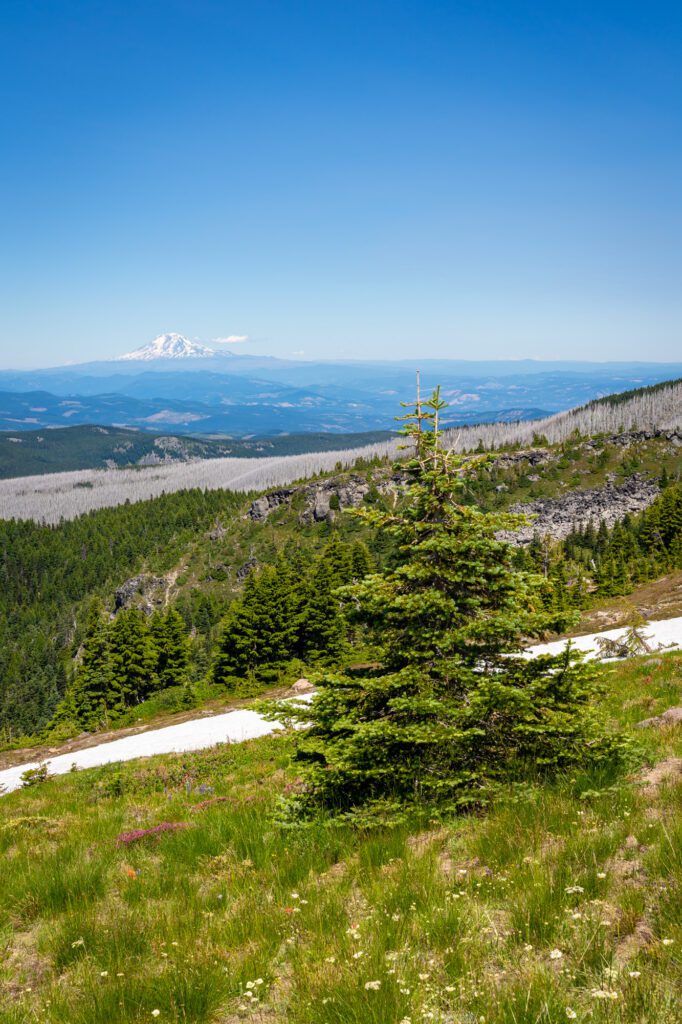
Once you’re on the correct Timberline Trail #600, you’ll climb steadily for about 3 miles. At no point on this trail will you say “whoa, that was steep,” but it is a long, gradual ascent.
There are a few other viewpoints along the way, particularly in the first mile or so and last half mile of this stretch, but you’re largely under the forest canopy, which is nice from a sun exposure point of view.
At the 3.5 mile mark or so, you’ll pass the junction for the cutoff trail (the scramble trail we’ve addressed above), which is a little hard to find from this direction. Stay on the Timberline Trail, passing a few mini ponds and campgrounds, before you meet the McNeil Point Trail #600M.
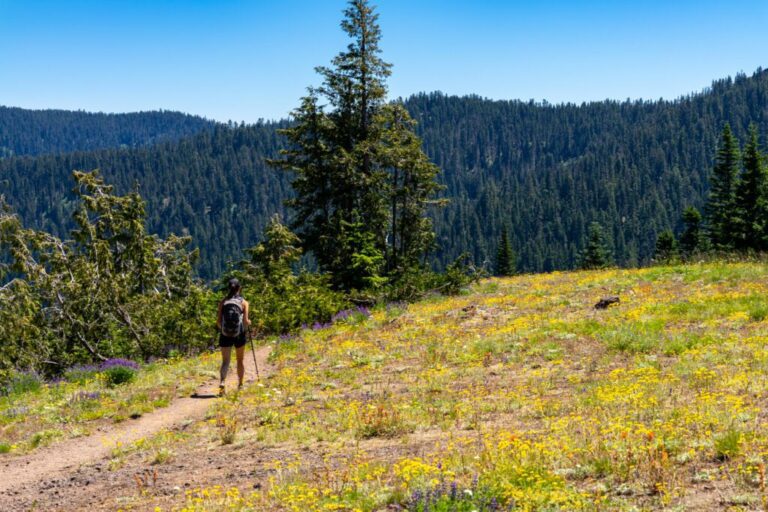
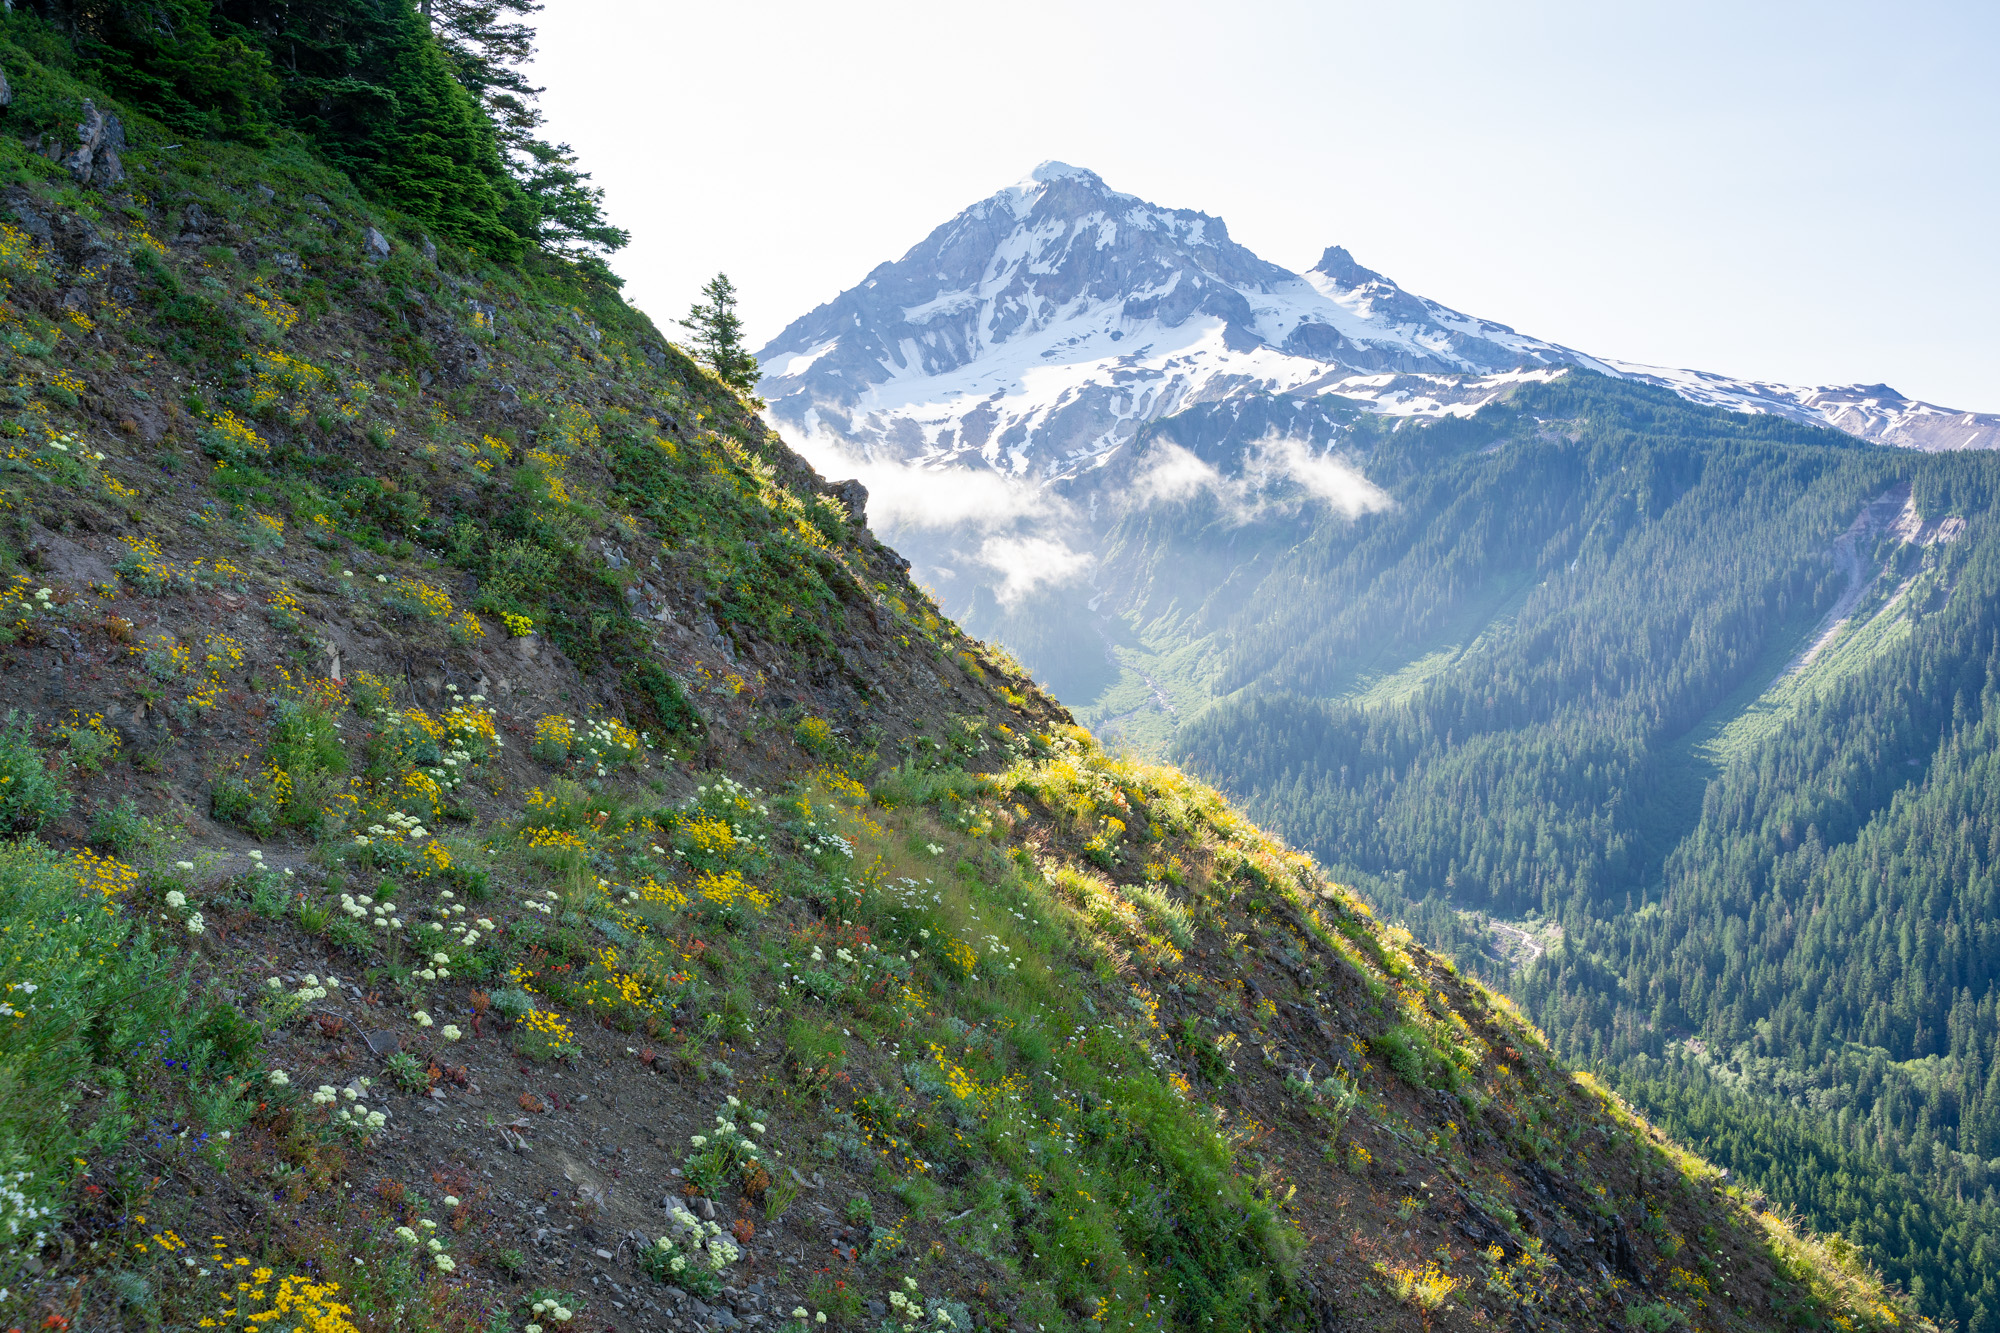
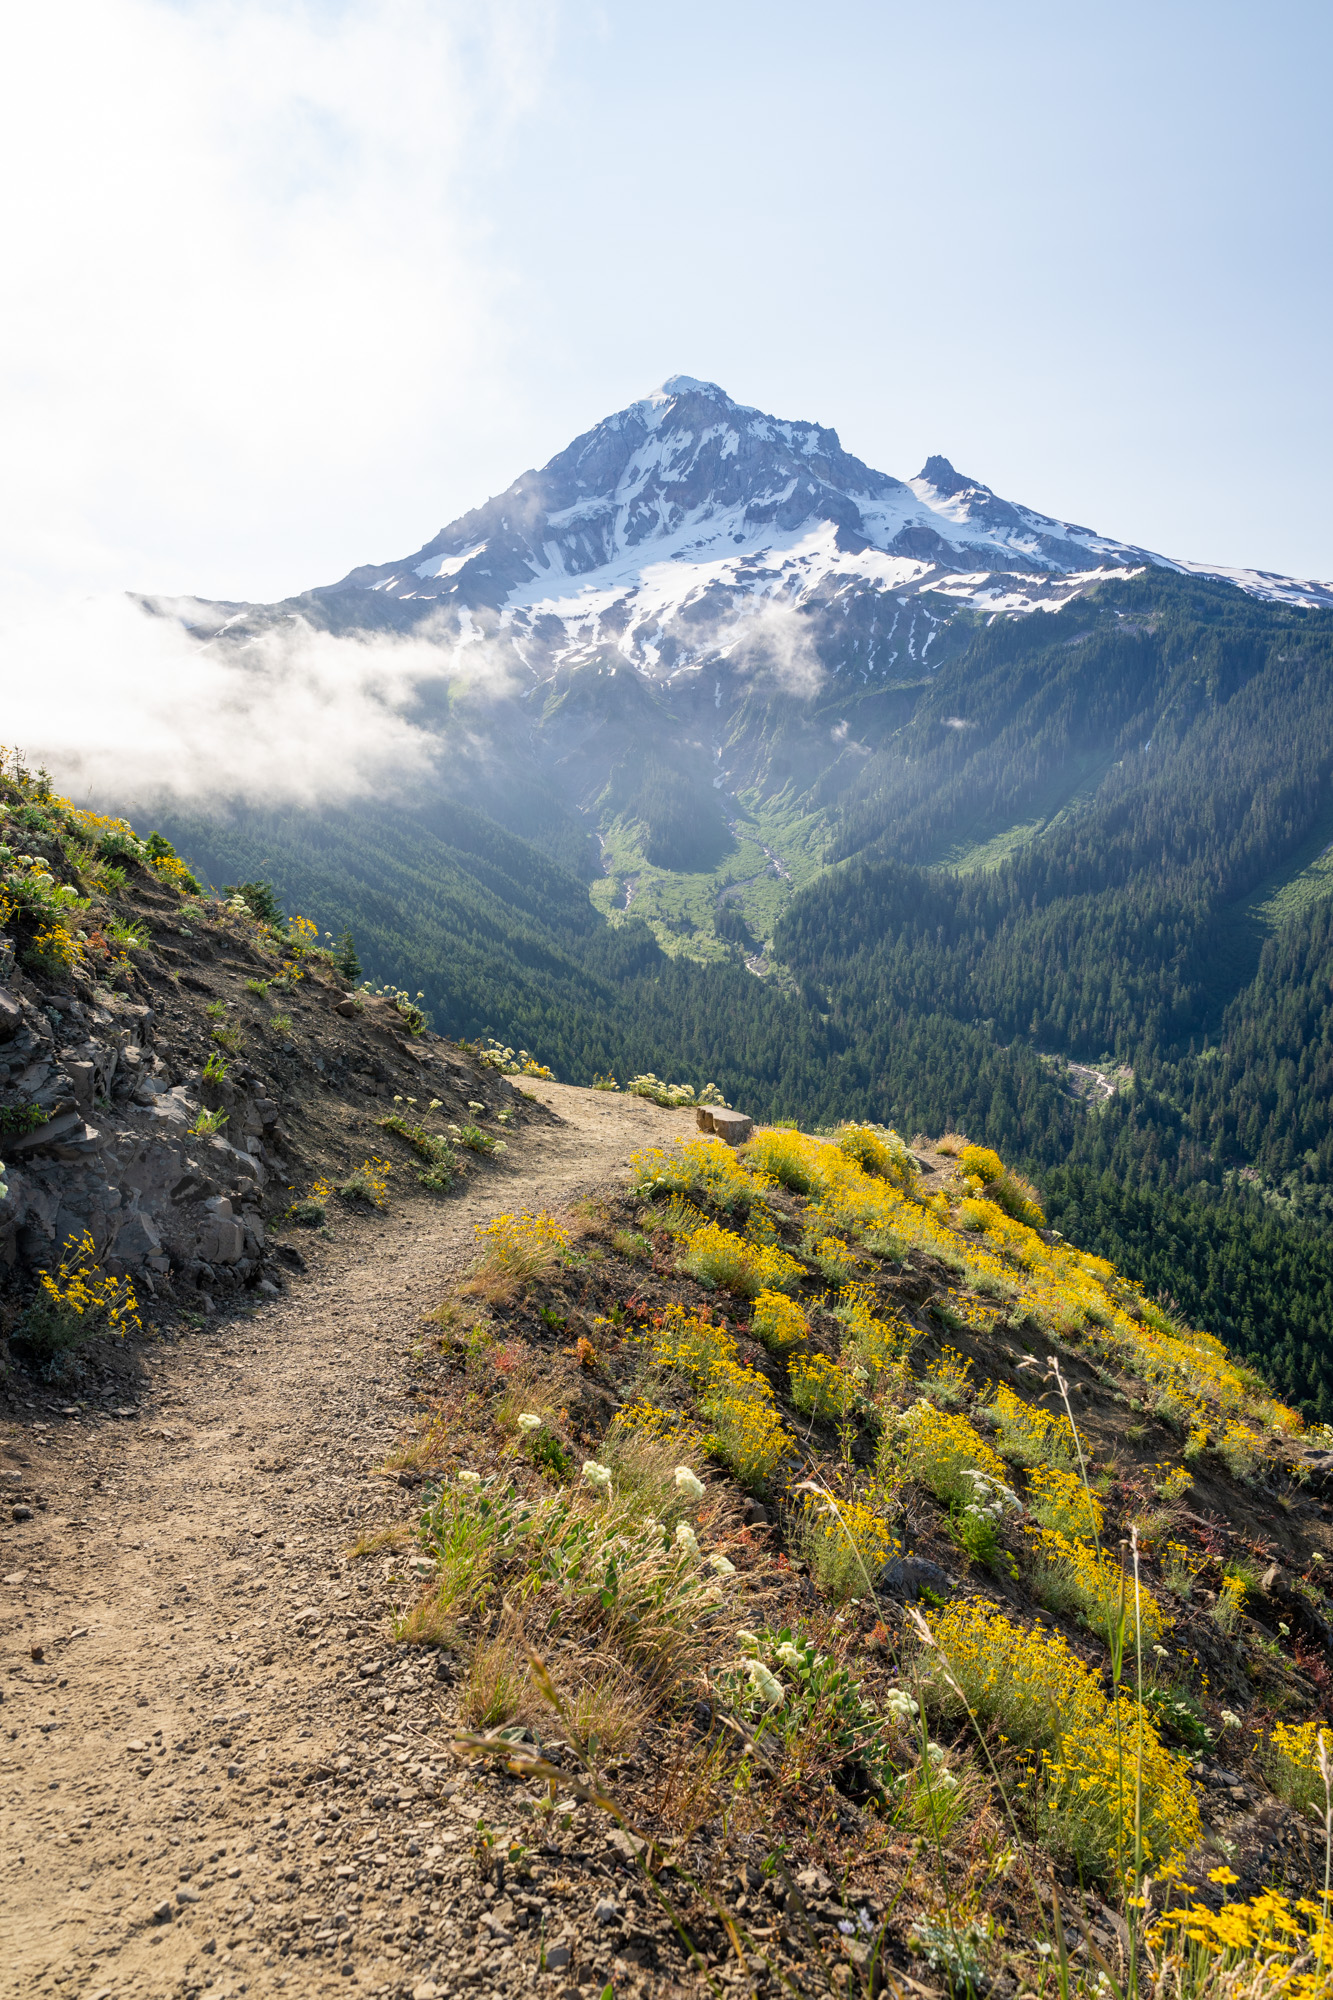
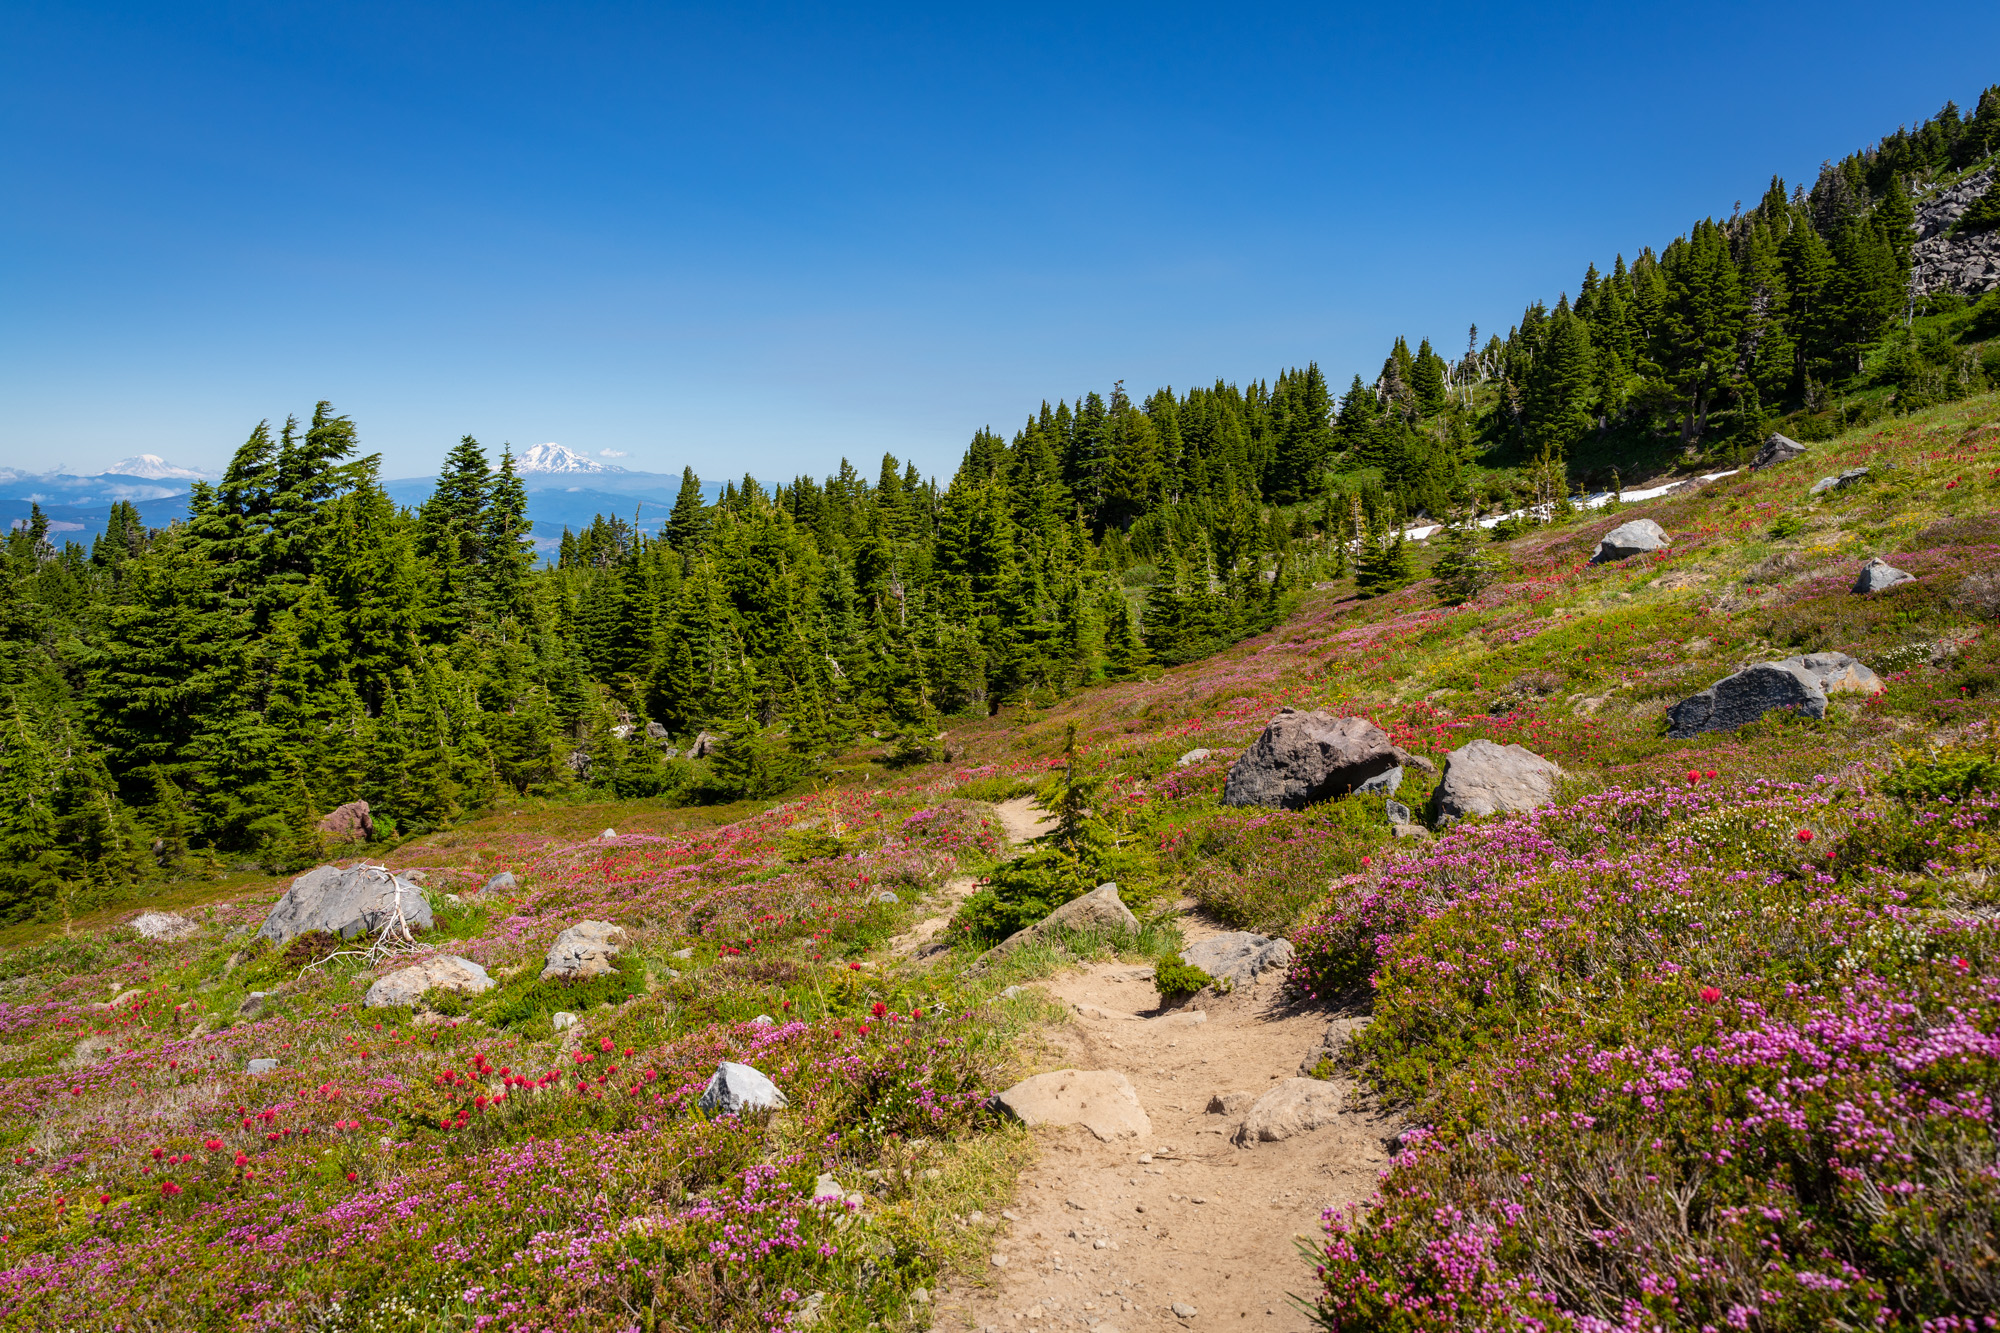
The last half mile or so before you get to the junction signals what you’re in for in the next section of trail: an abundance of wildflower meadows and unparalleled views of Mount Hood’s peak.
The Final Ascent to the McNeil Point Shelter
Length: 0.9 miles // Elevation Gained: 550 feet
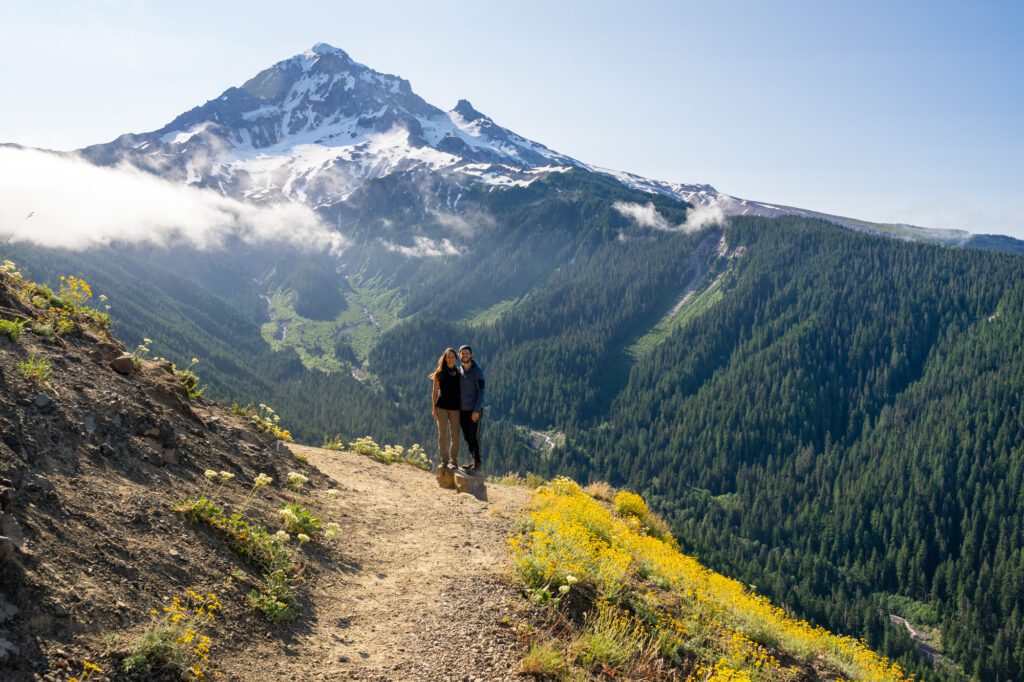
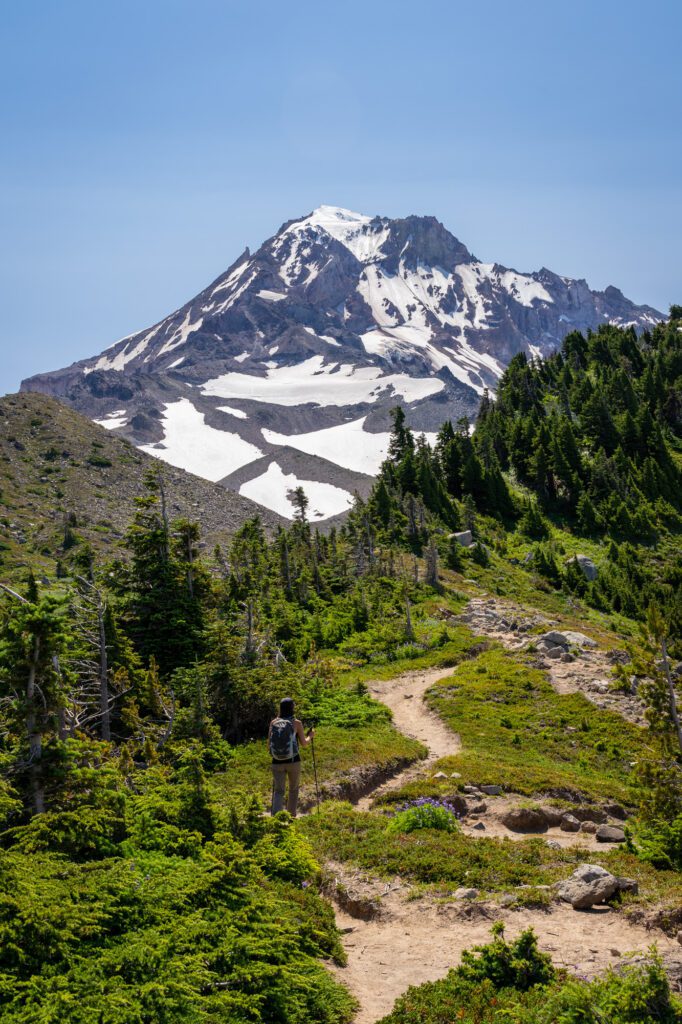
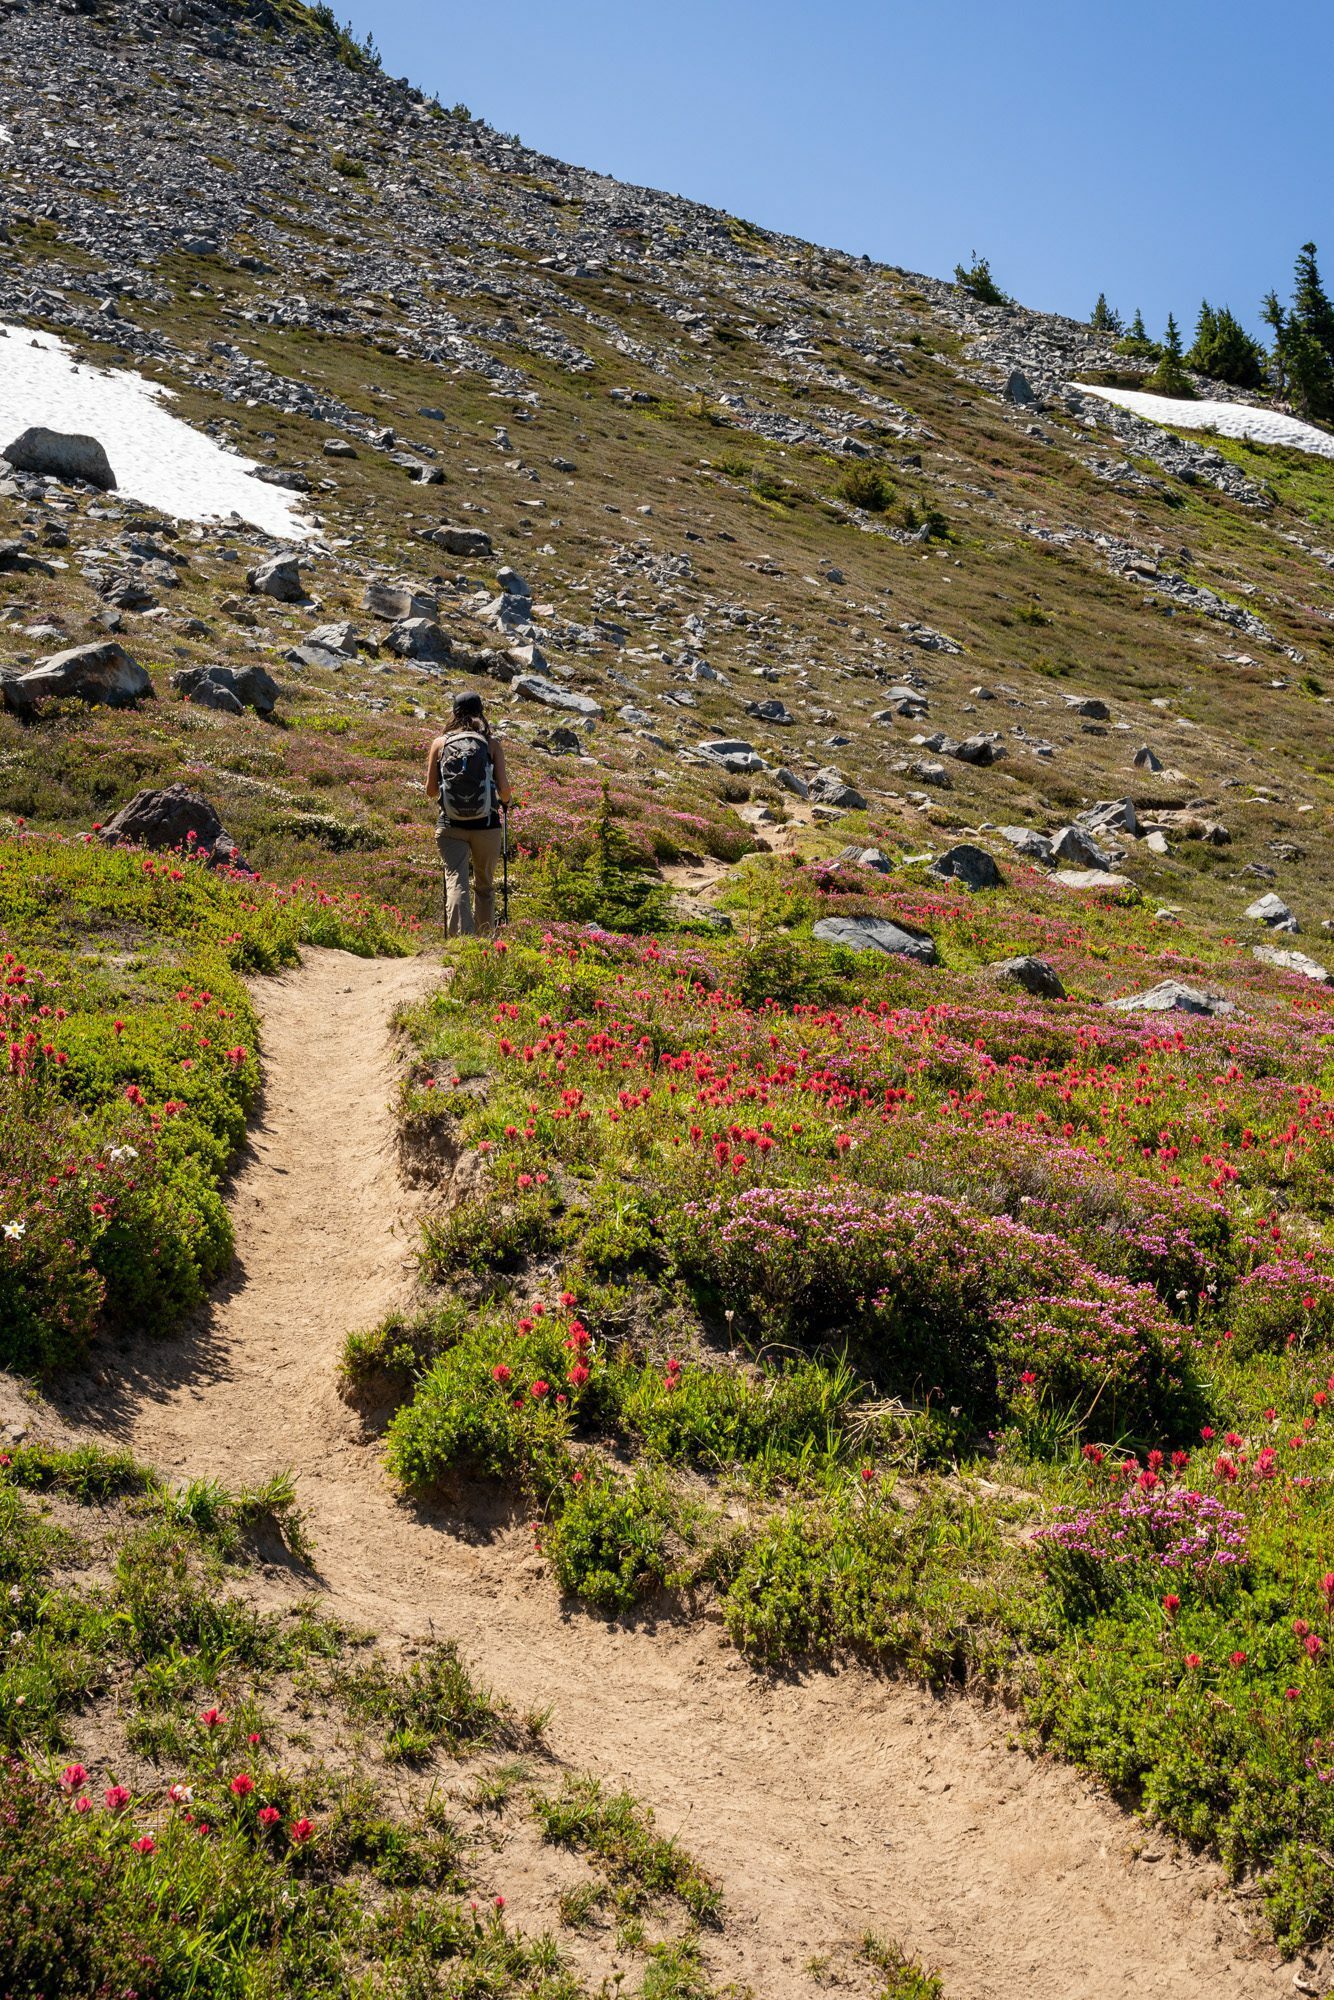
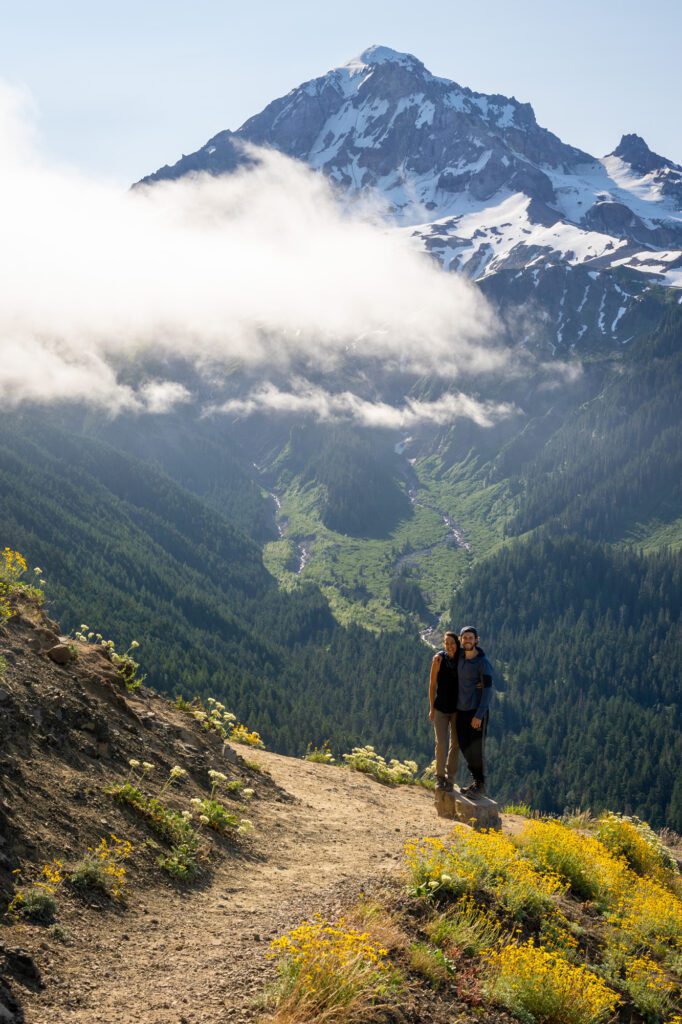
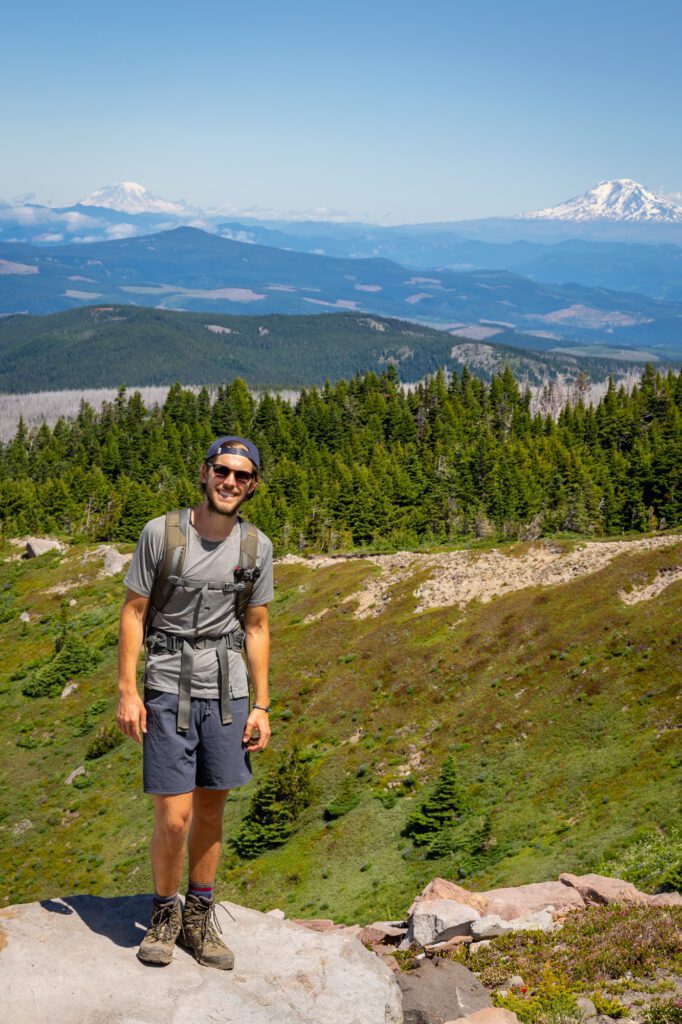
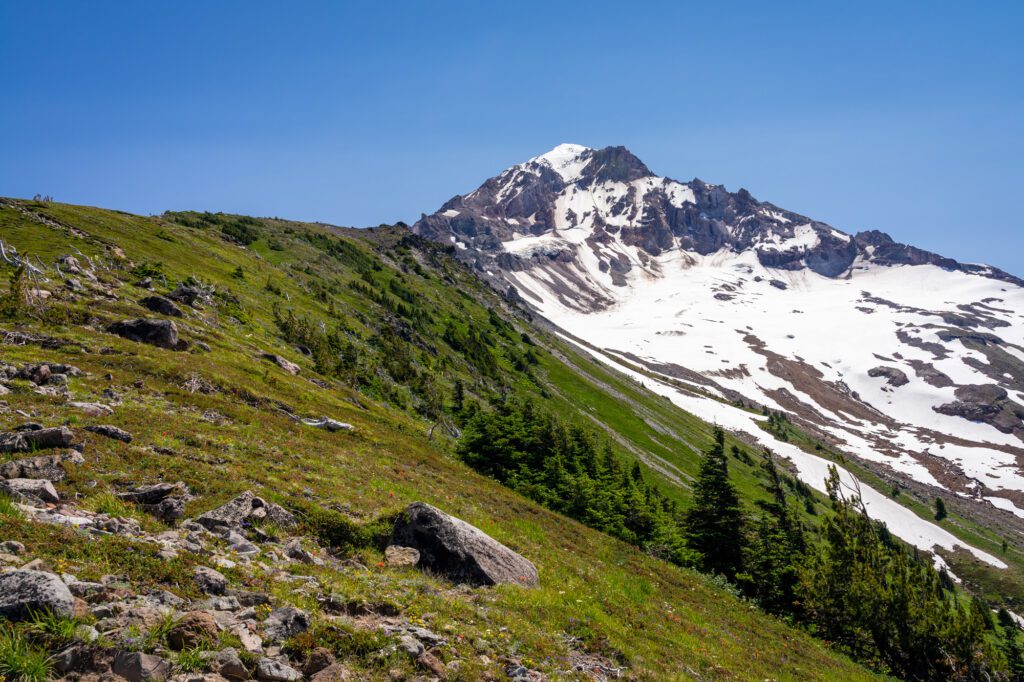
From the junction, you’ll turn south, traversing the northwest slopes of Mount Hood that are, at least in the summertime, covered with a multicolored blanket of wildflowers as far as the eye can see.
Plus, great views of the surrounding mountains to the north – Adams, St. Helens, and Rainier.
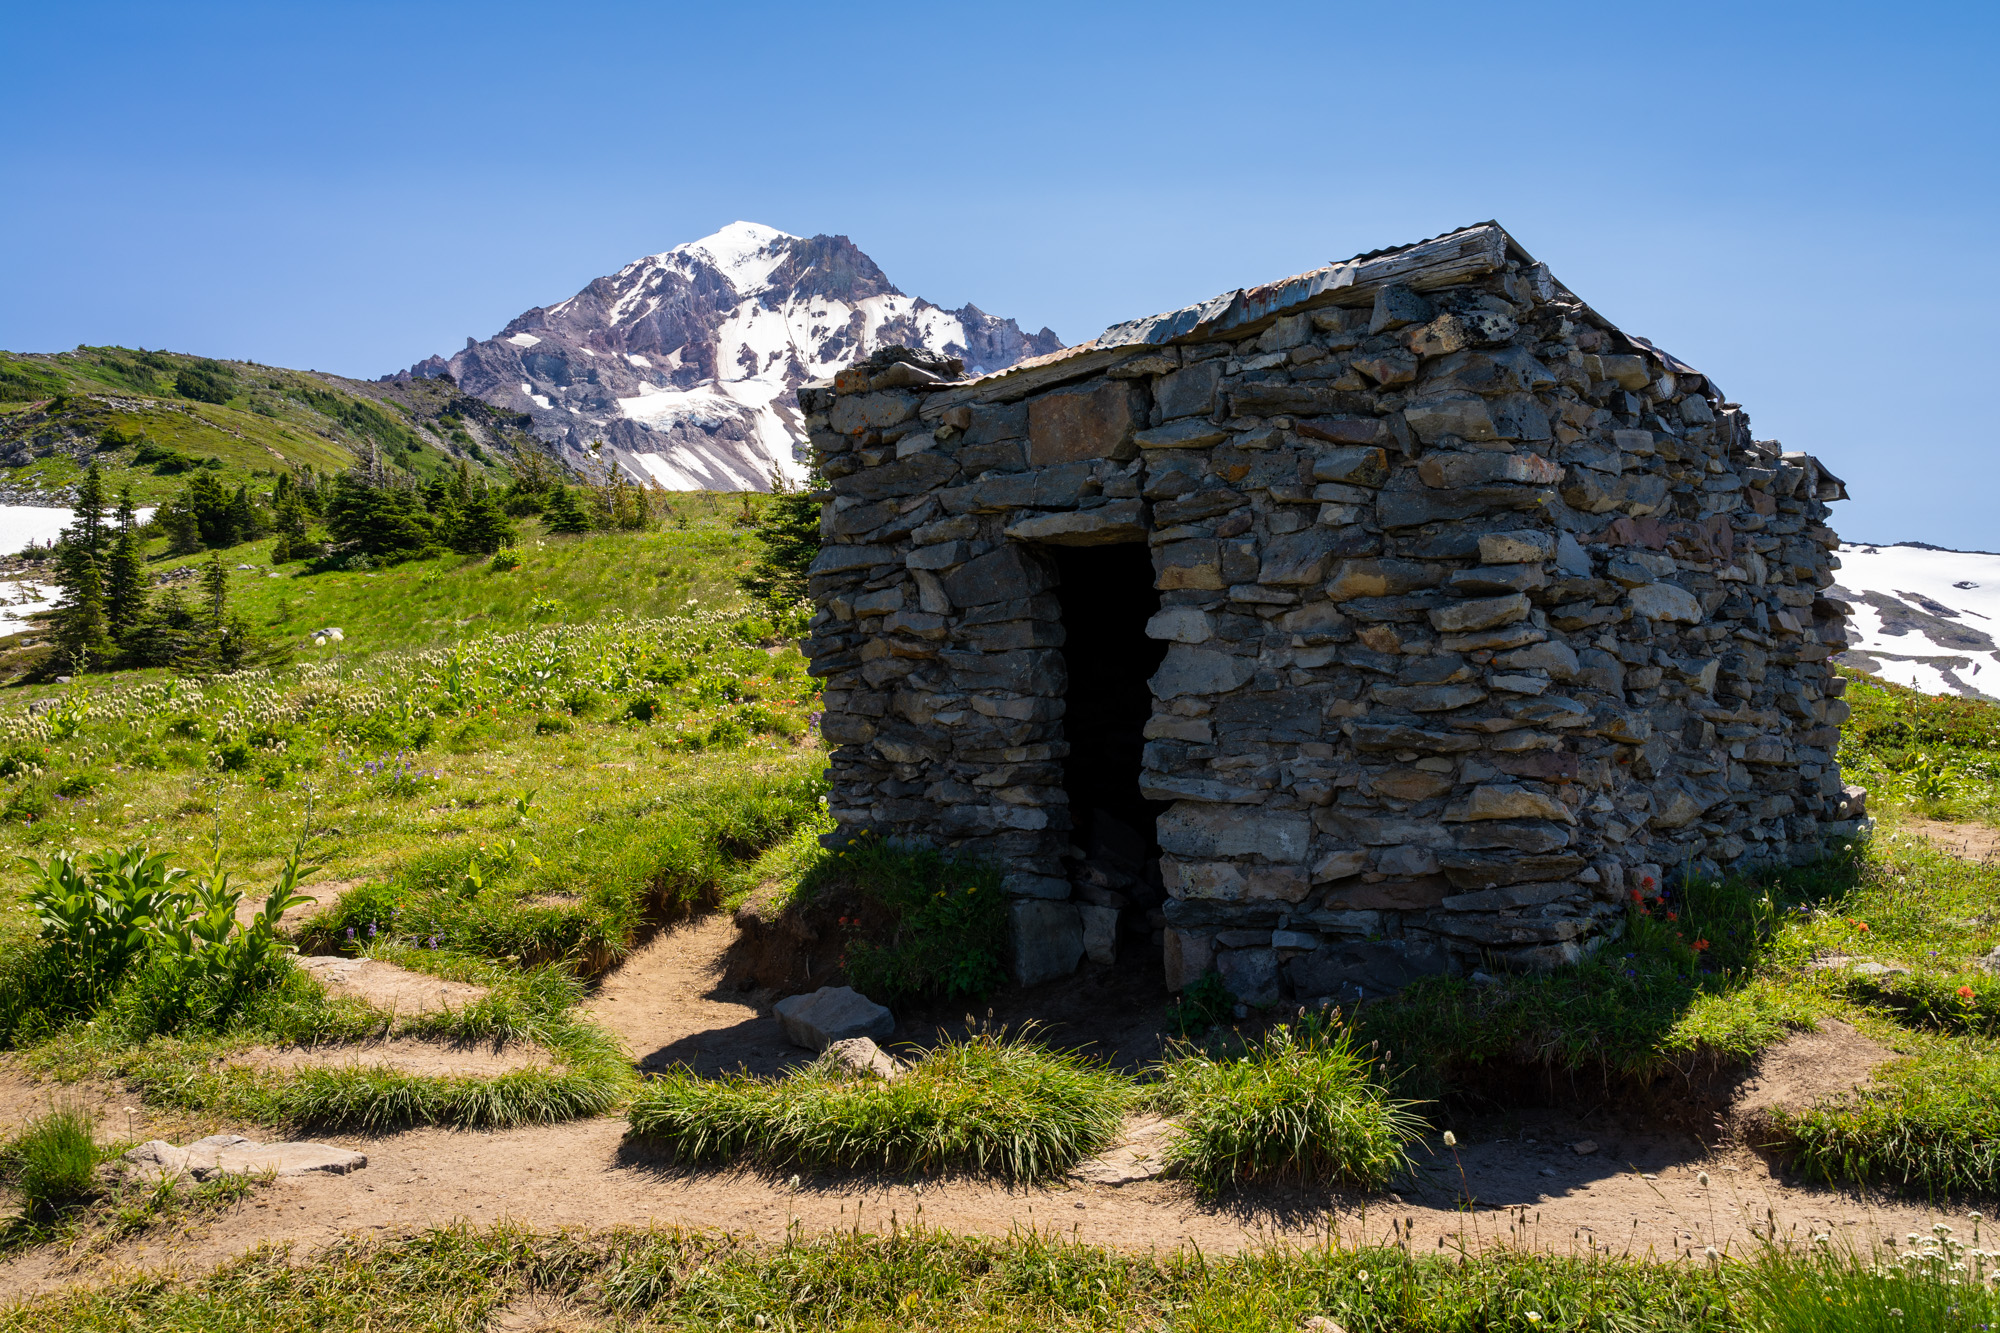
After some rocky sections and, depending on the summer, some snow patches on the shadier pieces of trail, you’ll arrive at the McNeil Point shelter.
It’s a stone shelter that is basically just a sturdy pile of rocks, but it provides some nice protection from the elements – the wind, in particular – especially if you’re spending the night up here.
From here, you have two choices. You can head back the way you came, ending the ascent and beginning the journey back to the trailhead. Or, you can continue climbing for another 0.5 miles or so to reach an even higher viewpoint, where Hood’s face is so close you can practically reach out and touch it.

The latter choice adds about 0.8 miles to the hike, along with another 550 feet of elevation gain (which is no joke, especially after the long hike you’ve already tackled).